

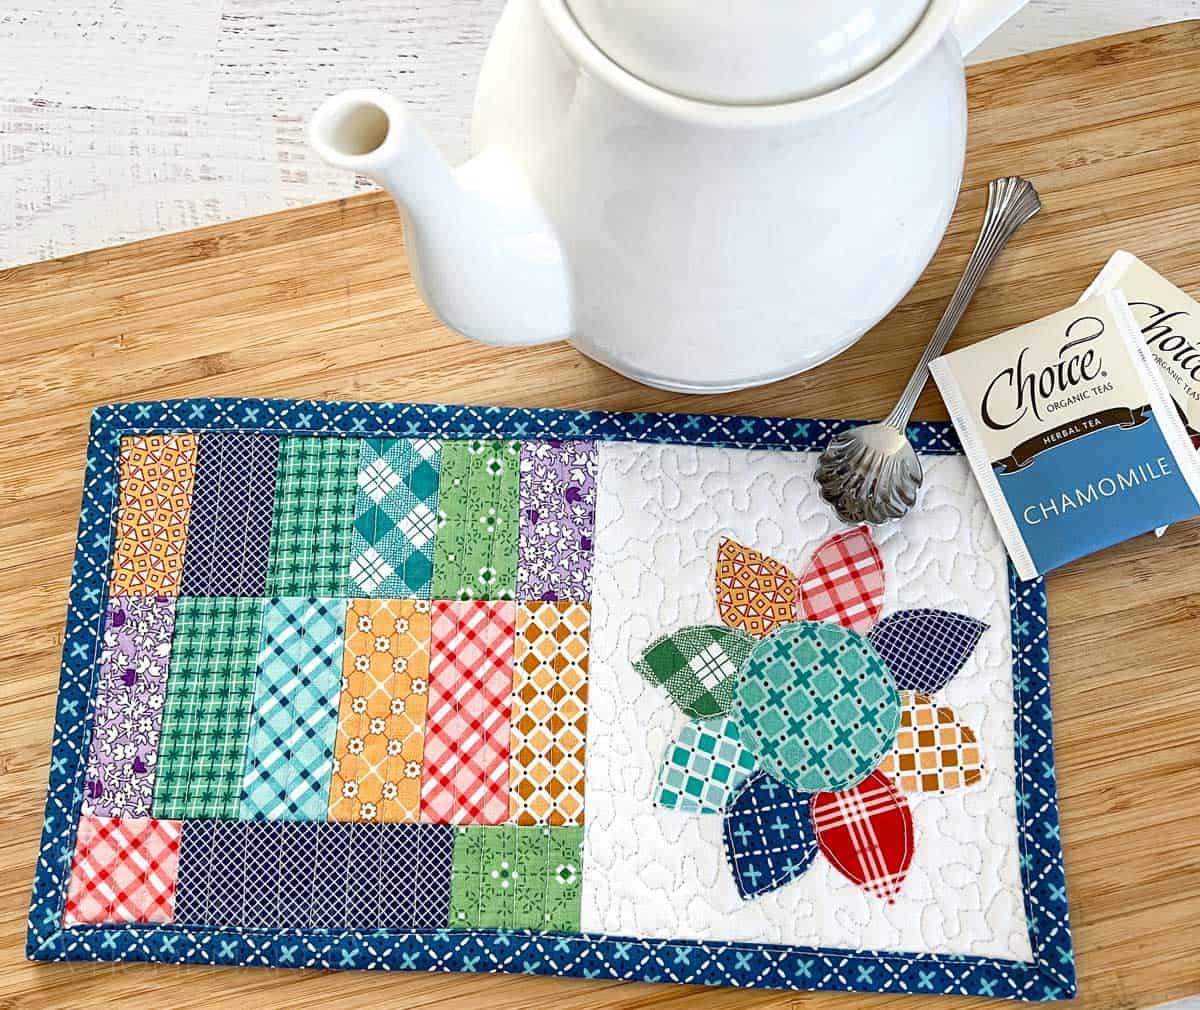
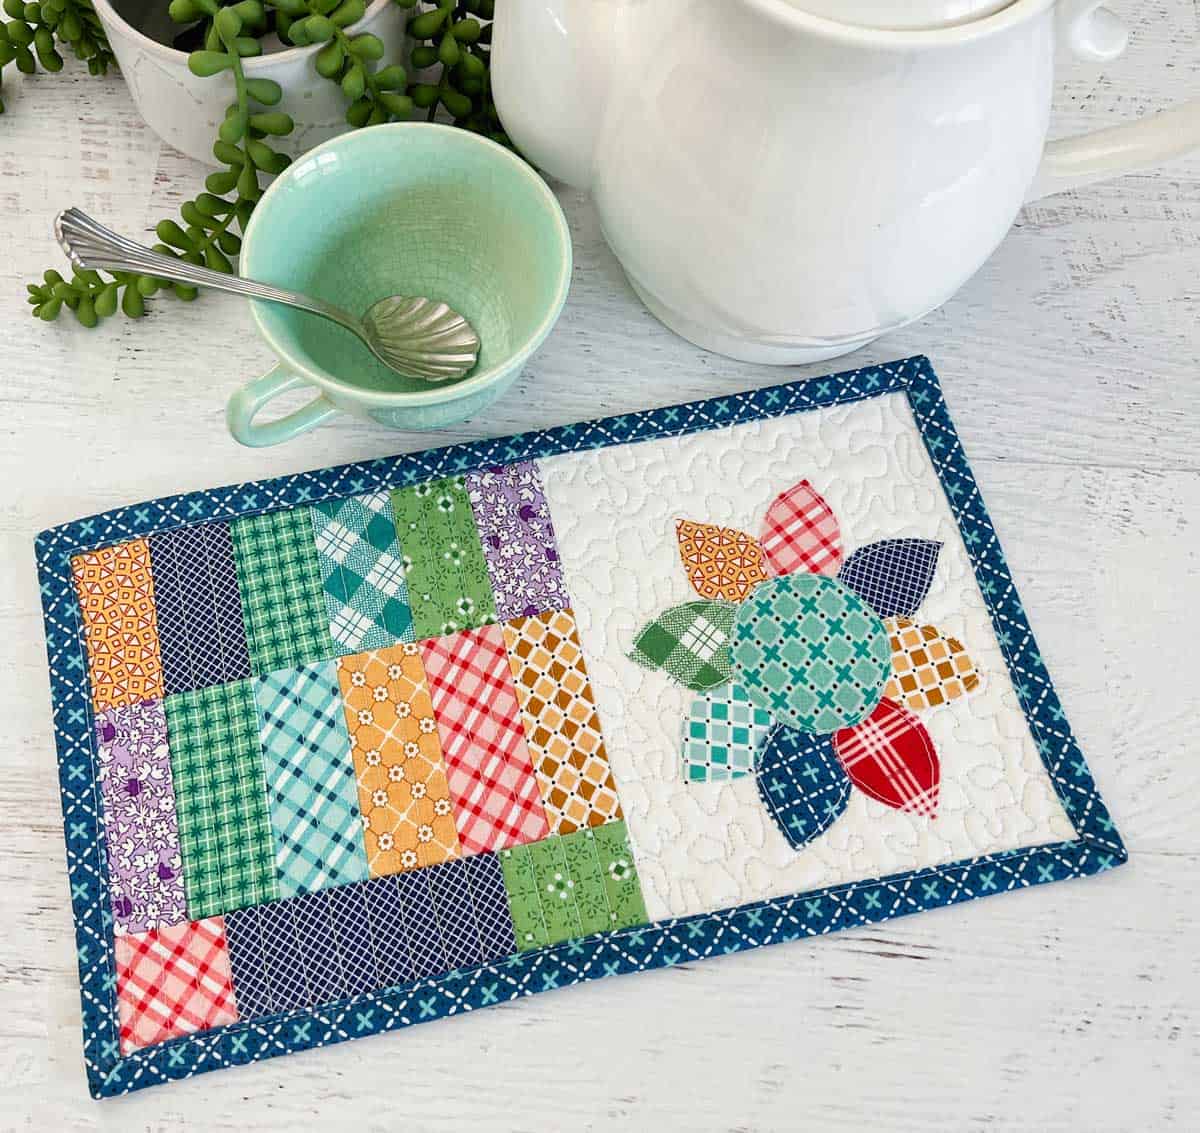
Hearth + Home Mug Rug Tutorial
This post may contain affiliate links which won’t change your price but will share a commission.
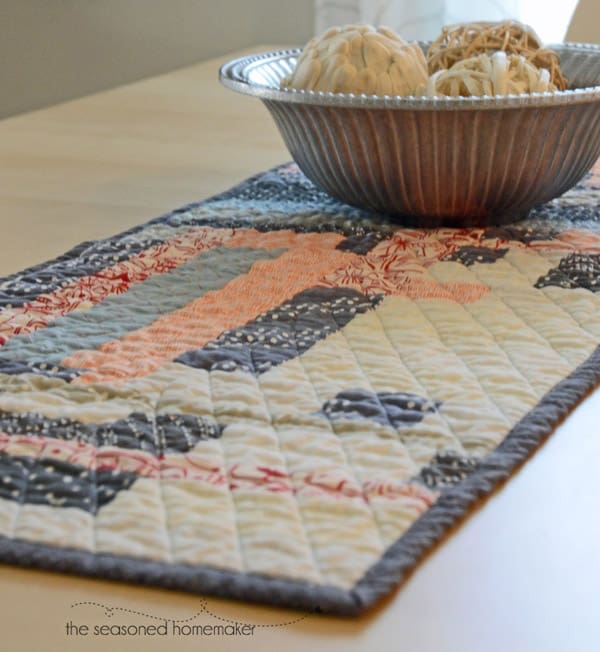
With every quilt you make there is always leftover fabric. And this is true with the Hearth + Home quilt pattern.
Because of its scrappy design there are leftover strips and pieces remaining after cutting strips for the blocks – especially if you’ve made the Home version of the quilt.
Instead of just tossing them out or storing them for fabric eternity, there is enough leftover fabric to make a few mug rugs. So I created a small design that works perfectly with these leftover pieces. Or any random scraps!
How to Make a Hearth + Home Mug Rug
Materials
- Hearth + Home Flower Applique (FREE! See Step 1 below or find it in my Shop > Freebies section)
- Assorted scraps leftover from Hearth + Home quilt project
- (1) 6.5” x 6.5” piece of Background or Low Volume Fabric (See example here)
- (1) 9″ x 14″ pc. of fabric for quilt back
- Use any remaining scraps and piece together backing!
- (1) 9” x 14” piece of Fusible Quilt Batting
- (1) 2.5″ x 45″ Strip for Binding
- Fusible Web
- Matching Aurifil 50 wt. Cotton Thread or Superior Threads Mono-Poly Thread
- Tailor’s Clapper (optional)
Supplies
- Sewing Machine
- Quarter Inch Foot for your sewing machine
- Water-Erasable Pen
- Wonder Clips or Sewing Pins
- Rotary Cutter with sharp blade
- Acrylic Ruler
- Self-Healing Rotary Cutting Mat
- Iron & Ironing Board
- Wool Pressing Mat
- Serrated Scissors (these are my favorite for cutting out applique)
Want an ad-free, printable copy of this tutorial? Scroll to the bottom of this post for more details!
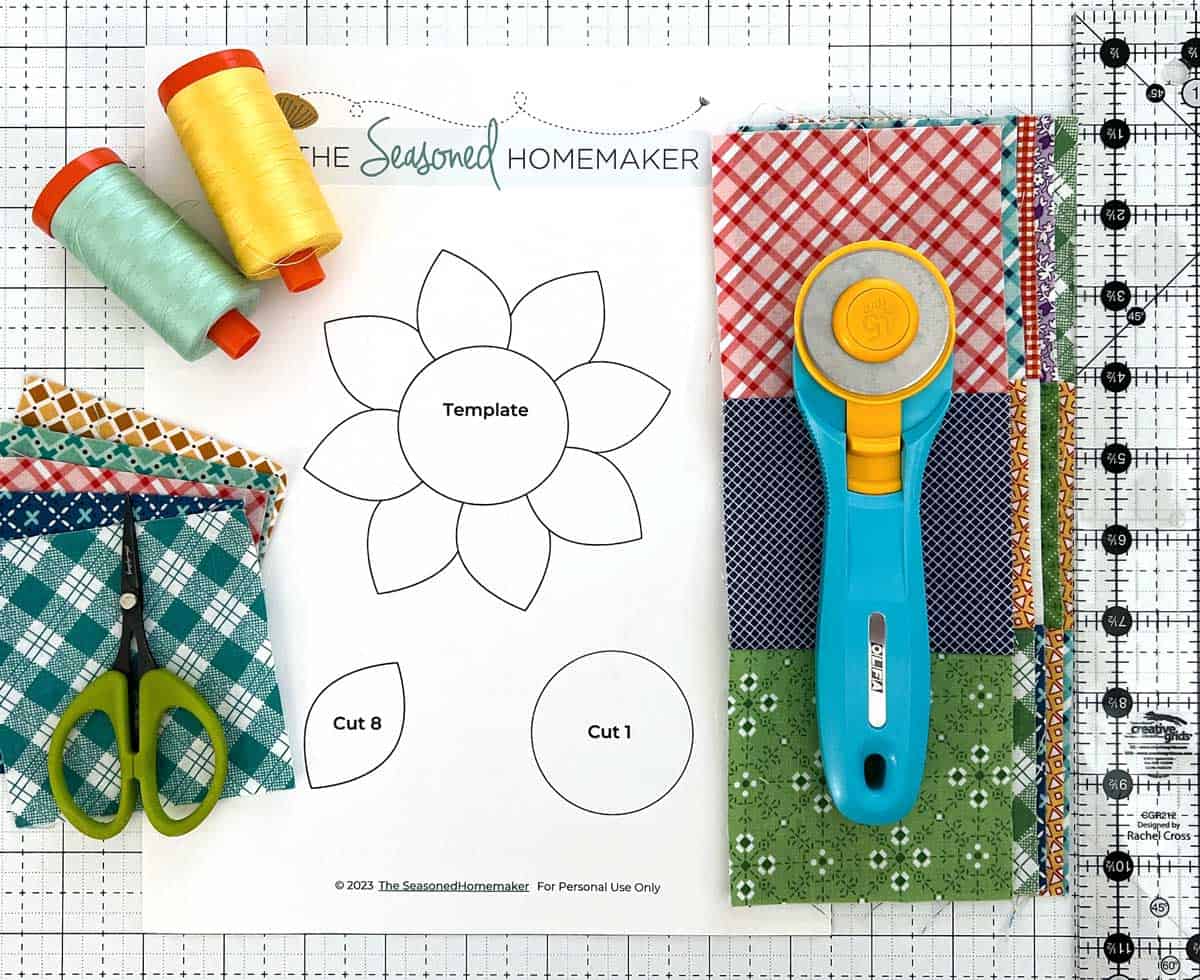
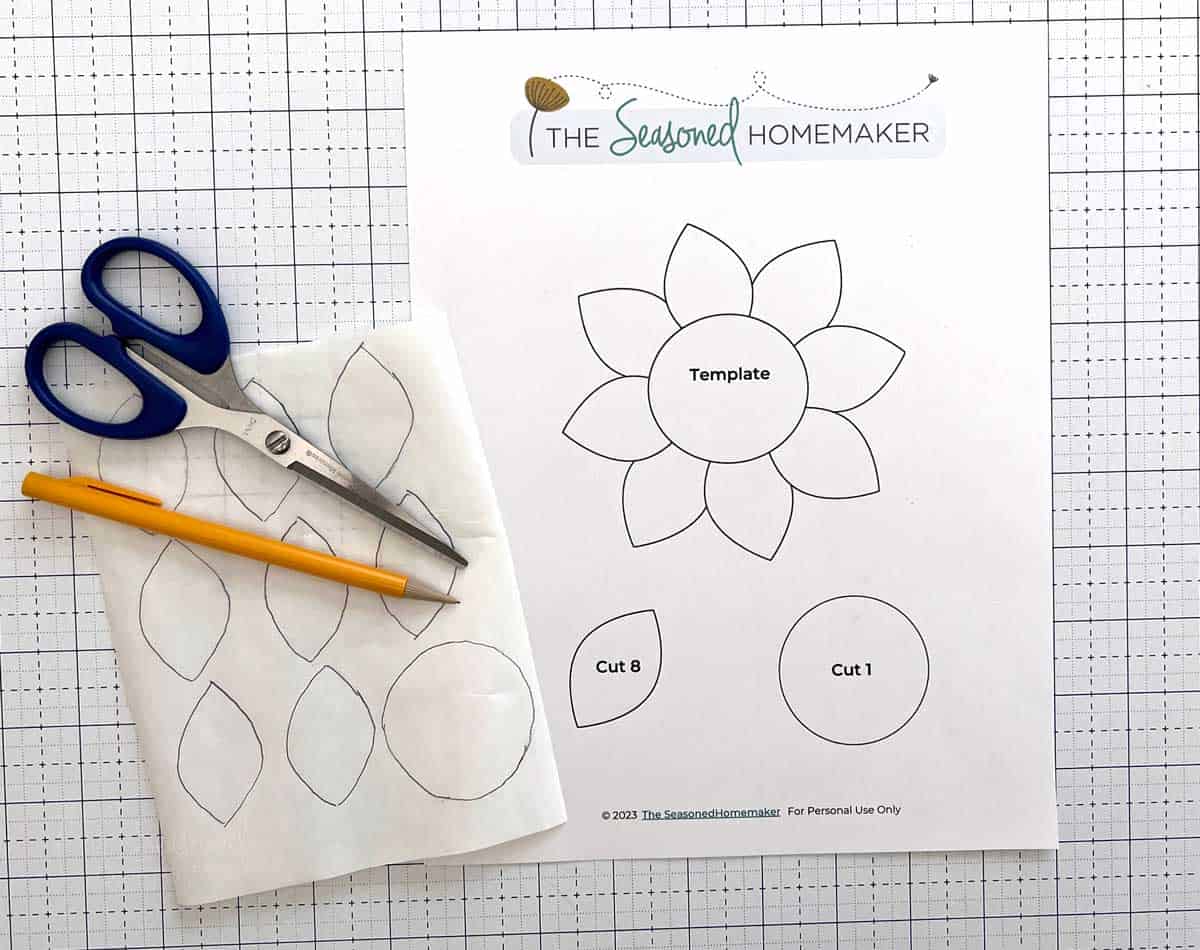
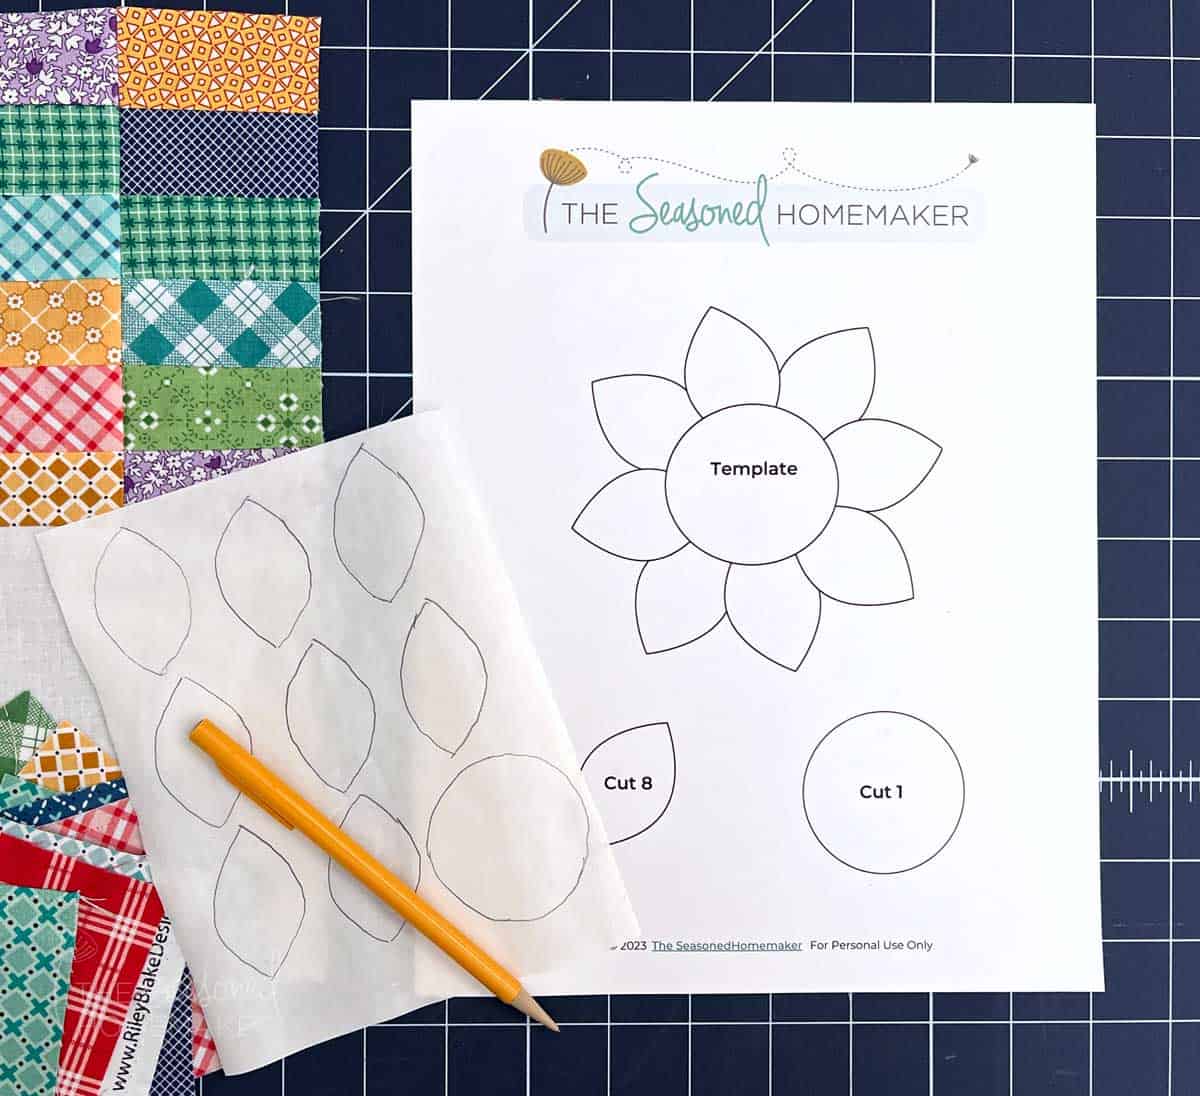
Step 1: Get the FREE Hearth + Home Flower Template
Get the FREE Hearth + Home Flower Template download by clicking the pink button below. You’ll be taken to the Freebies section of my Shop.
Step 2: Piecing the Leftover Strip Sets
When making the Hearth + Home quilt you’ll find that after subcutting the strip sets there will be a few. leftover strips in different widths. These are too small to use in your quilt, but when attached together, make a great side block for a mug rug.
- Take several of these end-piece strip sets and subcut them into 1.5″ strip sets.

- Rearrange the strips sets into a scrappy design that you prefer.
- Using a 1.5mm – 2mm stitch length, attach strip sets together in any manner you like. Press flat.
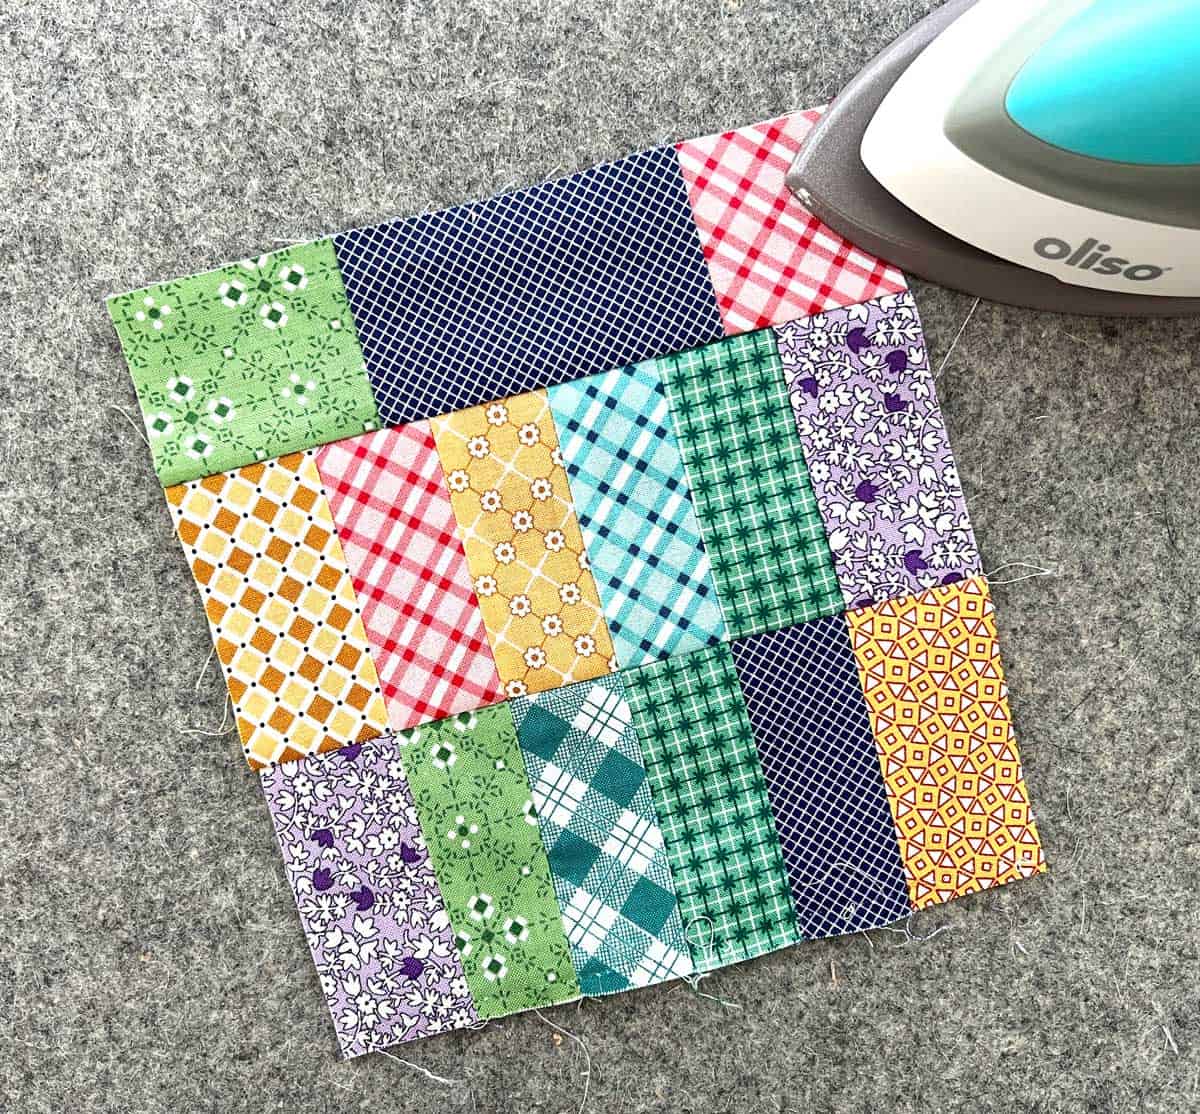
- Once you’re pleased with the overall look of the strips, trim the block down to 6.5″ x 6.5″. Be sure to use a ruler to line up the seams the block is square. Note: I’m using a 6.5″ square ruler which allows me to get a perfect 6.5″ square!
- Set aside.

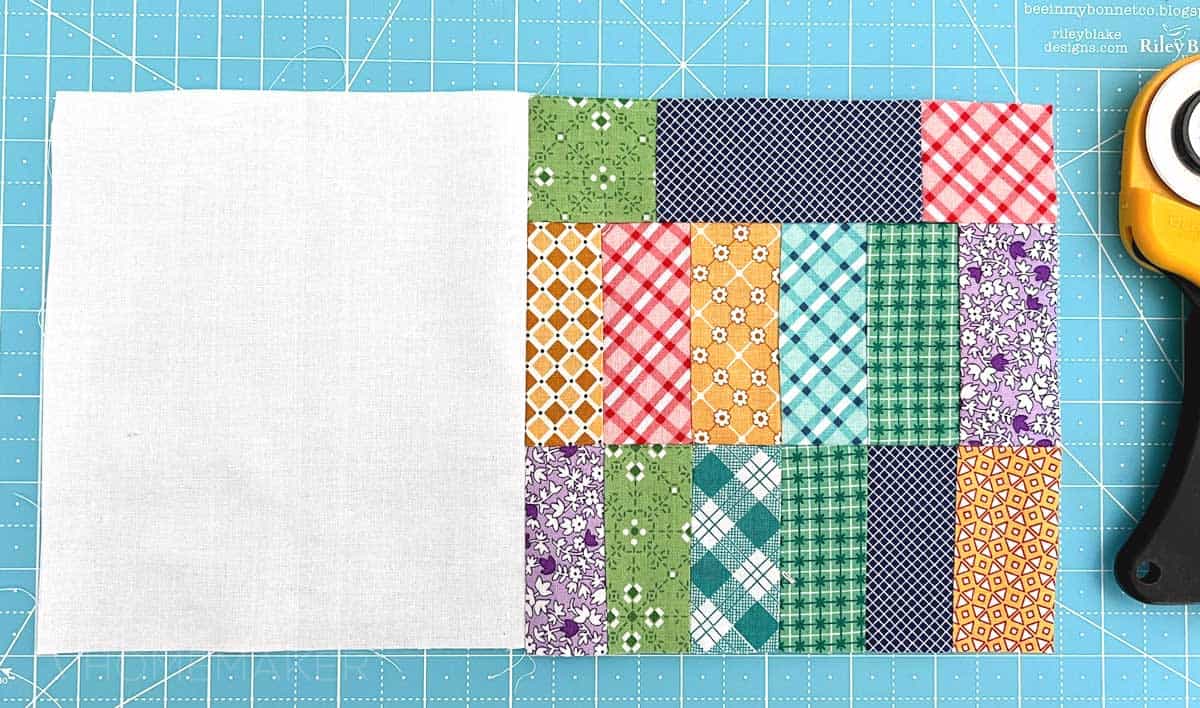
Step 3: Create the Quilt Top
When cutting the background fabric strips for the Home + Hearth quilt there will be a piece of fabric remaining at the end with the fold that is about 6.5″ wide. Use this piece as the background for your mug rug. Note: If your piece is a little shorter, no worries! Just make everything the same size.
- Cut (1) 6.5″ x 6.5″ piece of background or low volume fabric.
- Attach this piece to the 6.5″ x 6.5″ strip pieced block.
- Press all seams flat. Pro Tip: Press with steam and use a tailor’s clapper to flatten those seams!
Step 4: Preparing to Applique
It’s time to prepare the the flower applique designs.
Note: If you’re new to applique, see my video below.
- Print and cut out the Free Flower Template (see Step 1 above). Cardstock is recommended.
- Trace (8) Petals and (1) Circle onto the paper side of the fusible web product.
Step 5: Cut out the Flower Elements
- Rough cut around each of the design elements leaving a 1/4″ margin.
- Place the rough or shiny side of the the individual Petals and the Circle onto the back of assorted fabrics.
- Use a hot, dry iron and fuse the elements to the wrong side of your fabrics. Let cool.
- Cut out each of the elements on the tracing line. Set aside until Step 6 .
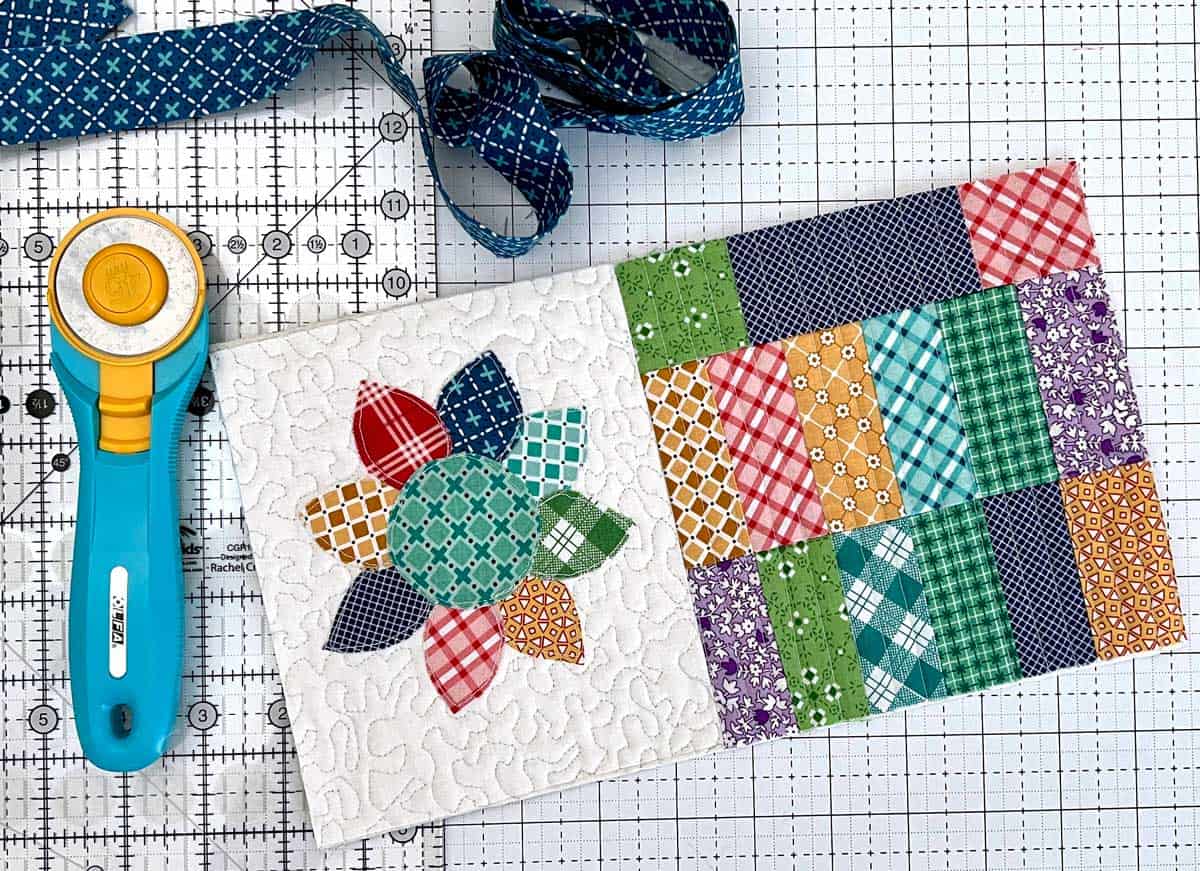
Step 6: Applique the Flower
It’s time to form the flower. You’ll want to center it on the background fabric.
- Using a water erasable pen, find and mark the center of the background fabric.
- Center the circle template over this mark and, using a water erasable pen, trace around the circle template.
- Evenly space the Petals on the piece of background fabric until they form a circle. Flower petals can overlap.
- Use a water erasable pen, mark the exact tip of where each Petal will be placed. This will keep petals from shifting and help you visually maintain the placement correctly in case they shift when fusing to the fabric.
- Peel the paper backing off the individual Petals one at a time. Then, one-by-one, fuse petals to the background or low volume fabric. Be sure to line them up with the mark you made.
- Remove water-erasable markings and let dry.
- Using either matching thread or Superior Threads Mono-Poly Thread, straight stitch or use a tiny zigzag stitch around each individual Petals.

Step 7 : Applique the Flower Center
It’s now time to finish the flower by adding the circle in the center. This will also cover up the inside edges of the petals.
- Find the center of the flower design and mark with a water erasable pen.
- Mark the center of the circle on the front of the circle and remove the paper backing on the circle.
- Using a straight pin to match the center of the circle, place it over the petals and then fuse to the center of the flower.
- Using either matching thread or Superior Threads Mono-Poly Thread, straight stitch or use a tiny zigzag stitch around the circle.

Step 8: Making the Quilt
Time to quilt the mug rug.
- Make a quilt sandwich with the quilt top, batting, and quilt back. Be sure to leave at least a 1″ margin of batting and backing.

- Quilt in any manner desired. Something like an all-over meander design, straight stitching, straight grid, or diagonal grid all would work.
- Once quilting is finished trim away excess fabric and batting, then square your quilt to 6.5″ x 12″. Note: Be sure to evenly trim from top, bottom, and two sides.
Step 9: Binding the Quilt
- Choose binding fabric to make your mug rug stand out. Example: If using pastels, introduce a new pastel color for the binding.
- Cut (1) 2.25″ or 2.5″ x WOF Strips.
- Alternate Idea: Piece together binding strips leftover from your project, attach strips and press wrong sides together.
- Sew binding to quilt.
If you need help with binding instructions see my tutorial: How to Machine Bind a Quilt.
Need more applique help? Watch this quick video!
Need basic knowledge about applique. Watch this short video on how to applique or see my eBook Applique Made Easy.
See below for more details about an ad-free, printable copy of this tutorial!
Get the Companion Pattern!
The Hearth + Home Mug Rug is made from scraps used to make the Hearth + Home Quilt. It’s a perfect companion project!
