

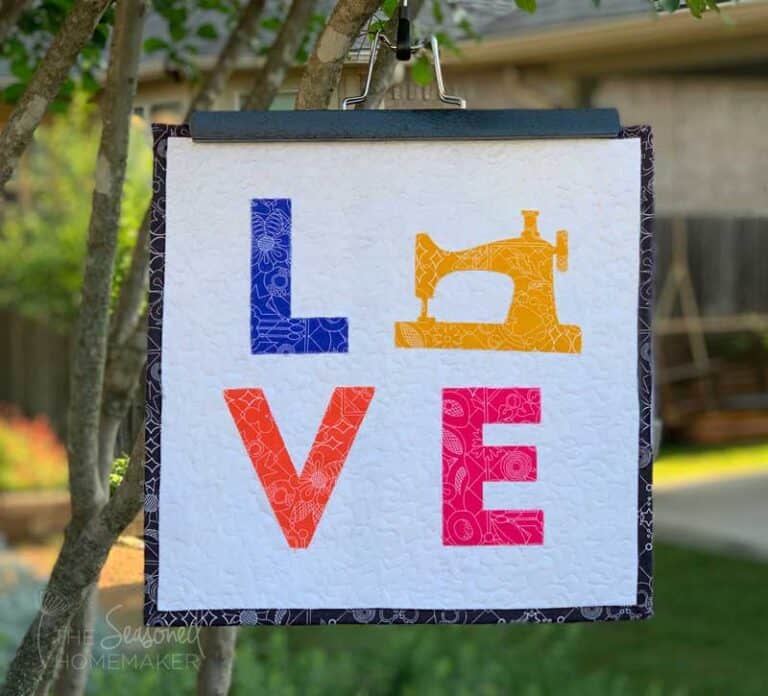
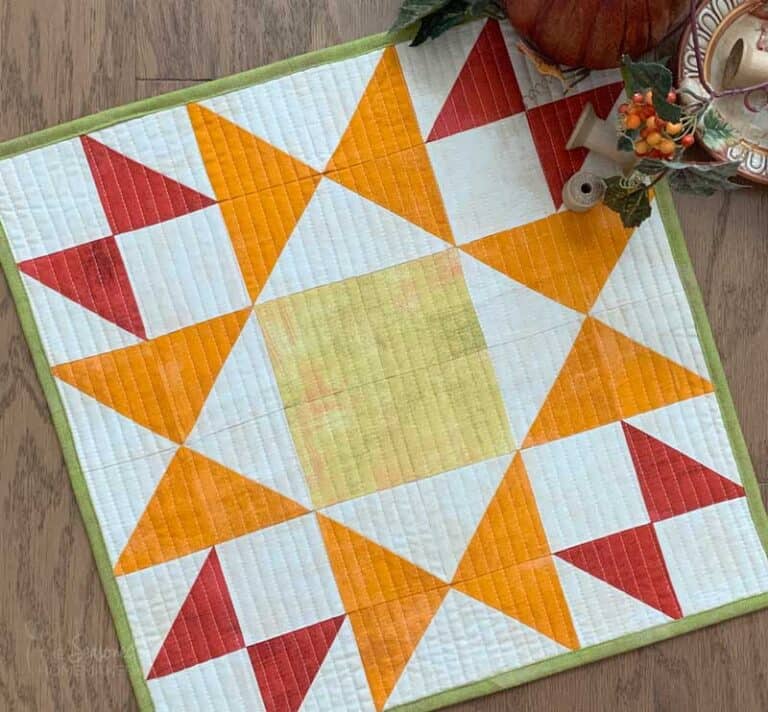
How to Bind a Quilt by Machine
This post may contain affiliate links which won’t change your price but will share a commission.
Inside: How to Bind a Quilt by Machine
Are you stumped when it comes to binding a quilt? You’re not alone. One way to get over this is to machine bind your quilt. Learn how to machine bind a quilt in this easy tutorial.
I have a confession. I have never bound a quilt by hand.
Instead, I machine bind all of my quilts and here’s why:
- It’s very beginner friendly.
- It secures the binding and this is great for quilts that get heavy use.
- I think it’s safer for baby quilts.
- I don’t plan to enter my quilts in any shows.
If this is you, then this tutorial is your best way to bind a quilt.
Want an ad-free, printable copy of this tutorial? Scroll to the bottom of this post for more details!
Basic Sewing Supplies Needed
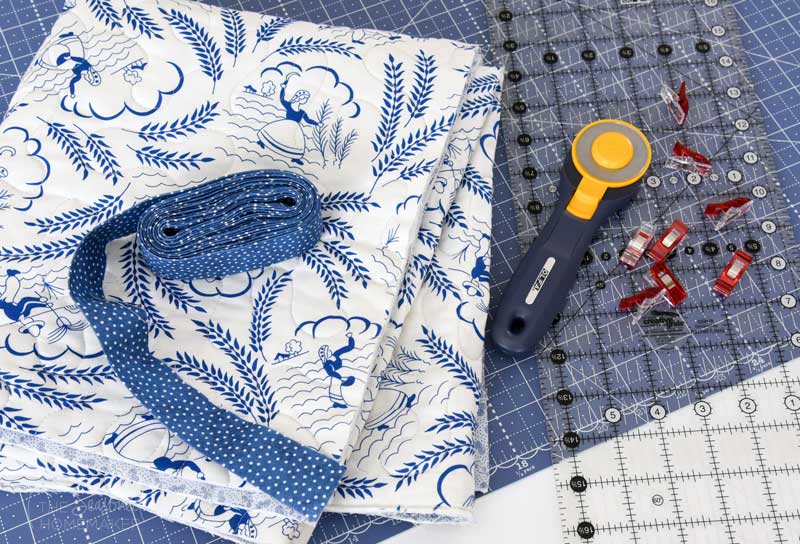
- Sewing Machine
- 1/4″ sewing foot
- Cotton Thread
- Wonder Clips
- Sewing Pins
- Schmetz 100/16 Jeans Needles
- Rotary Cutter with sharp blade
- Acrylic Ruler
- Rotary Cutting Mat
- Iron & Ironing Board
- Walking Foot (optional)
- Binding Tutorial (increase binding width to 2.5″)
How to Bind a Quilt by Machine
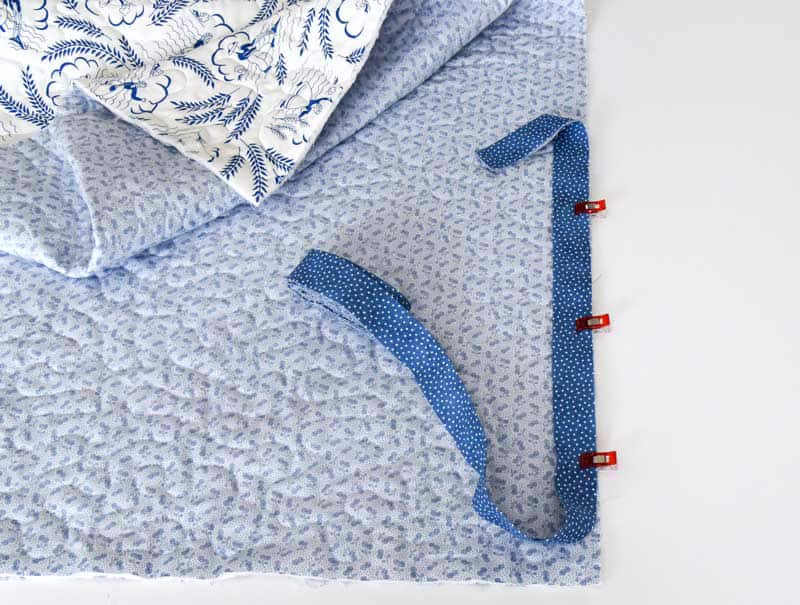
1. Attach Binding to Quilt Back
When attaching binding by machine, begin by sewing the binding to the back of the quilt. Start about three-quarters down on the long side of your quilt. Line up the binding and quilt raw edges.
Clip or pin to the quilt back
- Leave a 6″-8″ tail from the end of the binding. This is needed when you are attaching the binding ends.
- Use a 1/4″ foot and begin stitching with a 1/4″ seam allowance. Be sure to backstitch at the starting point.
2. Miter the Corners
The key to beautiful machine bound quilts is what happens in the corners. Follow these steps and you’ll have perfectly mitered corners every time.
Preparing for the corners
- Before you get to the corner, stop with the needle down and mark the binding 1/4″ from the edge. I love the Add-a-Quarter ruler for this!
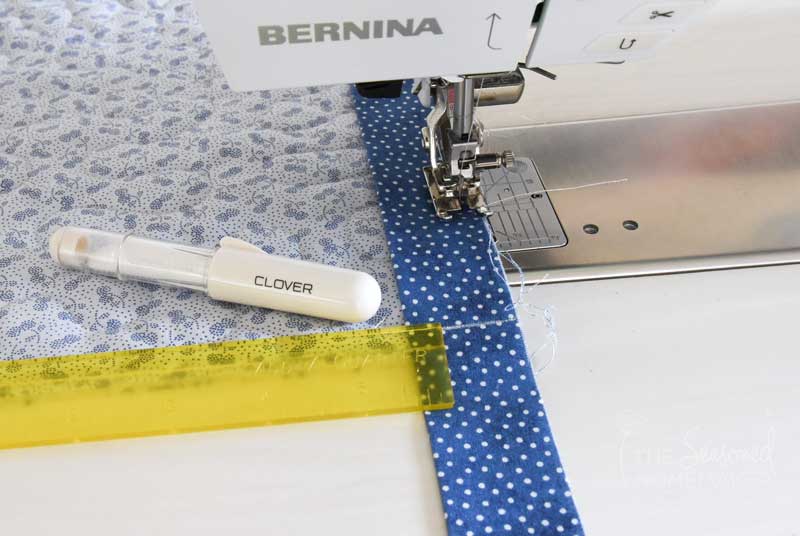
- Continue stitching until you reach this line and sew off the quilt at a 45° angle. Remove the quilt from your machine.
Creating a perfect corner
- Fold the binding up and away from your quilt at a 45° angle. This will create a triangle in the corner.
Finish sewing the corner
- Fold the binding back down over the corner and line up the raw edges. Pin or clip to hold.
- Begin sewing a scant 1/4″ from the top. Be sure to backstitch! This is the magic because it makes your binding fold to the front beautifully.
Where to stop
- Continue attaching the binding in this manner. Remember to take your time, especially at the corners. Stop stitching when you’re about 12″ from the starting point.
3. Join the Binding Ends
There are several different methods for joining binding ends. Some people match up the ends and straight stitch binding tails. This works fine as long as you lower your stitch length. But it can create a bulky spot on your quilt.
I attach my binding using a 45-degree seam. I like this method because it creates a beautiful, seamless finish. Plus, it’s strong and disperses the seam which prevents bulk in your binding.
Trim the binding tails
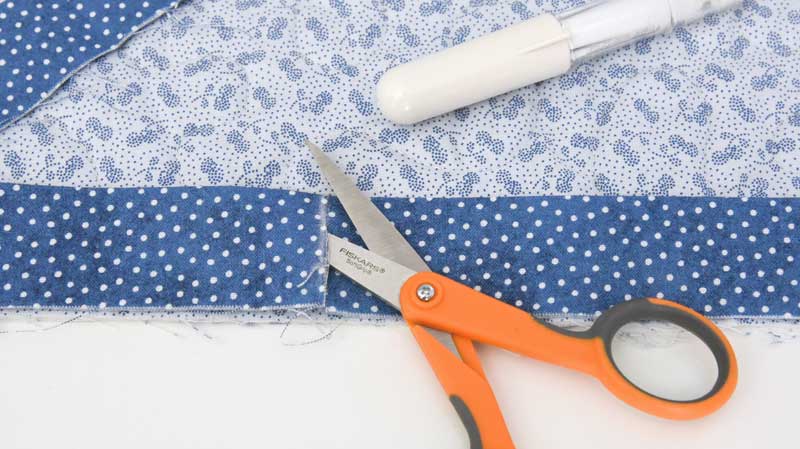
- This next step is where you need to be precise. Binding strips need to overlap by the same length that they are wide. That means if your binding strips are 2-1/2″ wide, they should overlap by 2-1/2″.
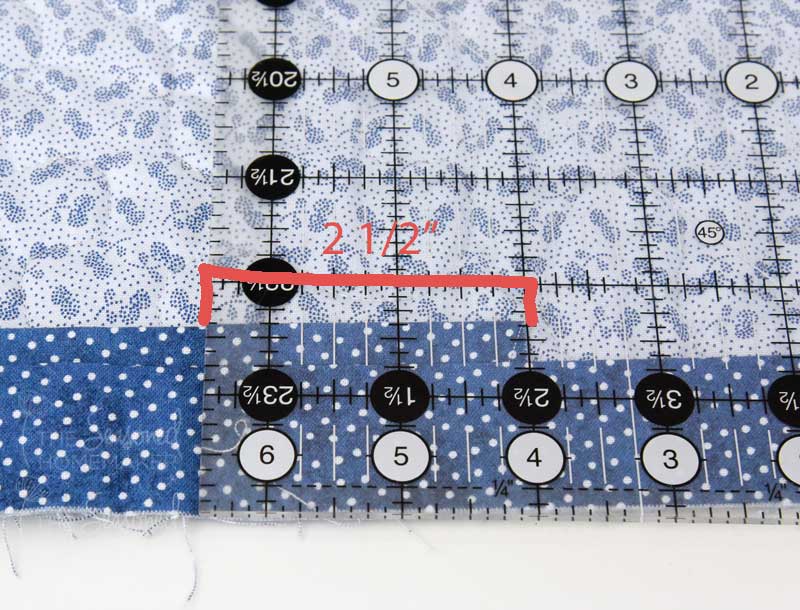
- Mark the cutting line and cut off excess binding tail. Pro tip: I usually cut away an additional scant 1/4″ because it makes the binding ease in better. Once you’ve done this a few time, give it a try!
Attaching the binding tails
- With the wrong side of the quilt facing up, flip the quilt so the two binding tails are pointing away from you and open up the two binding strips. Note: The placement is very important. If you do the next step with the strips facing the quilt you will end up with twisted binding.

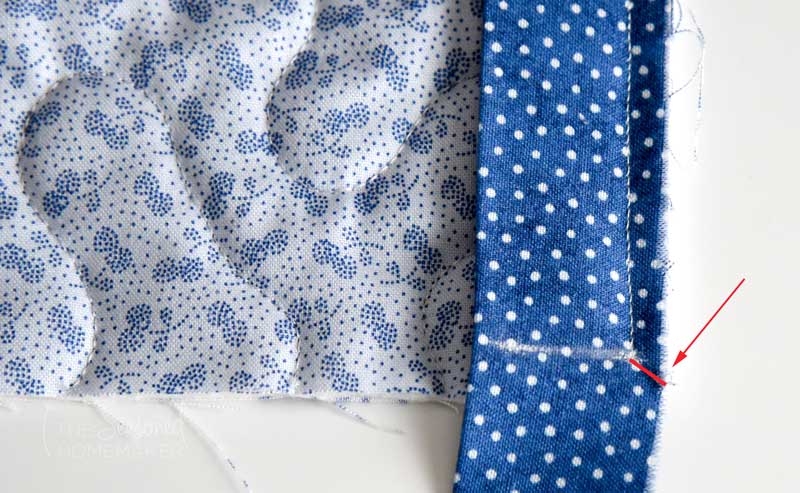
- Overlap them at right angles with right sides together. Pin to secure. With a water-soluble pen, draw a diagonal line from corner to corner.
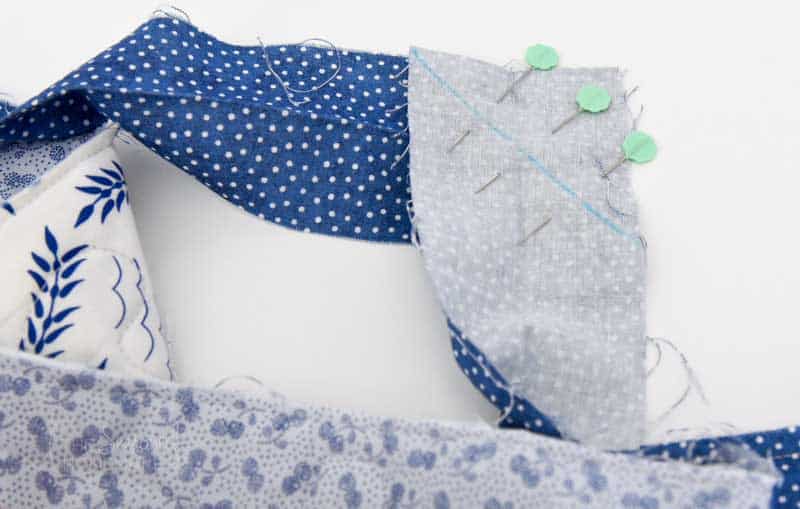
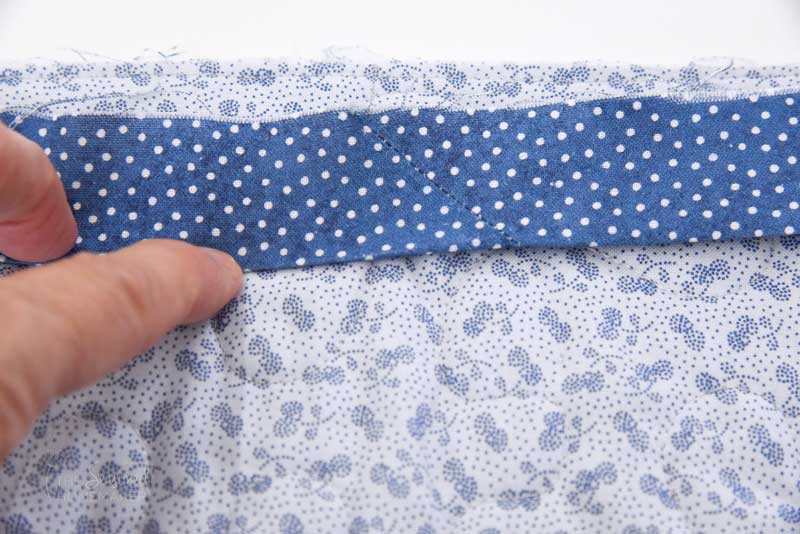
- Stitch the two ends together on the marked line and then trim the seam allowance to 1/4″. Notice how the seam is almost invisible. Note: Before cutting, do a check to make sure the binding isn’t twisted.
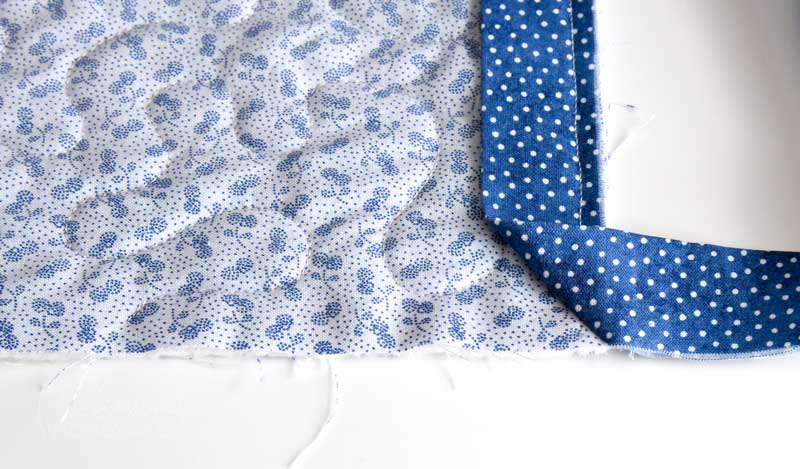
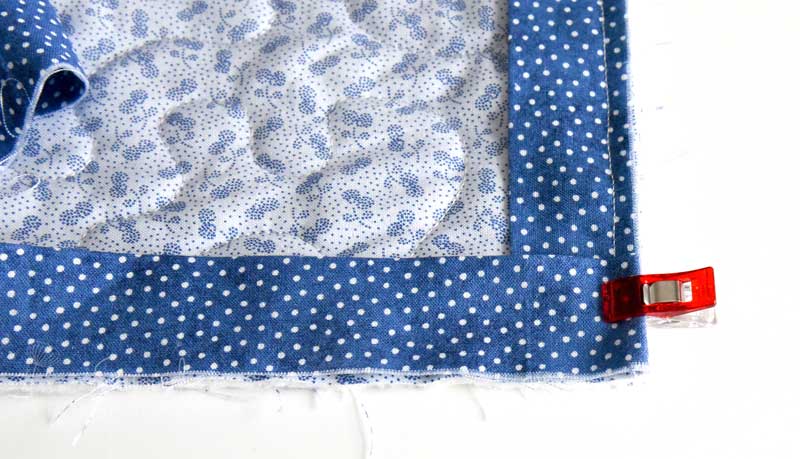
- Press the seam open and align with the raw edge. Finish stitching the binding to the quilt back.
4. Binding to the Front of the Quilt
Time to attach the binding to the front and get that perfect finish! The absolute secret to great looking binding is to take it slowly.
Note: Binding to the front will leave a visible stitching line on the back of your quilt. You will need to use a bobbin thread that matches the back of your quilt and a top thread that matches the binding.
Preparing to stitch the binding down
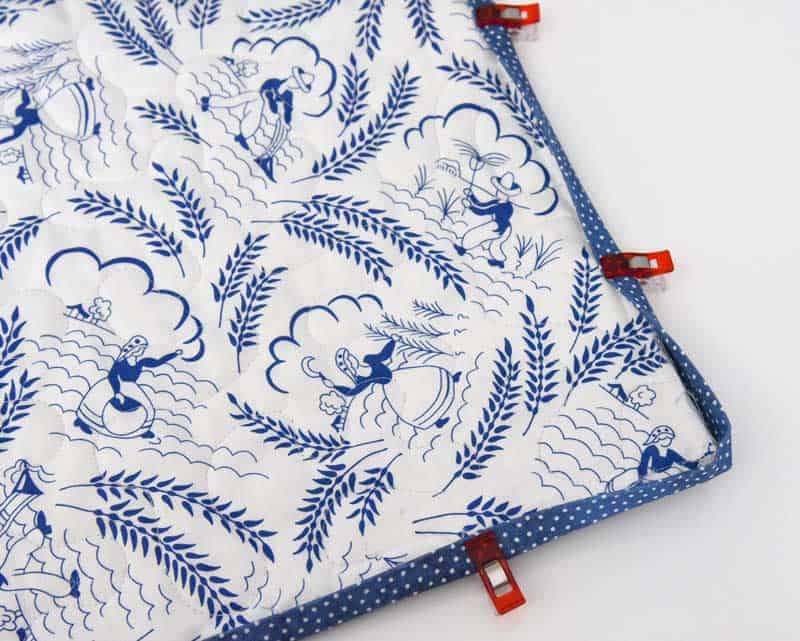
- Wrap the binding to the front of the quilt just past the stitch line. From the middle of the long side, begin securing with Wonder Clips approximately 6″ apart until you get to the corner.
- When you get close to a corner, don’t add a clip yet. Go around the corner about 3″ and pull the bottom binding up and over the seam line then add a clip. This will cause the corner to pucker out and make it easy to create a nice mitered corner.
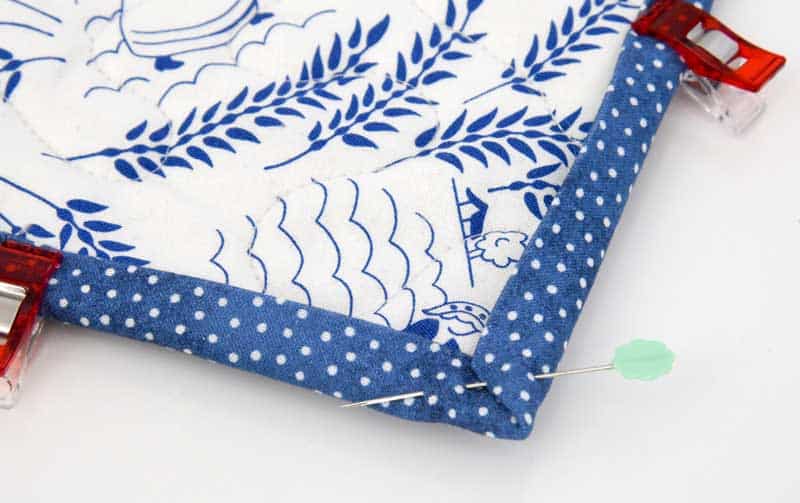
Preparing to miter corners
- Fold the bottom binding up and over the seam line and make it go straight across, creating a fold where it meets the other side.

- Bring the other side over to meet at the corner. It should form a beautifully matched mitered corner. Put in a pin that goes across the mitered fold to secure.
- Continue adding clips to hold the binding, stopping at every corner to create a miter.
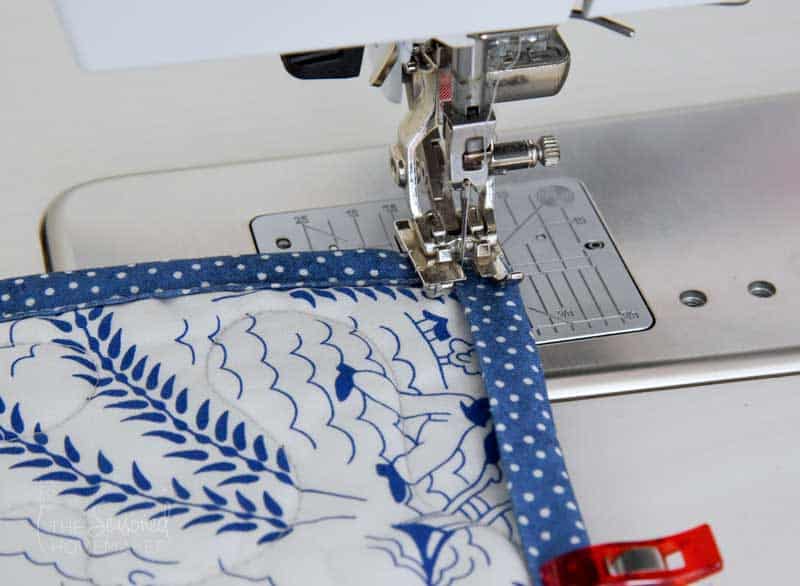
Stitching down the binding
- Use a 2.5mm – 3mm stitch length and sew down the binding. I use my 1/4″ foot for this, but many people prefer using a universal foot to line up the foot with the edge of the binding and then shift the needle a few stops (if you have this feature on your machine). This keeps your foot firmly on the binding and works exceptionally, especially with a walking foot.
- When you get to each corner take one stitch past the corner point, drop the needle, and turn the quilt. Be sure to remove the pin. Continue around the rest of the quilt.
6. Some Practical Tips
This beginner-friendly binding method helps new quilters gain confidence and create beautiful quilts to share and use. It’s ideal for baby quilts or quilts that will get a lot of wear.
Below are a few things I recommend that will help you get better and gain confidence.
- When wrapping the binding to the front, make sure to fold your binding beyond your original stitch line. This will prevent you from accidentally stitching over the binding on the back of the quilt.
- Use a Walking Foot if you have one available. It will keep your fabric from stretching.
- Use a 2-1/2″ binding strip. This will allow room for stitching down the binding.
- To avoid skipped stitches and a broken needle, use a Schmetz Jeans/Denim needle (size 100/16).
- Use a 50 wt. cotton thread, such as Aurfil.
Note: Watch the short instructional video. It will play automatically.
Get the Printable Post
Want an ad-free, printable version of this post? Click the button below and download the Printable PDF tutorial.
Thank you so much this was very insiteful. I have a terrible time with binding and you made it so simple.
This is the best detailed binding information I have seen. Thank you so much for being so patient in your teaching. You are the best!
Thank you!
Your instructions are so clear and easy to understand! I just may throw away my old instructions and print out yours, especially for joining the tails. I never knew the tip about flipping the quilt over and facing the tails away, and your cutting instructions for the tails is easy to understand. And thank you for using a binding that has a clear right and wrong side. Makes it so much easier to see what to do.
Thank you for such clear instructions! I have a book I bought several years ago on borders and finishing of quilts. I’ve had to mark it up with my own notes on how to do the binding ends since her directions were so incomplete. Finally a tutorial that makes sense of it all! I’m going to print out and laminate these direction and keep them by my machine. Thank you so much!
did You say that you’re making a video for this binding method it’s a great tutorial but I learn from hands on method thanks for all your instructions
Thank you. I hand stitch my bindings because I’ve not had good results with machine stitching but I sure would love to succeed at it! This is very helpful. Where did you purchase the lovely blue and white print? It reminds me of “the olde country”
Thank you for the very clear tutorial. I am about to bind a queensized quilt and I have been dreading it as I always seem to have issues with my mitered corners, definitely going to try your method .
Your tutorials are always so good. I cant wait to try this one! Thanks for actually explaining things that others skip, even on video tutorials.
you answered many questions I had. Thanks for the information.
Awesome! Just what I needed. Thank you and Happy quilting!
Your binding tutorial is spot on. You explain in ways that make it so easy to understand. I’m so glad I stumbled onto your site yesterday. Thank you for sharing your knowledge.
Such a wonderful tutorial. I always struggle after I cut at the 2 1/2″ mark. I somehow always get them twisted. Thank you so much for sharing.
Thank you for the tutorial! I have a hard time doing it to look nice.
I too sew all my binding on by machine and not by hand. And… I use the same method of sewing the binding to the back and then being it to the front. So many quilters sew the binding to the front.
I prefer this method because I like to see the nice top stitching on the binding edge on my quilt front.
Great minds think alike!
I have a quilt ready to bind, so I will try your tip for the final join. I sew my binding to the front and then fold it to the back because I think it looks neater, but that’s just my preference. I also use a decorative stitch to finish it from the front.
Great information. I was doing it wrong and ended up with stiches on and off the back binding.
I also bind by machine, pretty much the same way you do, BUT your instruction for joining the ends is so much clearer than what I’ve seen before. It’s one of those things that’s difficult to get your head around to start with. The only things do I differently are that I use my “ditch” foot to run along the edge of the binding on the front and move the stitching slightly to the right – and I often glue the binding to the front using a little hem guide ruler to make sure it’s the same all the way around.
I also use glue and an Edge Stitch foot. I love the idea of the hem guide ruler. Thanks for sharing.
Awesome! So clear and helpful, especially the mitered corners and joining the ends. Thank you so much!