Fall Leaves Mug Rug
This post may contain affiliate links which won’t change your price but will share a commission.
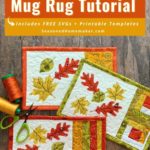
Inside: Fall Leaves Mug Rug
Want to make an easy fall project? Try creating a simple Fall Leaves Mug Rug! You’ll find printable templates PLUS Cricut designs. A little something for everyone!
The Fall Leave Mug Rug is the perfect project to start off the new season. All you need are a few scraps and you’ll be good to go. This step-by-step tutorial includes FREE applique designs + instructions for both hand cutting and Cricut cutting.
Let’s get started making our Fall Leaves Mug Rugs!

Want an ad-free, printable copy of this tutorial that removes all of the Cricut instructions? Scroll to the bottom of this post for more details!
How to Make a Fall Leaves Mug Rug
Materials
- PDF Fall Leaves Designs for Hand Cutting (see below for download)
- (1) Cream Fabric (7″ x 7″) – Fall Leaves Background
- (1) Fall-themed fabric (8″ x 11″) – Quilt Back
- Fabric Scraps in Fall Colors
- Maple Leaf – Cut (1) 6″ x 6″
- Oak Leaf – Cut (1) 6″ x 4″
- Small Leaf – Cut (1) 3″ x 4″
- 1/8 – 1/4 yard Binding Fabric
- Heat’n Bond Lite
- Fusible Quilt Batting
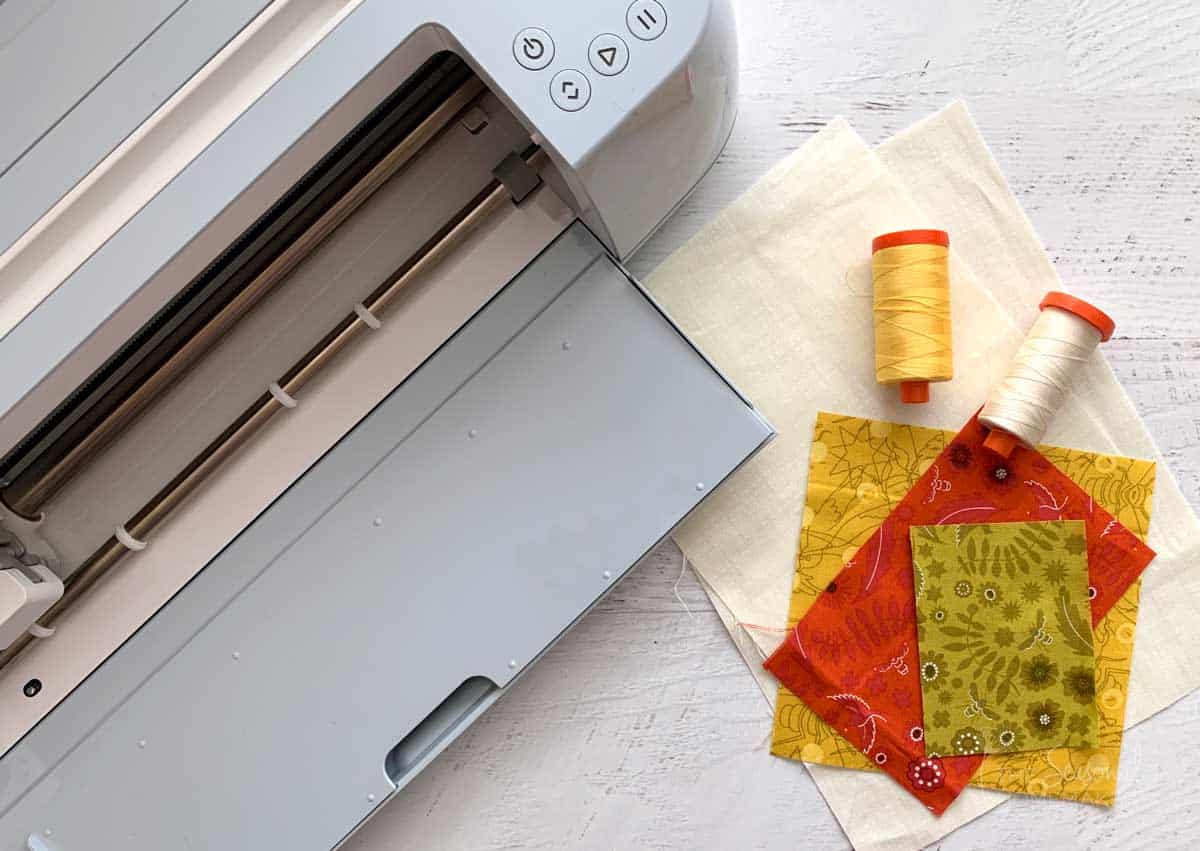
- Aurifil 50 wt. Cotton Thread
Supplies
- Sewing Machine
- Quarter Inch Foot for your sewing machine
- Water soluble marker (optional)
- Rotary Cutter
- Acrylic Ruler (6.5″ x 24″ is best)
- Self-Healing Rotary Cutting Mat
- Walking Foot (optional, but highly recommended)
- Iron & Ironing Board
- Wool Pressing Mat
- Serrated Scissors
- Cricut Maker 3
- Cricut Rotary Blade
- Pink FabricGrip Mat
- Cricut EasyPress 2 or Iron
- Cricut EasyPress Mat or Thick Towel
NOTE: IF YOU DON’T OWN A CRICUT, SKIP STEPS 1, 3, AND 4. INSTEAD, HAND CUT THE DESIGNS USING THE FREE PDF FALL LEAVES TEMPLATE. GET IT BELOW!
For the Hand Cutting Method: I’ve created a simple design that you can download for FREE. To download the FREE Fall Leaves Templates click the button below. You’ll be taken to the Freebies section of my Shop.
1. Choose a Design
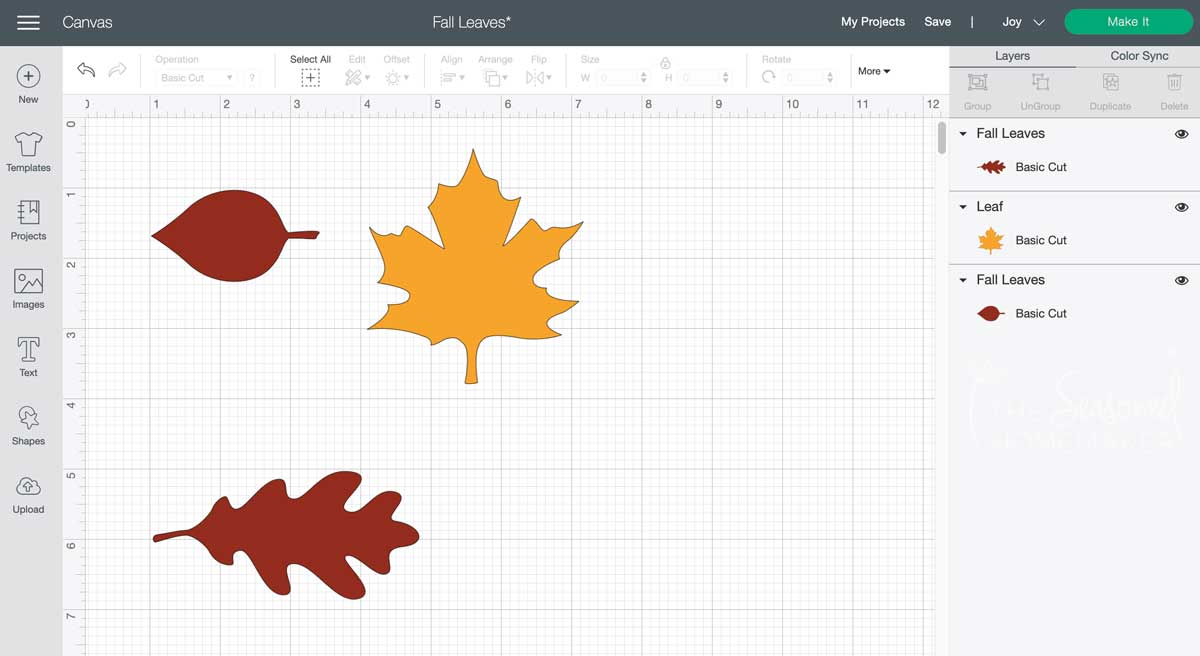
To cut out the leaves on a Cricut Maker you will need upload the PDF Fall Leaves design into Cricut Design Space which will convert the files in the software.
For my design I created three different leaf designs and loaded them into Cricut’s Design Space software. You can access them in Cricut Design Space here: Fall Leaves or upload into Design Space the PDF templates included in the FREE Fall Leaves Template.
Once the design has been selected, open the file in the Design Space software and resize the image or add more leaves, if desired.
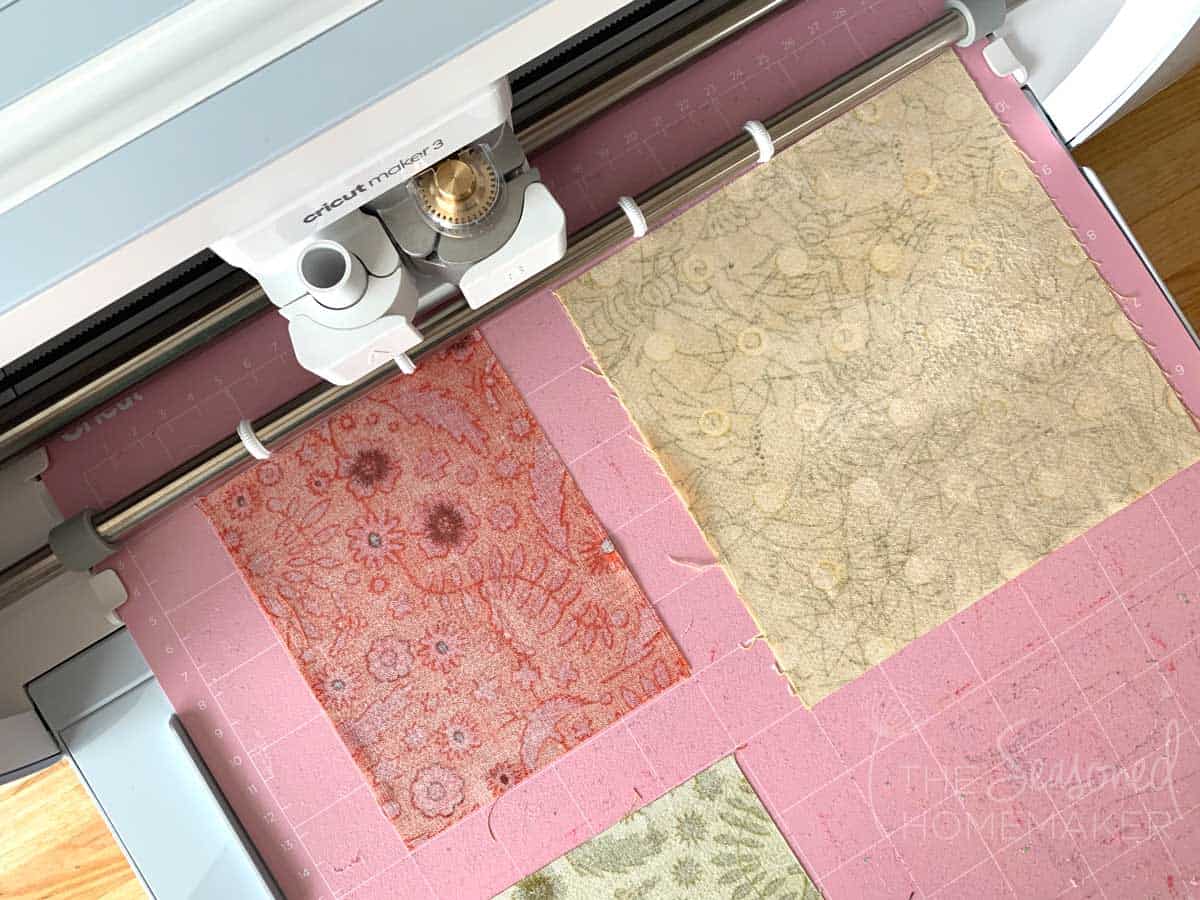
Since I plan to cut three different leaves on three different fabrics I made three individual cut files. I sized each leaf to cut individually. You will need to pay attention to fabric placement on your mat. Note: Use the Pink FabricGrip Mat for cutting fabric applique.
2. Prepare the Fabric for Applique
Now that the design and sizes are chosen, it’s time to prepare the appliqué fabric.
Cut Fabric Scraps larger than the individual leaf size. See Supplies & Materials for suggested sizes.
Using a dry iron or the EasyPress2, apply Heat’n Bond Lite to the back of the fabric scraps. If using the EasyPress 2 with the EasyPress Mat, set the temperature to 305º F. and the timer for 20 seconds.
Once cooled, remove the paper backing. The back of the fabric will now be shiny.

3. Preparing to Cut the Design Out
- Depending you how you want to place your leaves you may want to mirror the image. See the Edit button for Mirroring.
- The Design Space software will determine where to place the fabric. Follow the software ruler markings that match the markings on the cutting mat.
- Place your fabric right side down on the Pink FabricGrip Mat. The shiny side with the Heat’n Bond should be facing up.
- It is important for the fabric to be securely attached to the Pink FabricGrip Mat. Use a brayer to flatten the fabric to the mat. This will keep the fabric from stretching and secure it to the mat. Remember, when the machine is cutting, it’s going pretty fast over the fabric. Any place where fabric isn’t adhered to the mat could ruin the cut. Note: You can also secure the fabric to your mat using blue painter’s tape.
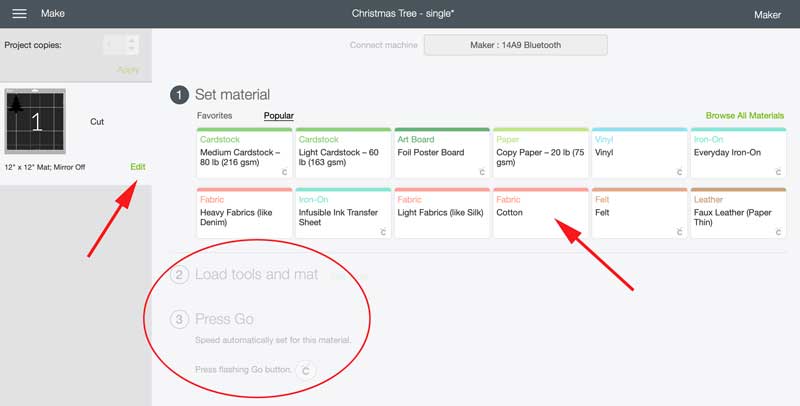
4. Cut Out the Designs
At this point, it’s time to cut the design. Load the Cricut Rotary Blade into the Cricut Maker. Follow the directions in Design Space. Be sure to choose “Cotton” for your Material. The software will instruct you when to load and unload the mat.
Once the designs are cut out, carefully peel back the fabric at the corner and slowly pull away the excess fabric. The cut designs will remain on the mat. Use a scraper to carefully remove the designs and set aside.
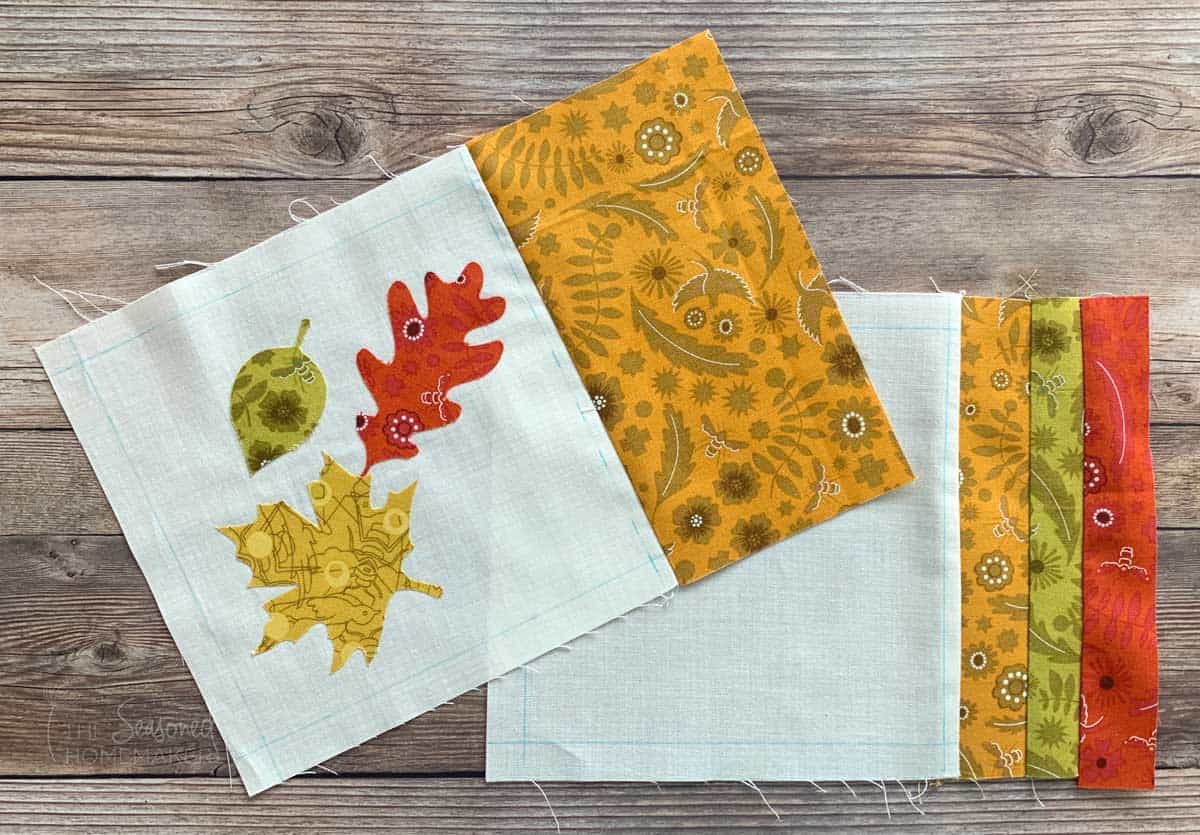
5. Designing the Mug Rug
It’s decision time. Before you place the applique designs in Step 6 you need to decide how you want to customize your mug rug. Choose one of the options below and attach it to the right side of the 7″ x 7″ piece of cream fabric. Take note of placement since the quilted mug rug will be trimmed down after quilting.
- Add a 3.5″ W x 7″ H piece of fall-themed fabric to the right of your creamy colored fabric.
- Use leftover fall-themed scraps to cut (3-4) 1.25″ x 7″ strips and stitch together with a 1/4″ seam allowance. This will be trimmed down to fit the mug rug in Step 6. See this tutorial for more details.
- Make (2) 3.5″ x 3.5″ FPP Log Cabin blocks, connected top to bottom. Get a FREE FPP Template here!
6. Placing the Appliqué Designs
Note: I recommend using a water soluble marker to map out leaves placement on the quilt top fabric.
Using a water erasable pen make a margin about 1/2″ around all four sides of the cream background. Next, determine where you want to place your leaves. They can slightly overlap for a nice look. Keep in mind, you’ll be trimming this down after you quilt so leave some margin.
Place the leaf designs shiny side down inside the marked area. Using a dry iron or the EasyPress 2 (305º for 20 seconds), fuse the designs to the top fabric. Let cool.
Pro Tip: It’s easy to resize your leaves and add more! If using the hand cutting method, use a printer to enlarge or reduce the size of the leaves (ex: reduce by 25%). If using a Cricut Maker 3 then adjust the size in Design Space.
7. Time to Quilt
Make a quilt sandwich with fusible batting. Fuse the batting to the mug rug front and back.
Set your stitch length to 3mm. Begin by stitching around the leaves with a straight stitch close to each leaf’s edge. This will secure the design and add quilting.
For fun, stitch in leaf veins in a contrasting color! Finish quilting the mug rug in any style you choose. Be sure to remove any markings when finished.

8. Finishing the Mug Rug
Trim and square the mug rug. Keep in mind that mug rugs don’t really have a standard size, however, you will want to pay attention to the leaf placement and overall design when trimming down. A good size should be in the 6″ x 9″ range.
Make enough 2.25″ (or 2.5″) binding to finish the project. Note: See this tutorial for more help with machine binding.

Mug rugs are a great way to try out different techniques (like 3″ FPP Log Cabins!). They don’t require a ton of fabric and can usually be made from scraps.
Use your imagination and have fun creating your own Fall Leave Mug Rug.
>>> Want an ad-free, printable copy of this tutorial that removes all of the Cricut instructions? Click the pink button below and download the Printable PDF instructions.