

How to Square Up a Quilt
This post may contain affiliate links which won’t change your price but will share a commission.

Inside: How to Square Up a Quilt
Did you know that the quilting process can make your perfectly pieced quilt top un-square? This happens because quilting can stretch a quilt out of being square. This tutorial will teach you how to square up a quilt.
True confession here. My very first quilts weren’t squared up following the quilting process. Instead, I used the quilt top as a guide, trimmed the excess batting, then slapped on some binding. They were all kinds of uneven.
I know better now and I’m here to show you how to square up your quilts and help you prevent this from ever happening.
What is Squaring Up a Quilt?
Once the quilting is complete it’s necessary to trim away the excess backing and batting before binding the quilt. This is called squaring up a quilt; it is the process of creating 90-degree angles at all corners of the quilt and consistent straight edges between the corners.
What happens if you don’t square up your quilt? You may have a corner (or two) that curls or possibly the quilt never lays flat and always looks a little wonky.
However, when properly squared, your quilt will lay perfectly on a bed or fold neatly with all of the corners matching.
Pro Tip: Add borders or widen borders on your quilt tops because quilting can shift and change the shape of your quilt. When squaring, you may have to trim away more than expected. By having a little extra border you will be able account for these inconsistencies and still have a square quilt.
Want an ad-free, printable copy of this tutorial? Scroll to the bottom of this post for more details!
Supplies
In order to correctly square up your quilts you are going to need a few supplies.
- A finished quilt!
- 12.5″ Square Ruler *
- 6.5″ x 24.5″ Ruler
- 60 mm Rotary Cutter
- 24″ x 36″ Cutting Mat
- Iron & Ironing Board
- Spray bottle with water
*About Square Rulers: The most commonly used square ruler is 12.5″, however, there are larger square rulers (15.5″ and 16.5″). If you plan to make a lot of quilts it would be worthwhile to invest in one of these larger rulers.
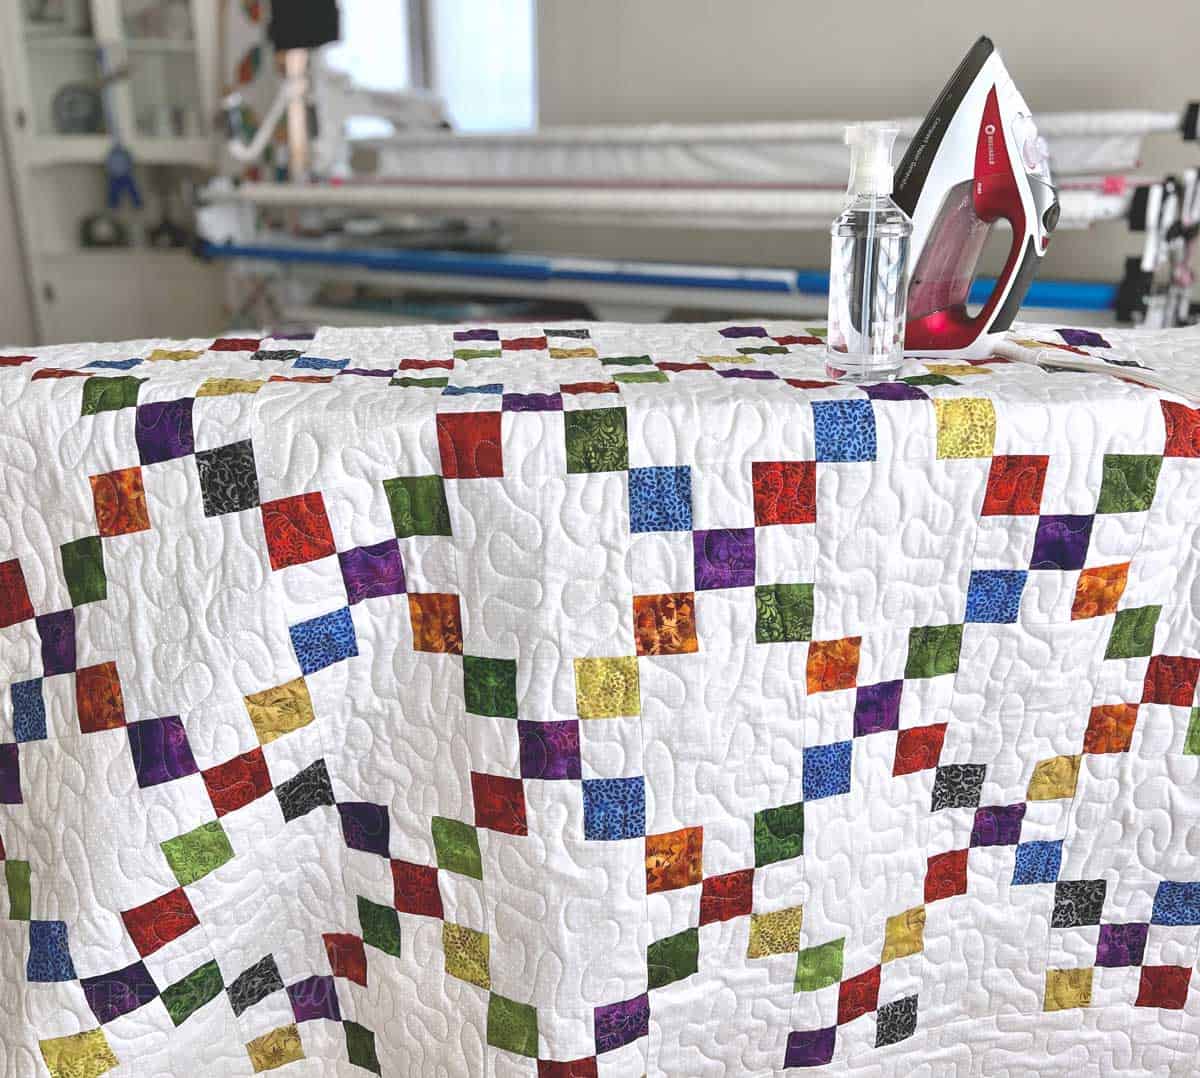
Step 1: Iron your Quilt First
This is something I’ve recently started doing with all of my quilts and it has made a huge difference in how accurately my quilts are squared.
Quilting creates wrinkles and shifts the quilt top and backing. I recommend you lightly spritz your quilt with a little water and iron out all of those inconsistencies. This will set your stitches and go a long way in preventing any wonky-ness when you start the squaring process. Plus, you get a chance to look over the entire quilt to check for quilting imperfections that may need an adjusting.
Step 2: Squaring Surfaces!
One of the issues with squaring a quilt is having a large enough surface to do this well. For mini quilts or baby quilts, you should be able to square your quilt on a large table. However, laying a large quilt out on a clean floor is going to be your very best option for getting an accurately squared quilt.
Why a floor? Using a raised surface can create uneven edges. This can happen when you allow your quilt to hang over the edge of a table because it pulls on the quilt and there could be bowing along your quilt’s edges.
If you don’t have a large open space with an even surface you can roll up or fold the edge not being squared onto the quilt, but make sure that it is flat and even on all ends.

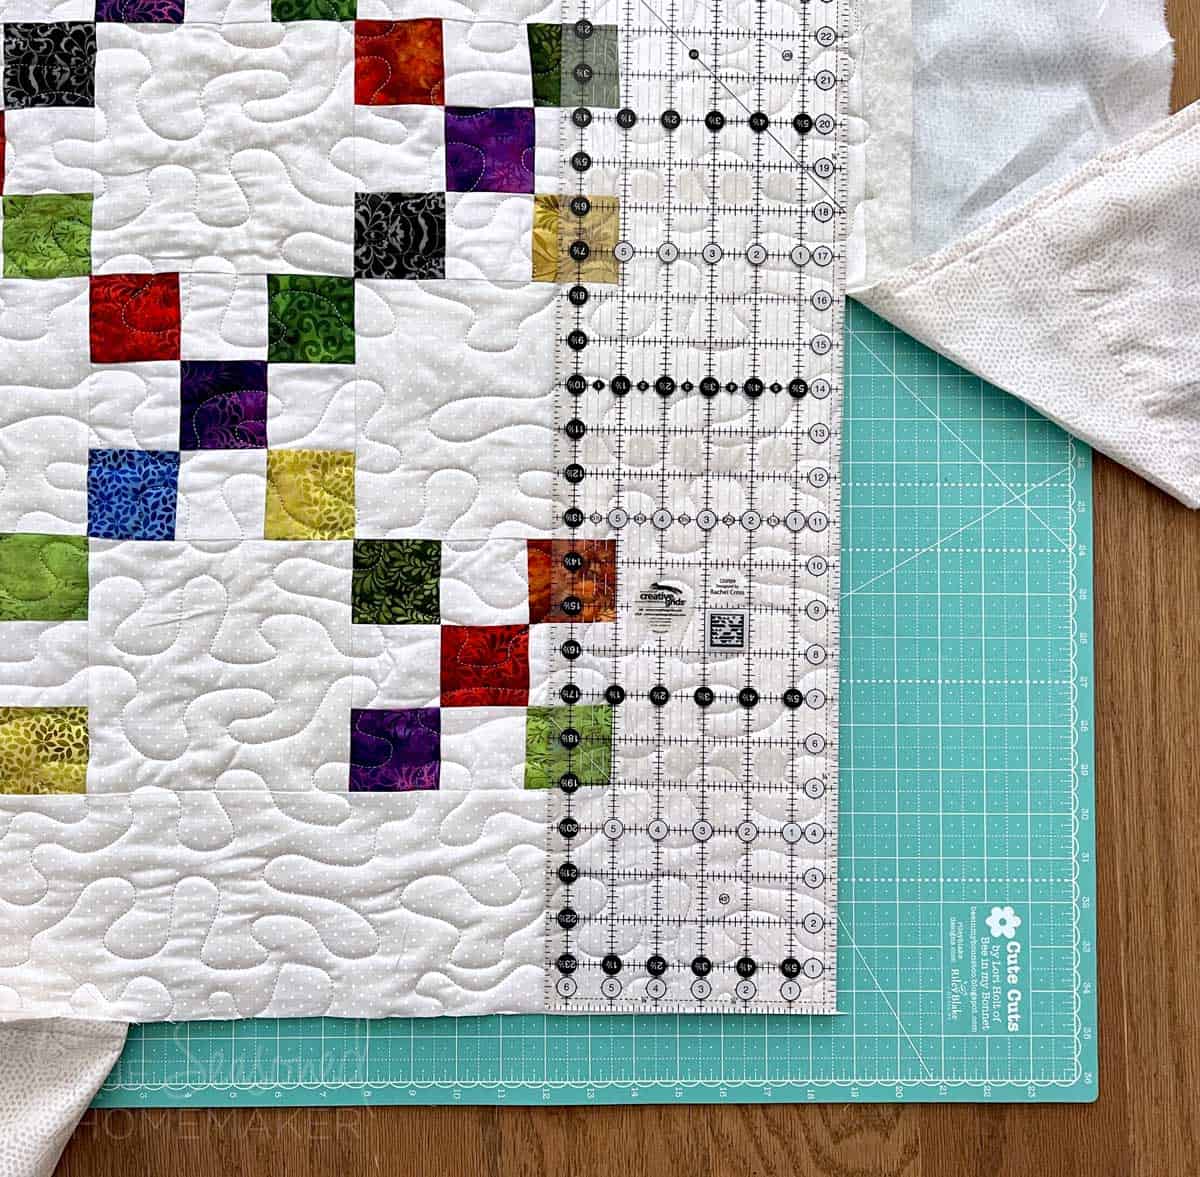
Step 3: Squaring the Quilt Corners
Squaring the corners is the first step and essential in accurately squaring your quilt. Follow the steps below to perfectly square the corners of your quilt.
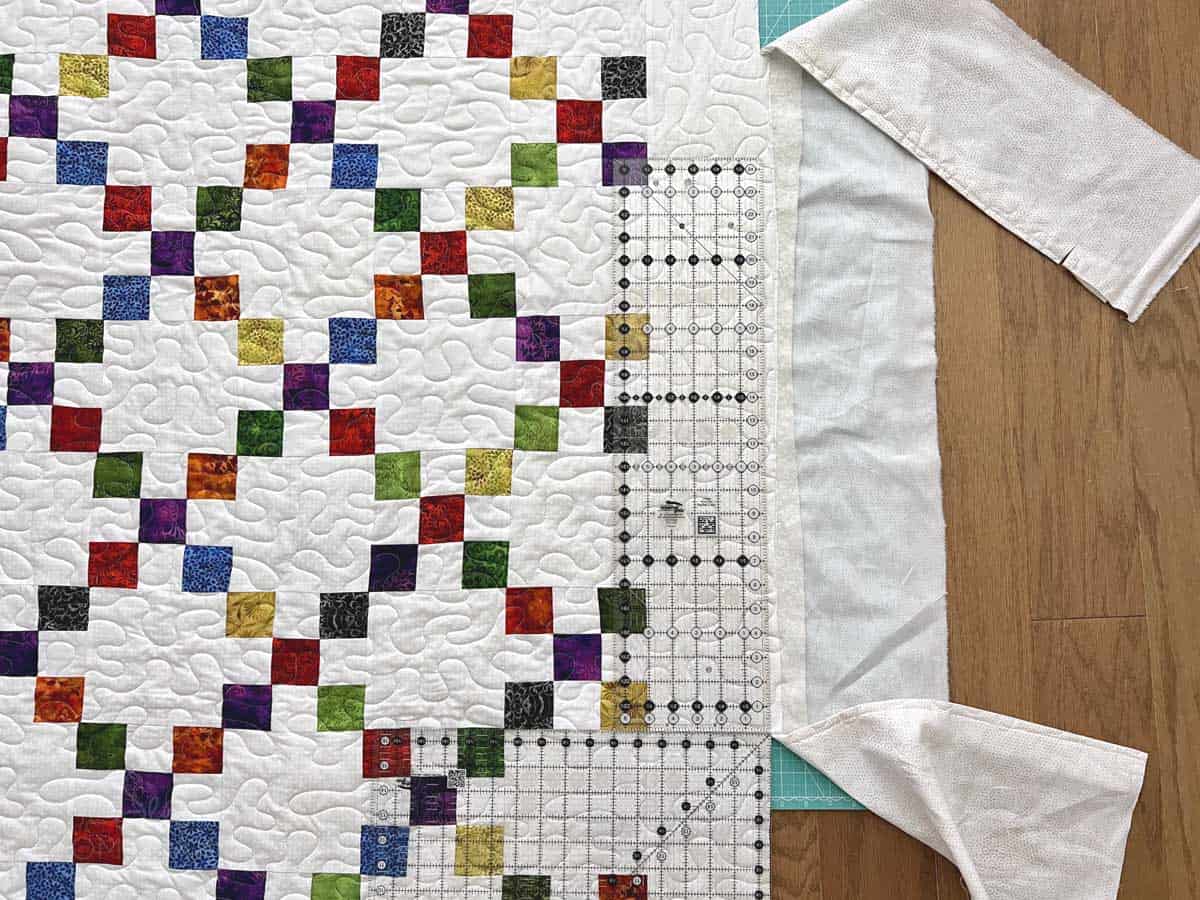
- Start with the corners first. Place a cutting mat beneath the bottom right corner. Make sure the cutting mat is under the entire area you’ll be cutting. You don’t want to come off the mat when cutting!
- Place a square ruler in the corner (I’m using a 16.5″ ruler). Be sure to double check the alignment of your ruler. There may be places where some of the quilt extends beyond the ruler and other places where there is batting showing. This is normal and will get sewn into the binding.

- Make sure you notice where the 1/4″ line on the ruler is hitting your quilt. For quilts with points at the edge, be sure they have a 1/4″ seam allowance so you don’t cut off any points, even if it means you have batting showing. This batting will be sewn into the binding and will disappear once you bind the quilt. This allows your binding to be stuffed and not hollow.
- Using a rotary cutter and mat, trim both outside edges on either side of the square ruler.
Pro Tip: Borders can be your best friend when squaring up a quilt. In the image below, notice how I trimmed more than a 1/4″ from the edge. When adding a border, I like to increase the border size by 1″ allowing additional margin for squaring. Borders are also beneficial because the seam lines give you a second place for ruler alignment.

- After trimming the first corner, turn the quilt to the next corner and repeat these steps on the other three corners. Smooth out the quilt until it is flat before placing ruler and cutting. This will help you avoid accidentally cutting off some of your quilt.
Alternative Idea: You can also use a contractor’s framing square and draw the cutting lines. I did this while I was growing my quilt supply stash. WORD OF WARNING: It is not safe to use a contractor’s framing square with a rotary cutter; it is only to be used for marking the cutting lines. Use a quilter’s ruler for making the cuts along the lines you’ve drawn.
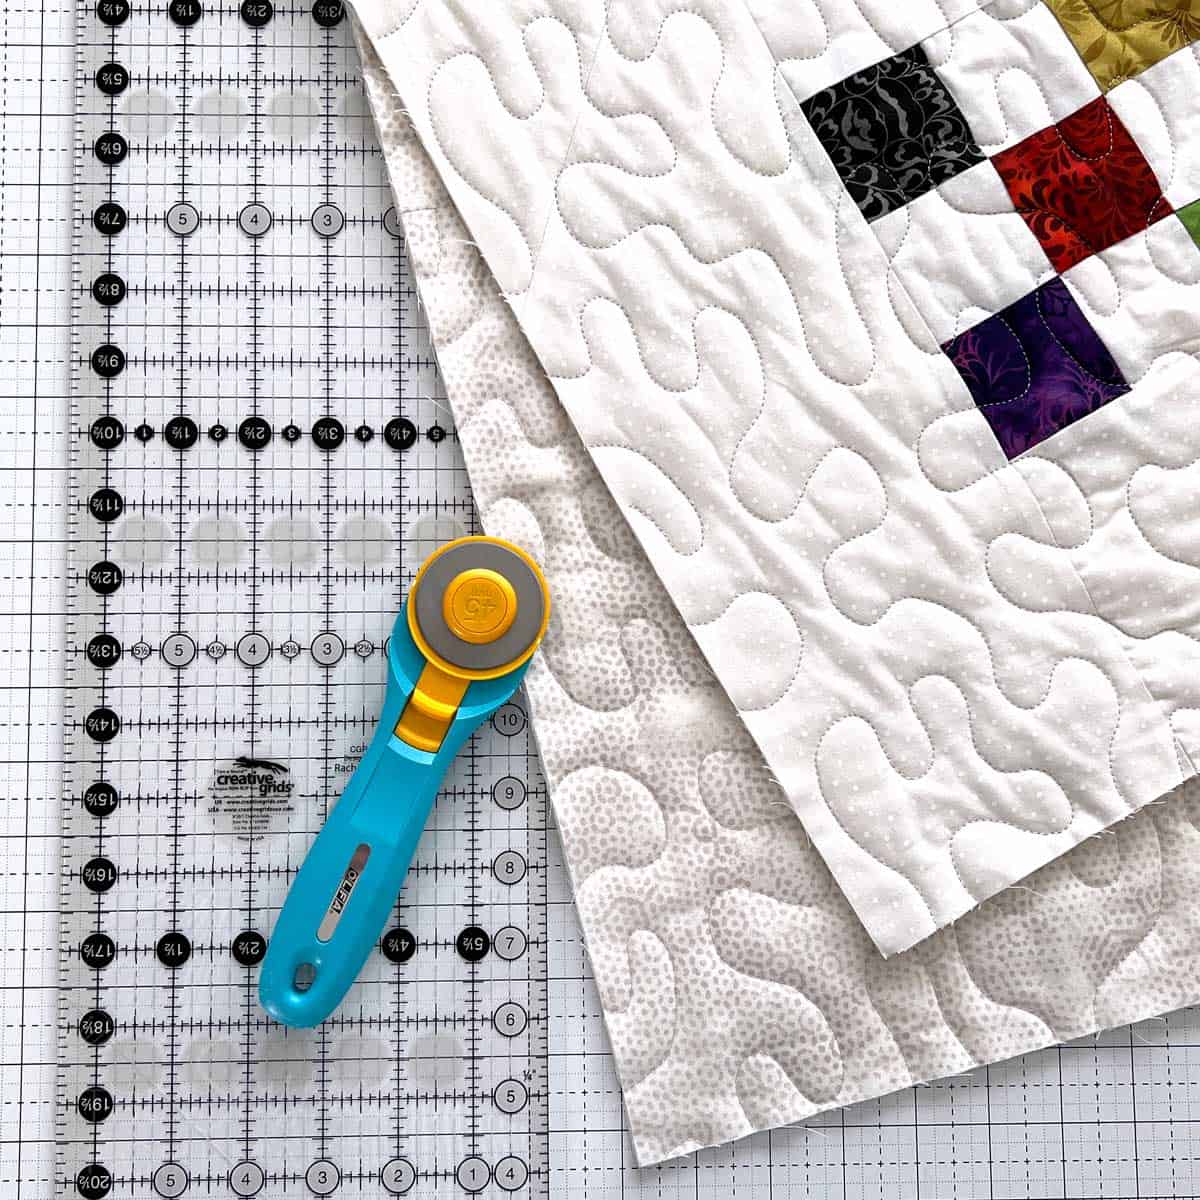
Step 4: Trimming the Quilt Sides
Now that the corners are nice and square, it’s time to trim the sides.
- Make sure the cutting mat is beneath the side getting trimmed. Depending on the length of the side being trimmed there will be some adjusting. It’s best to follow the saying, “Measure twice, cut once.”
- Using the 6.5″ x 24″ ruler, line up the the 90-degree corner you cut in Step 3.
- Using a rotary cutter and mat, trim the side of the quilt the length of the quilt ruler(s).
Notice how the quilt’s bottom edge and the border seam also help with lining this up.
- Slide the mat, quilt, and rulers along the edge of the untrimmed side. If there is still a gap of space between the first trim and the 90-degree corner at the other end, add the square ruler in the corner and another ruler, if available.
- Repeat these steps until all four sides of the quilt are squared up.
Pro Tip: Add the square ruler in the corner if the length of the side being trimmed extends beyond the length of the ruler. Place the two rulers together to get a perfectly straight cutting edge.
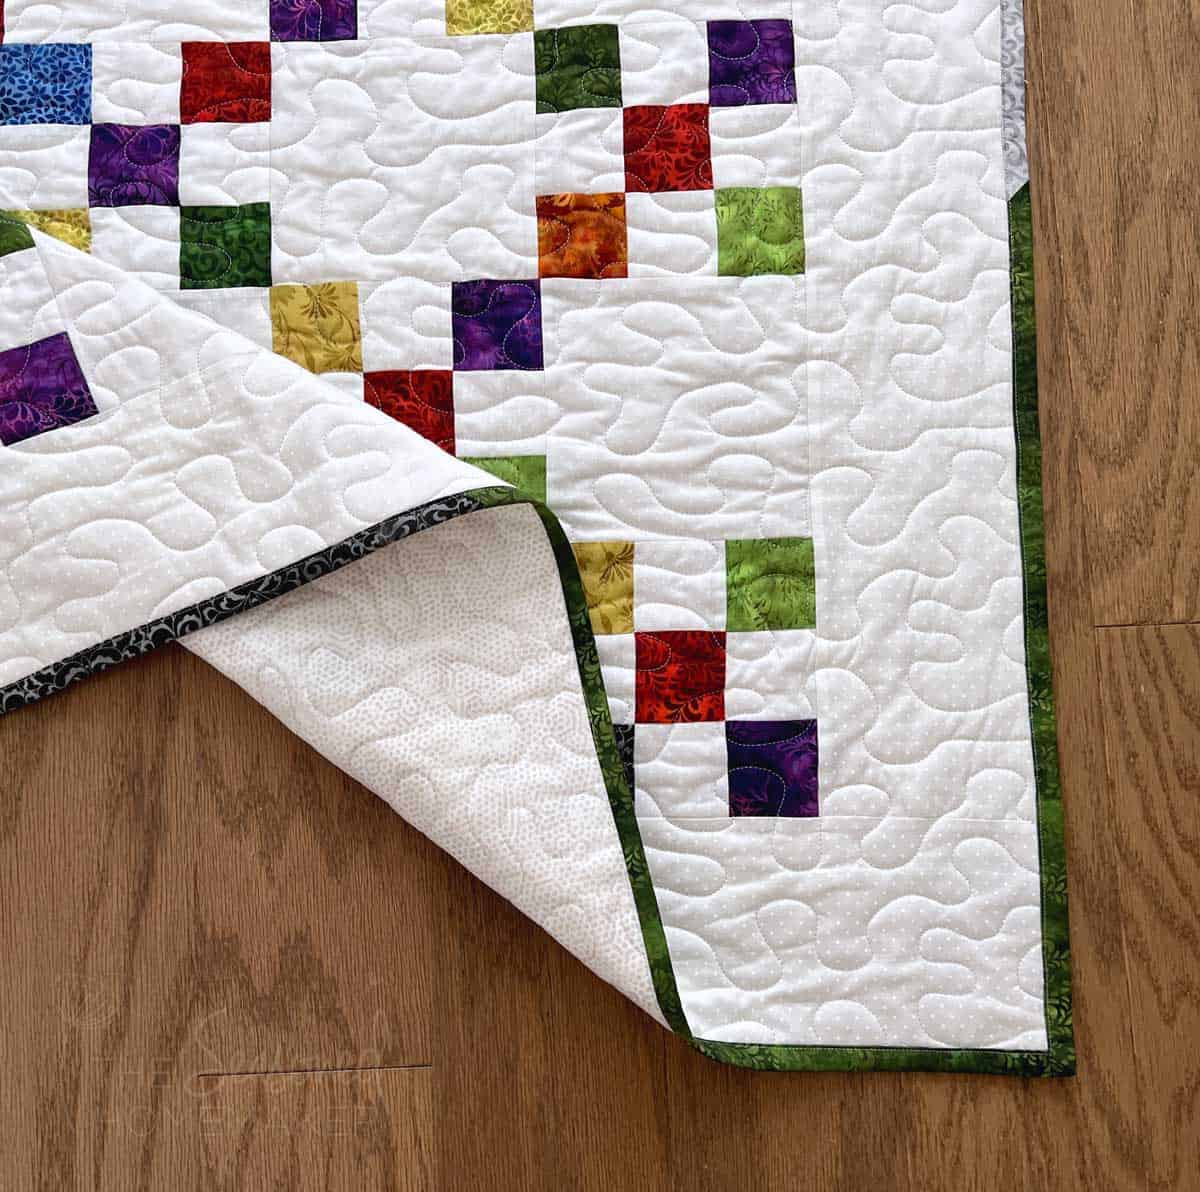
Step 5: Finishing the Quilt
Once your quilt is properly trimmed and square it’s time to attach the binding and call your quilt finished.
I prefer to machine bind my quilts. I have a tutorial that walks you through how to machine bind a quilt. There is also a recap video embedded in the tutorial.
Remember, handmade quilts are never perfect! The squaring process takes a little practice so don’t strive for squaring perfection. Instead, follow these directions and you’ll have corners that are square and straight sides. And, those minor imperfections become part of the quilt’s charm that will never get noticed.
>>> Want a printable version of the post? Click the pink button, and download the Printable PDF instructions.


How do you make sure that after you square the first corner that the second corner and so on that they are in line with each other? Skipping from one corner to the next, you could be square but out of line.