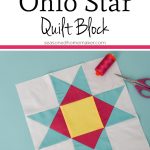
Ohio Star Quilt Block Tutorial
This post may contain affiliate links which won’t change your price but will share a commission.
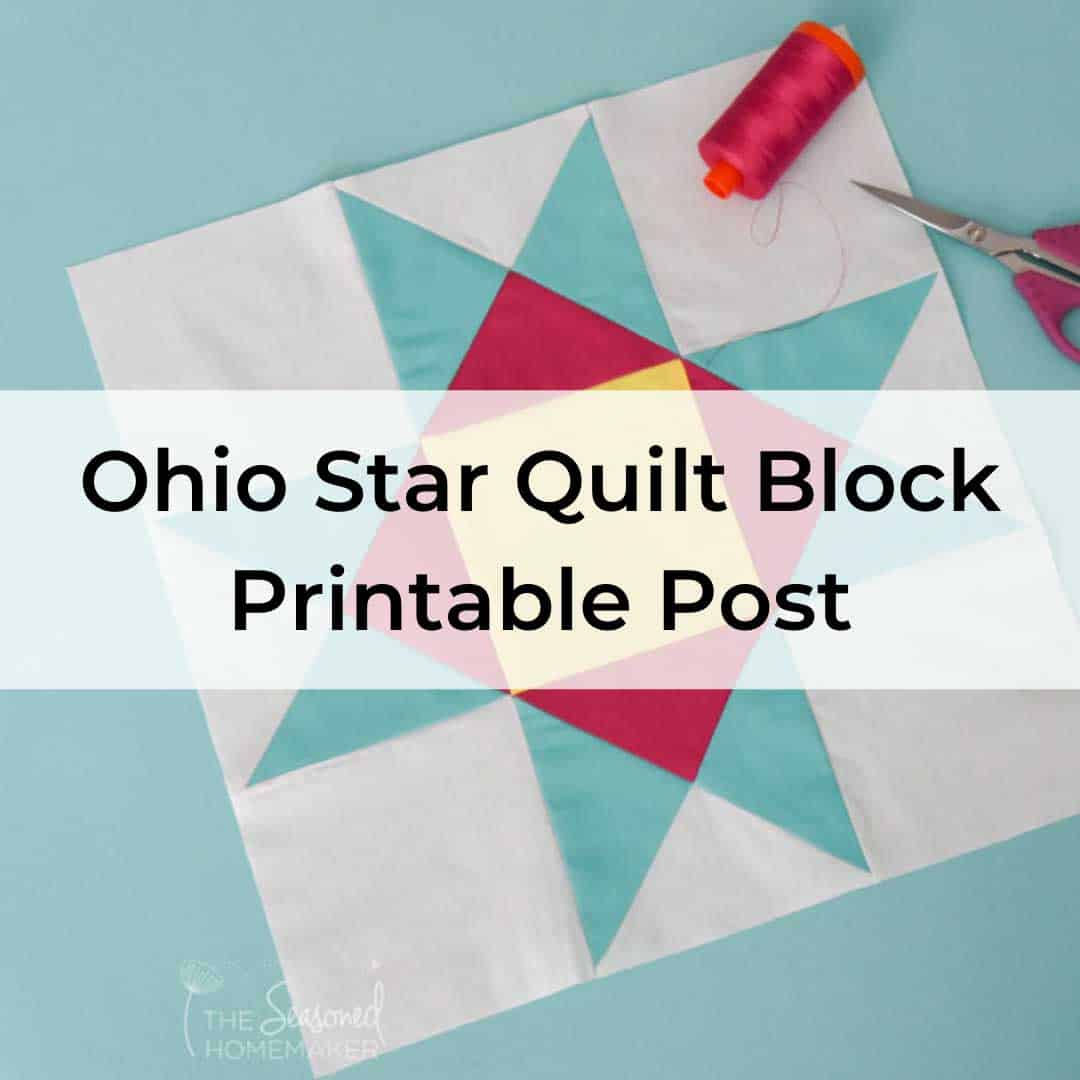
INSIDE: Ohio Star Quilt Block Tutorial
Learn quilting with the Ohio Star Quilt Block Tutorial for beginning quilters. Simple and easy steps are outlined in this tutorial.
The Ohio Star Quilt Block is a great skill building block, and you’ll be surprised by its simplicity and versatility. It goes together quickly and is used to make more quilts than I have time to name.
This versatile block is one of the most iconic American quilt blocks. And, it continues to be popular today with modern quilters because there are so many different ways to design this block.
The history of the Ohio Star is not very clear. Many believe its history is rooted in the American Civil War. I was unable to verify this, but did discover that this block was extremely popular until the 1930s.
Ohio Star Quilt Block Pattern Tutorial
Want an ad-free, printable copy of this tutorial? Scroll to the bottom of this post for more details!
Supplies
- Sewing Machine
- It’s nice to use a 1/4″ sewing foot to help maintain a perfect seam allowance
- Cotton Thread
- I prefer Aurifil 50 wt. thread
- Sewing Pins
- Rotary Cutter with sharp blade
- Acrylic Ruler
- Rotary Cutting Mat
- Iron & Ironing Board
This block is easier than you think – I promise! Follow the simple steps below and you will have success!
Plus, you’ll learn a couple of new quilting techniques for your next quilt!
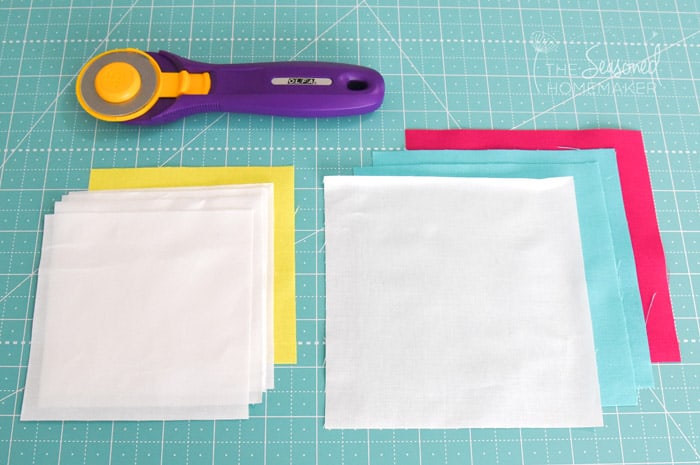
Step 1: Cutting
Cut out the following from the Materials list below.
Materials:
- White fabric: Cut(4) 4.5″ squares
- Yellow fabric: Cut (1) 4.5″ square
- White fabric: Cut (1) 5.5″ square
- Pink fabric: Cut (1) 5.5″ square
- Turquoise fabric: Cut (2) 5.5″ squares
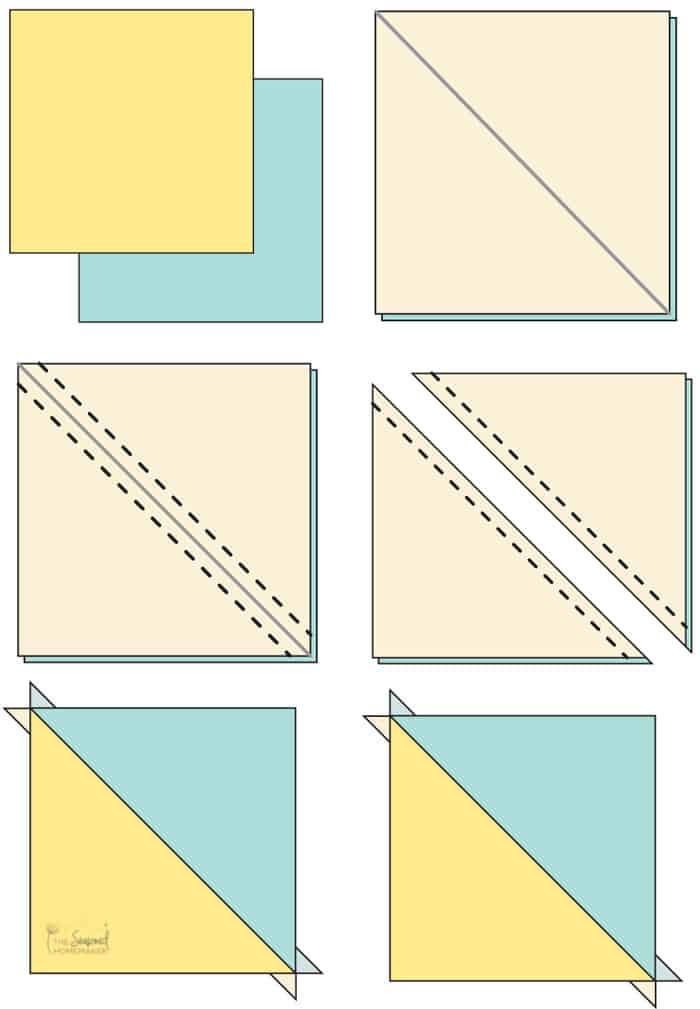
Step 2: Half Square Triangles
The Ohio Star Quilt Block starts with Quarter Square Triangles (QST). To make a QST you will first need to know how to make a Half Square Triangle (HST).
- Place a light and a dark fabric square right sides together.
- Use a pencil or water soluble marker, draw a diagonal line from one corner to the opposite corner. Personally, I prefer a pencil, but this will ultimately depend on the fabric you’re using.
- On both sides of the diagonal line, stitch a scant 1/4″ seam.
- Using an acrylic quilter’s ruler and rotary cutter, cut along the pencil line.
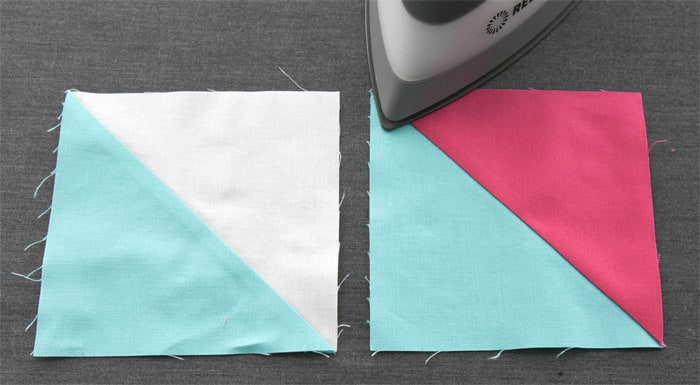
Make one pair of HST’s from the 5.5″ turquoise fabric and 5.5″ white fabric.
Make one pair of HST from the 5.5″ turquoise fabric and 5.5″ pink fabric.
Press the seams towards the darker fabric. I like to use the Clover Roll and Press to avoid ironing until I’m finished.
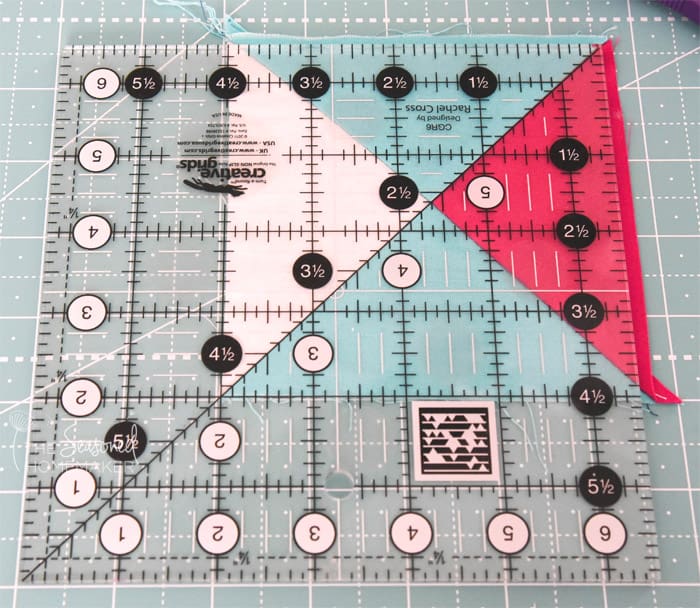
Step 3: Quarter Square Triangles
- To make a QST take two HST’s and place them right sides together with opposite colors touching.
- Use a pencil or water soluble marker and draw a line from corner to corner, bisecting the HST seam.
- On both sides of the diagonal line, stitch a scant 1/4″ seam.
- Using an acrylic quilter’s ruler and rotary cutter, cut along the pencil line.
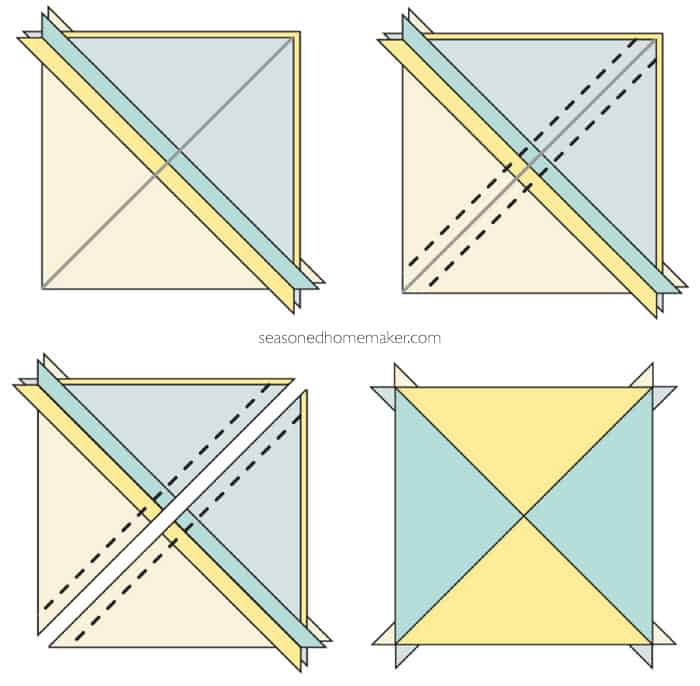
- Match up a turquoise/white HST’s with a turquoise/pink HST.
- Be sure that the turquoise fabric is on the opposite side. Nest the seams.
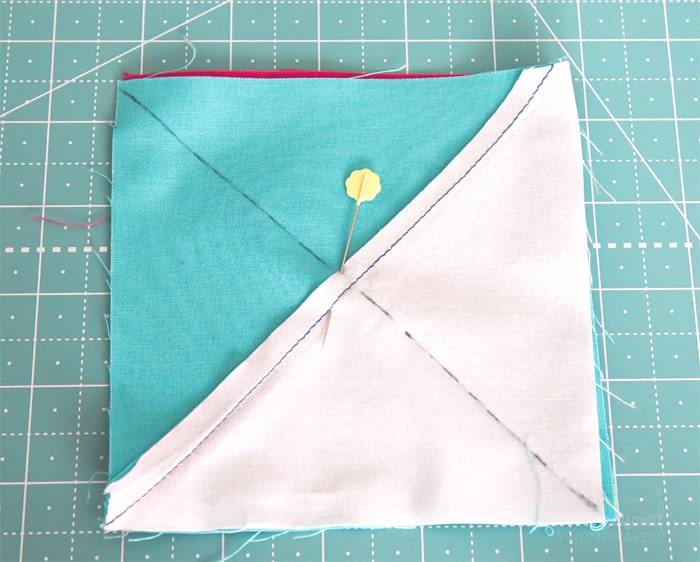
- Draw a diagonal line from corner to corner, opposite of the previous seam. Be sure to nest the seam allowance.
- Using a scant 1/4″ seam allowance, stitch on both sides of the mark.
- Cut on the line. Say a little prayer and open up your QST. Press.
- Trim each square to 4.5″ using a square ruler with clear markings like this Creative Grids Ruler.
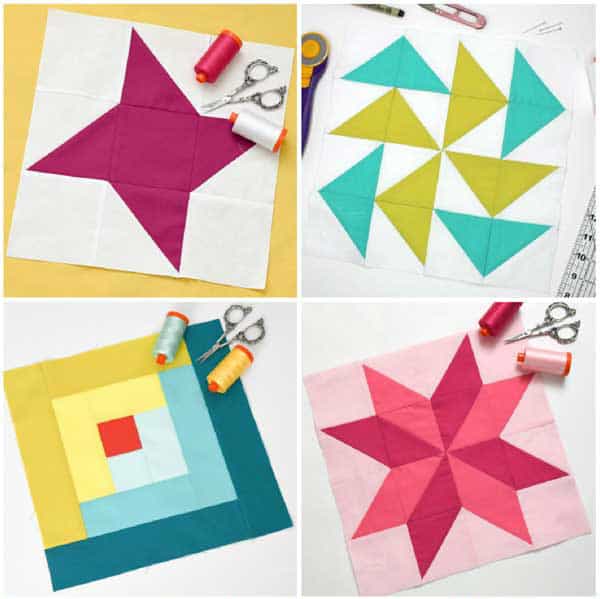
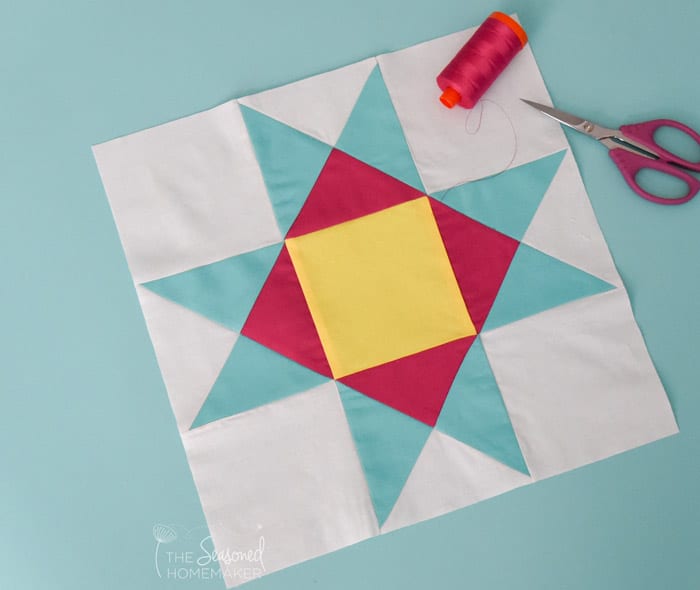
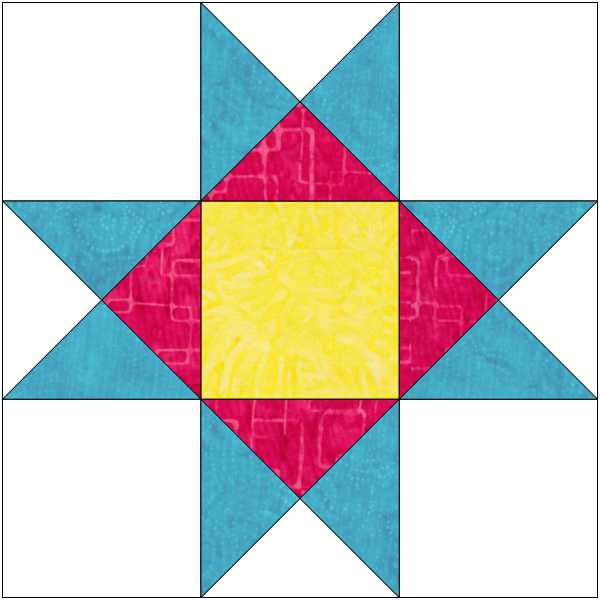
Step 4: Creating the Block
Now comes the fun part – when your block comes together. As you can see, when laid out it’s a simple nine patch block.
Assemble the block using the image below as a guide. Be sure to nest seams as you connect the rows together. Pay close attention to where the points meet.
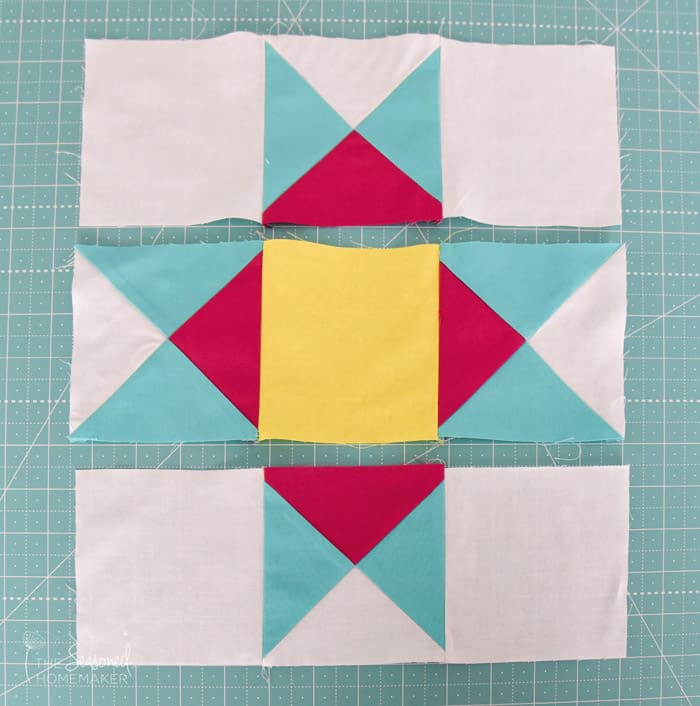
There you have it. A beautiful Ohio Star Quilt Block.
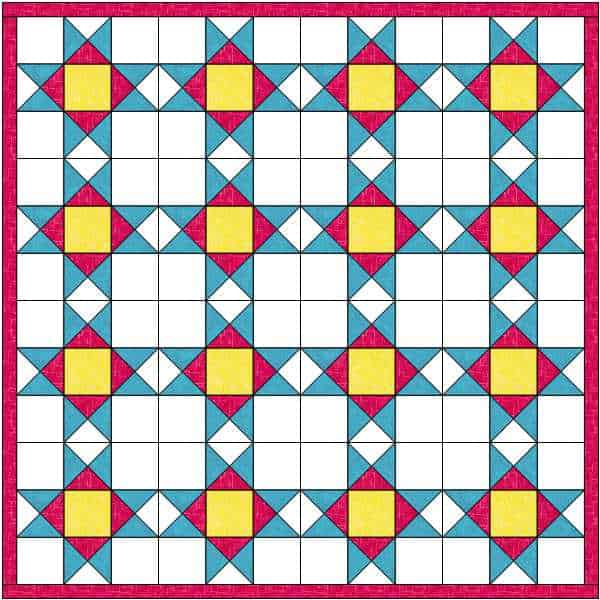
Quilt Inspiration
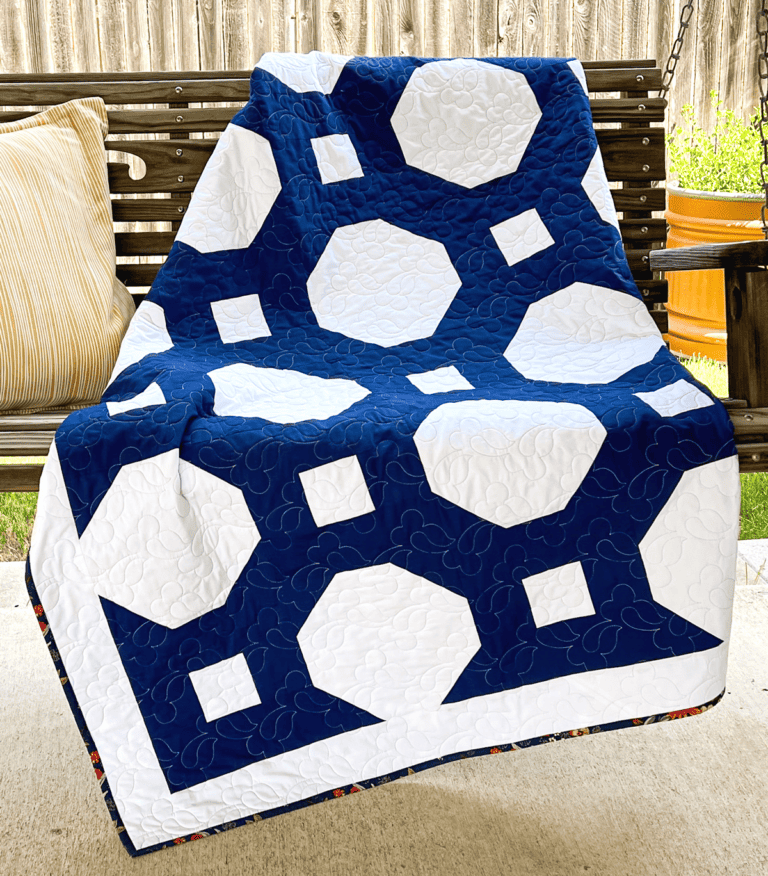
If you really love this block, I have a couple of quilt ideas for you. The first is a modern version with lots of negative space. Don’t you love how this traditional block that dates back well into the 1800s can still look fresh and modern?
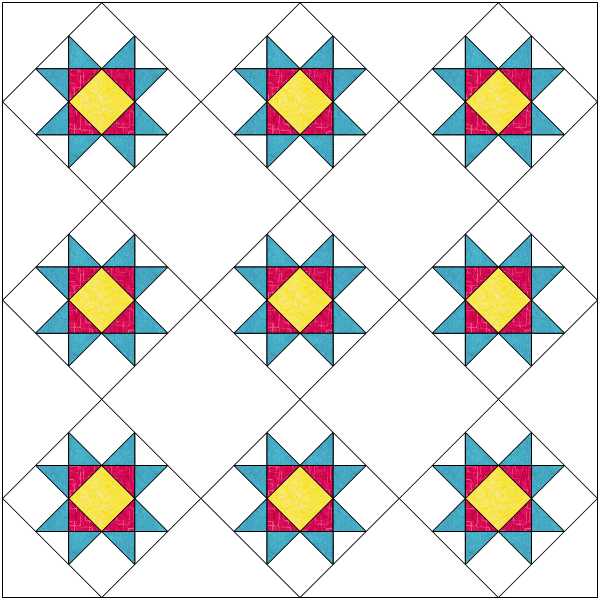
The second quilt idea is more traditional, but I’ve used modern fabrics. What I love about this design is all of the secondary designs that get built in. Notice the diamonds and four-patch squares. Imagine all of the quilting possibilities.
The Ohio Star Quilt Block is a great skill building block and that is why I encourage you to give this one a try.
You’ll be surprised by its simplicity and versatility. Best of all, it can be made in very little time.
>>> Want a printable version of the post? Click the pink button, and download the Printable PDF instructions.
Did you like this post? Check out a few of the other Quilt Blocks in this Series.
>>> Click this link to see all of the Blocks of the Month