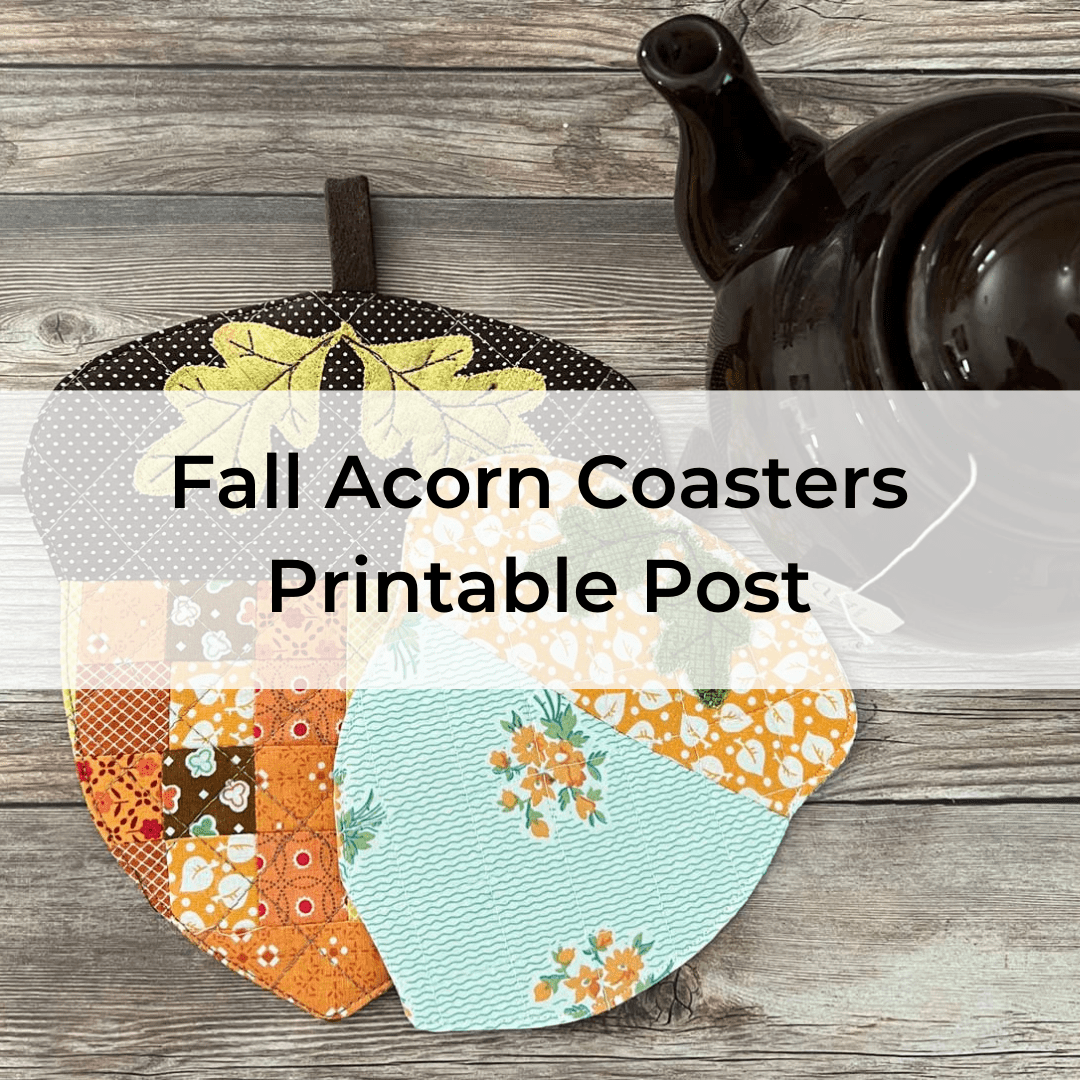
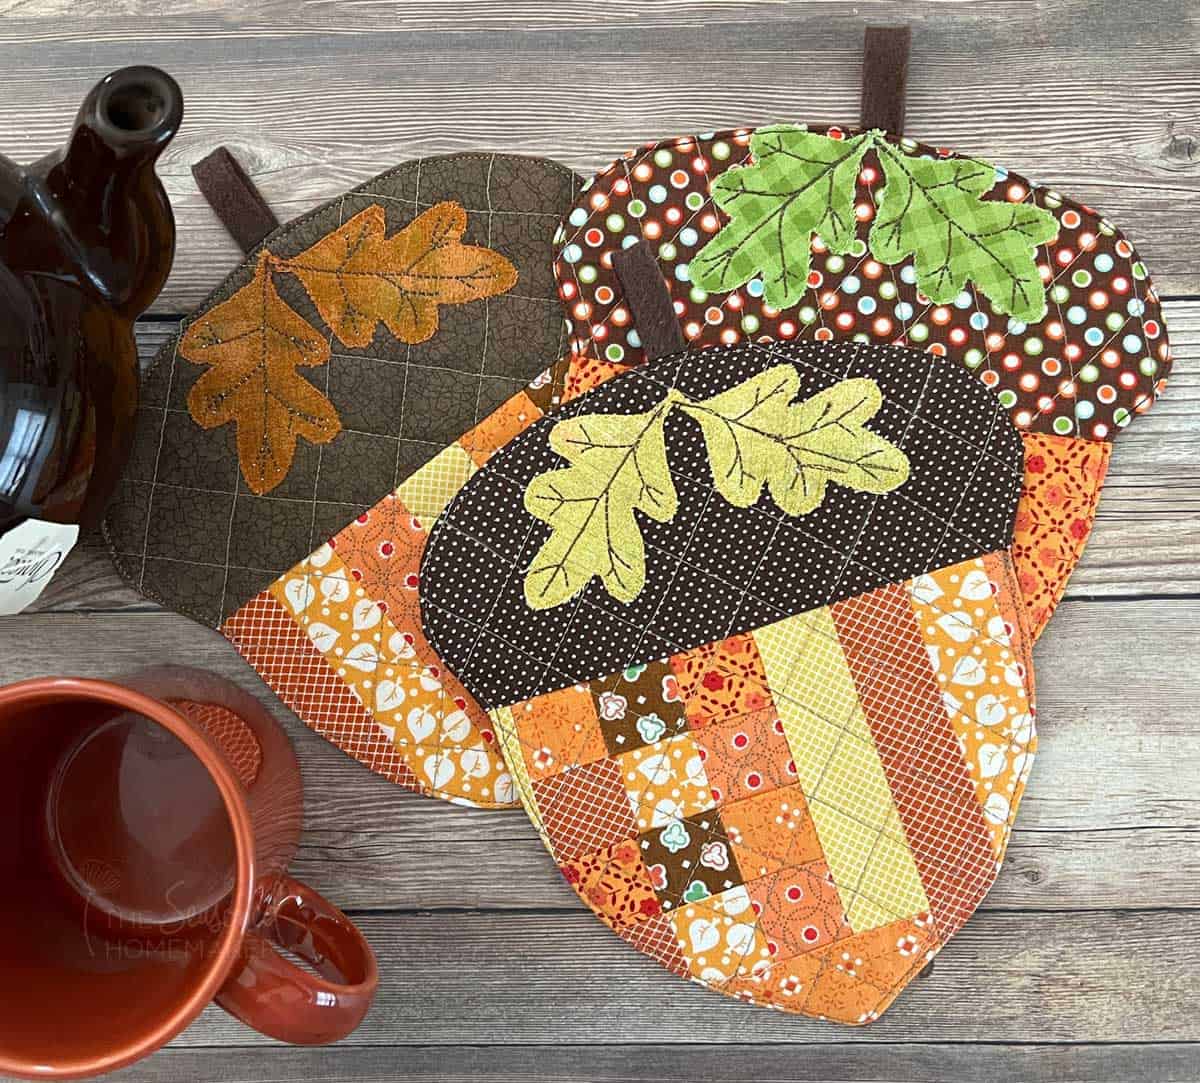
How to Make Fall Acorn Coasters
This post may contain affiliate links which won’t change your price but will share a commission.

Inside: How to Make Fall Acorn Coasters
Sometimes all you need is an easy project that adds a taste of Fall into your home. And that’s exactly what these adorable acorn coasters are designed to do.
It’s a super easy project that you can complete in an afternoon. And, it uses up those leftovers like fabric and batting scraps. So, pull out those fall-colored scraps and let’s get started!
Want an ad-free, printable copy of this tutorial? Scroll to the bottom of this post for more details!
How to Make Fall Acorn Coasters
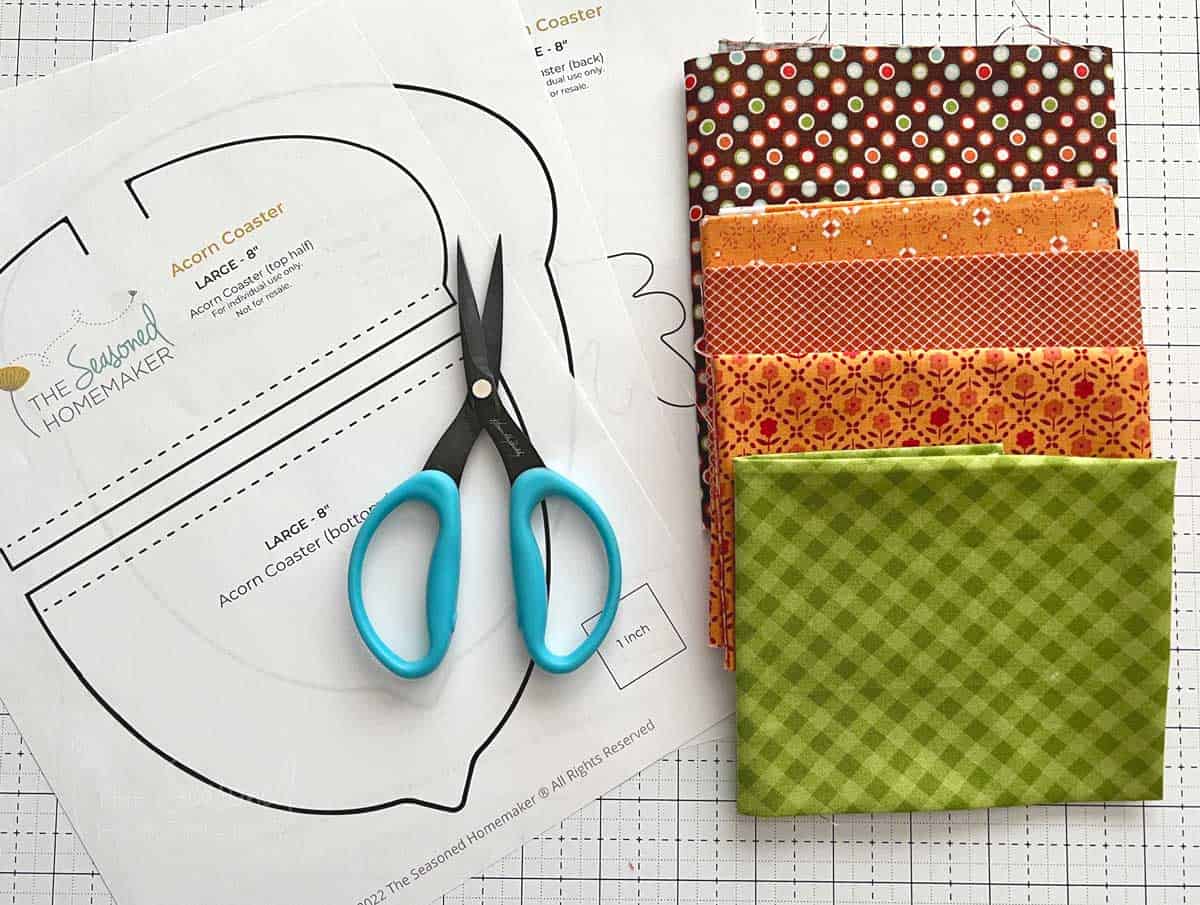
Supplies
- Acorn + Leaves Template (FREE! See box below or find them in my Shop > Freebies section)
- Assorted Fall Colored Fabric scraps
- (1) 4” x 5” Piece Fall-colored Fabric for Acorn Leaves
- (1) 10” x 10” Piece Backing Fabric
- Small piece of Brown Wool Felt
- (1) 10” x 10” piece of Quilt Batting
Materials
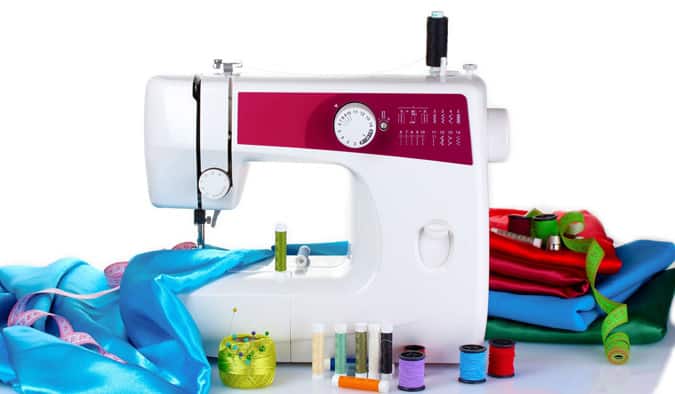
- Sewing Machine
- Quarter Inch foot for your sewing machine
- Aurifil 50 wt. Cotton Thread
- Water-Erasable Pen
- Wonder Clips or Sewing Pins
- Rotary Cutter with sharp blade
- Acrylic Ruler
- Self-Healing Rotary Cutting Mat
- Iron & Ironing Board
- Wool Pressing Mat
- Serrated Scissors
- Wonder Fuse Fusible Web
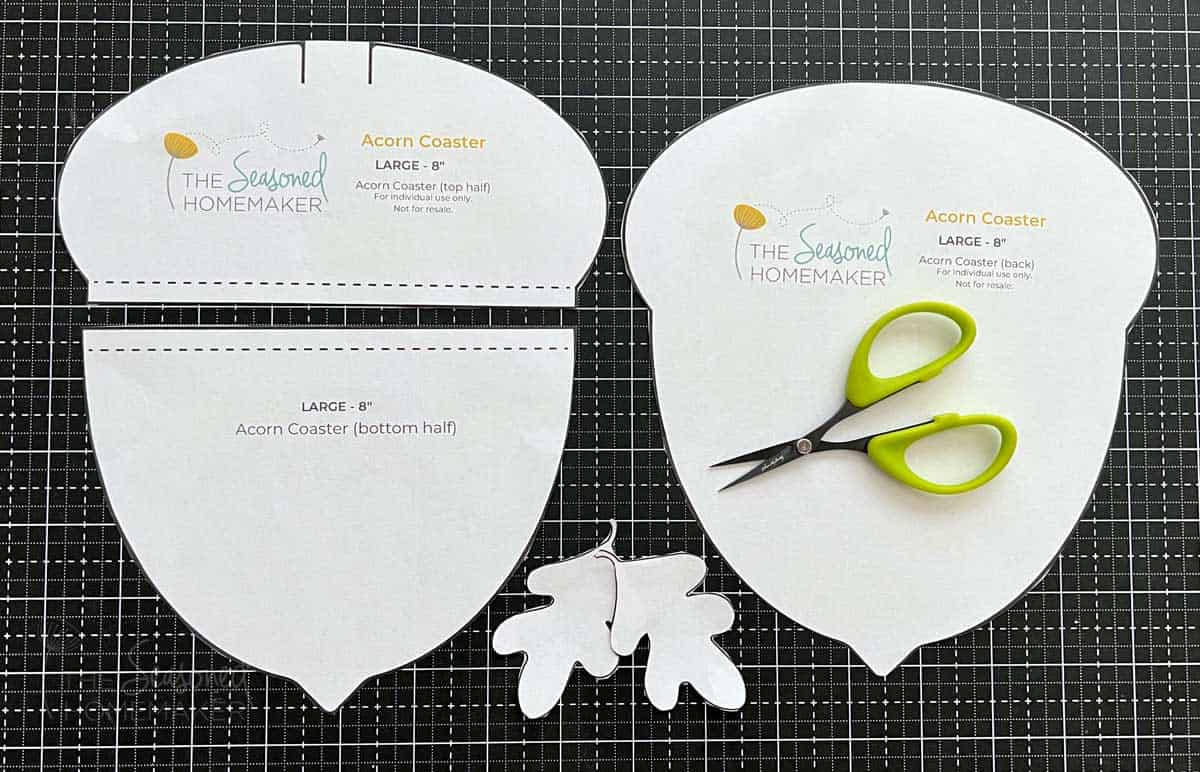
Step 1: Download FREE Template
Download and print the Free Acorn Templates. Click the pink button below and you’ll be able to snag them for FREE in my Shop.
Step 2: Preparing the Acorn Pieces
- Print out the Acorn and Oak Leaf Templates.
- Cut out the templates and set aside.
Step 3: Fabric Options for Acorn Top & Bottom
Below are several options for making the top of your acorn coasters.
- Strip piece several 2″ pieces of fabric together to create a 10″ x 10″ piece of fabric. (Learn more here.)
- Strip piece, sub-cut, and re-assemble into a 10″ x 10″ piece of fabric. (Learn more here.)
- You can use two separate pieces of 10″ x 10″ fabric for both the Acorn Top and the Acorn Bottom.
- Use (1) piece 5″ x 10″ brown fabric for Acorn Top and (1) piece 7″ x 10″ fall colored piece of fabric for Acorn Bottom.
- Piece fabrics together using the Quilt As You Go method. Anything goes!
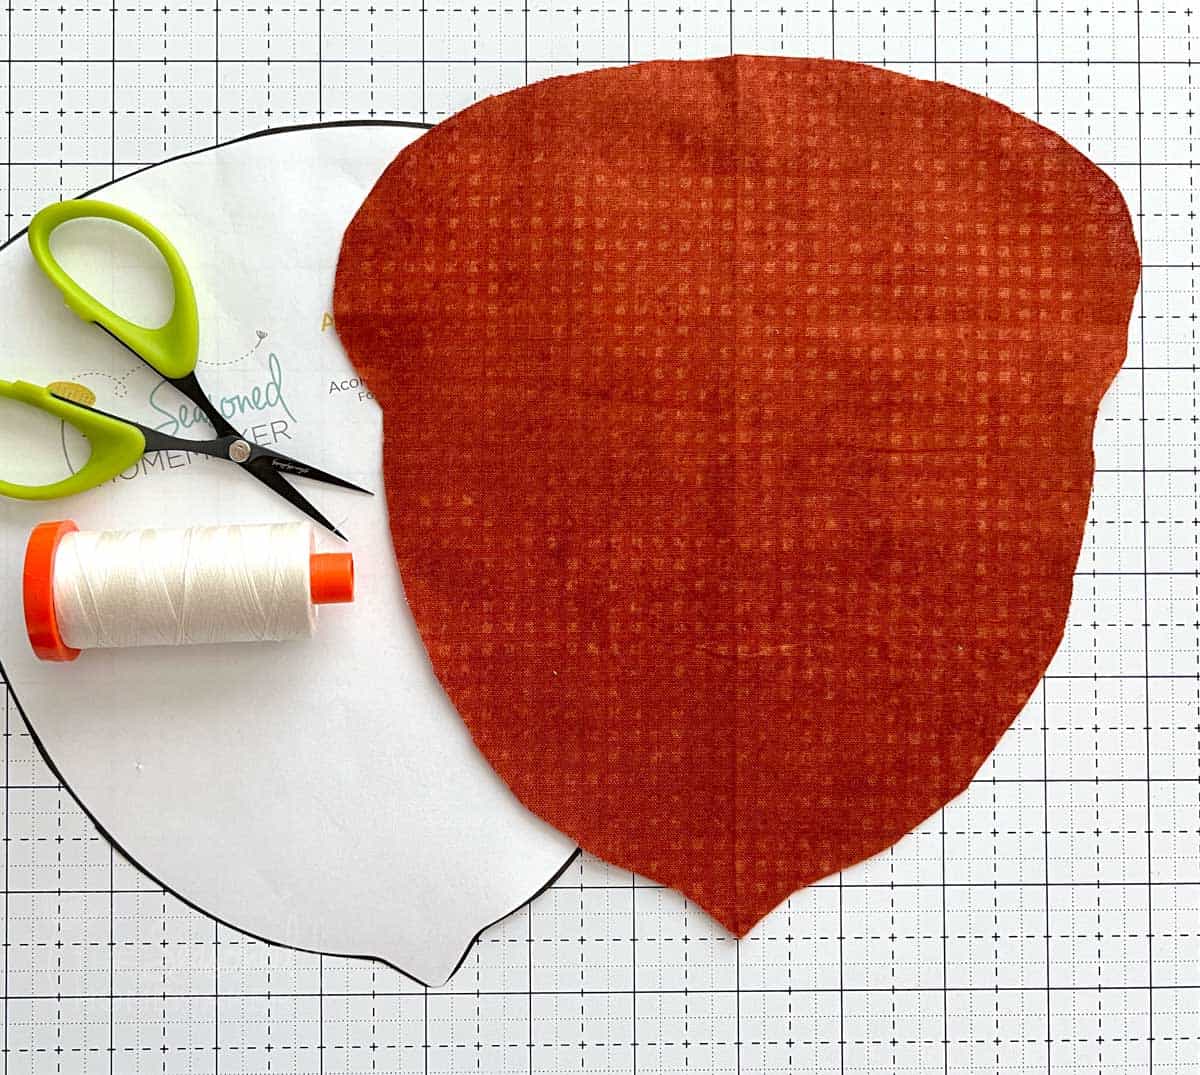
Step 3a: Acorn Back
- Cut out the Acorn Back. It can be a solid piece of fabric or it can be pieced together using one of the suggestions above.
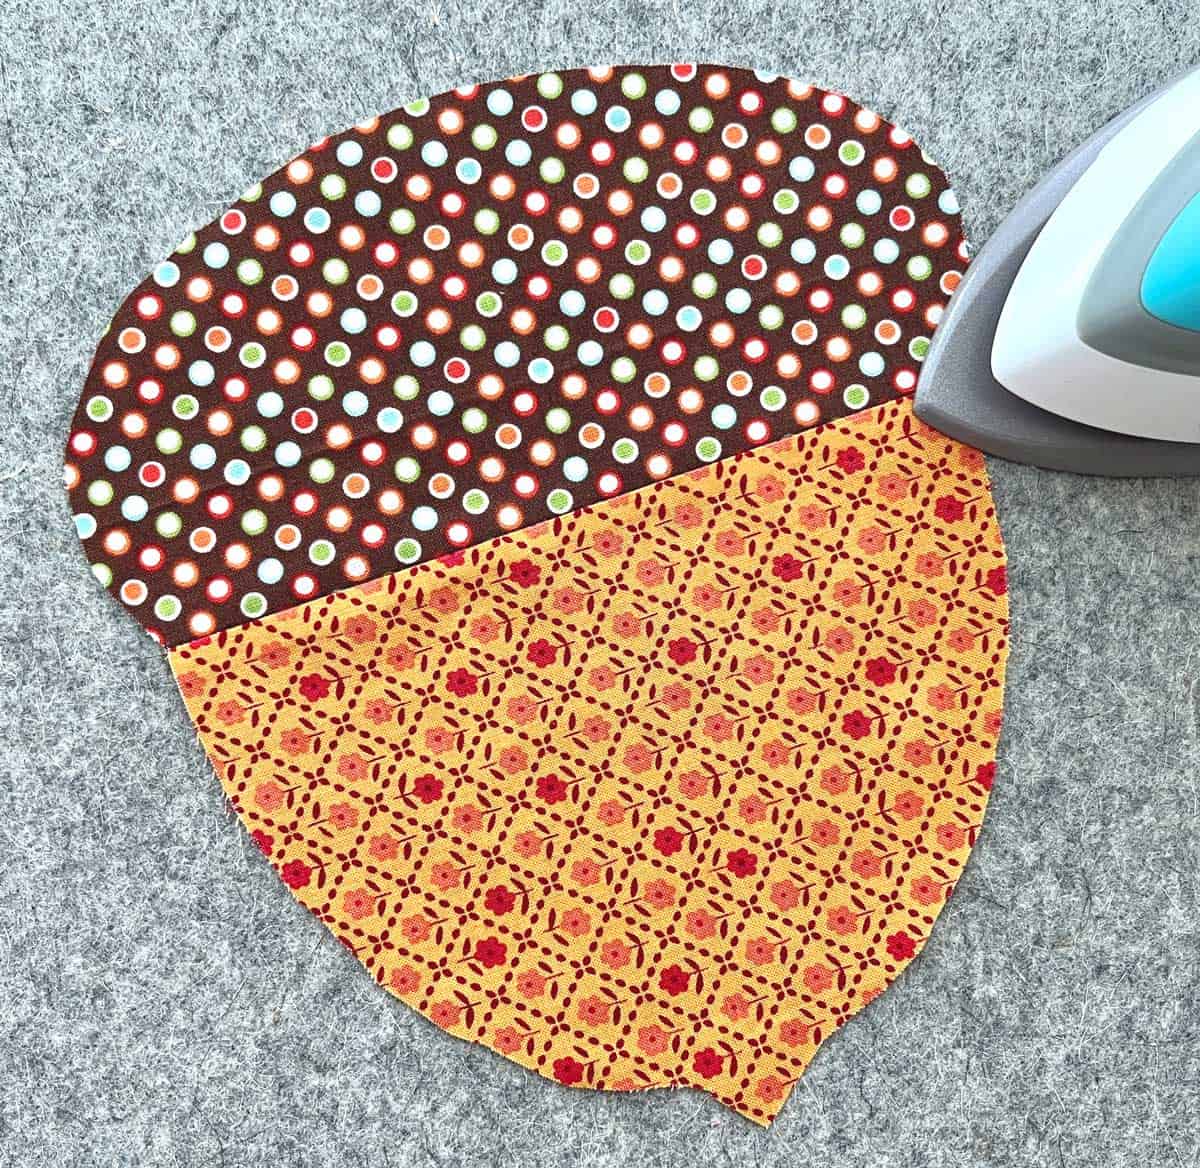
Step 4: Making the Acorn Front
- Set stitch length to 2 mm and use a 1/4″ seam allowance.
- With right sides together, connect the Acorn Top to the Acorn Bottom.
- Press the seam and set aside.
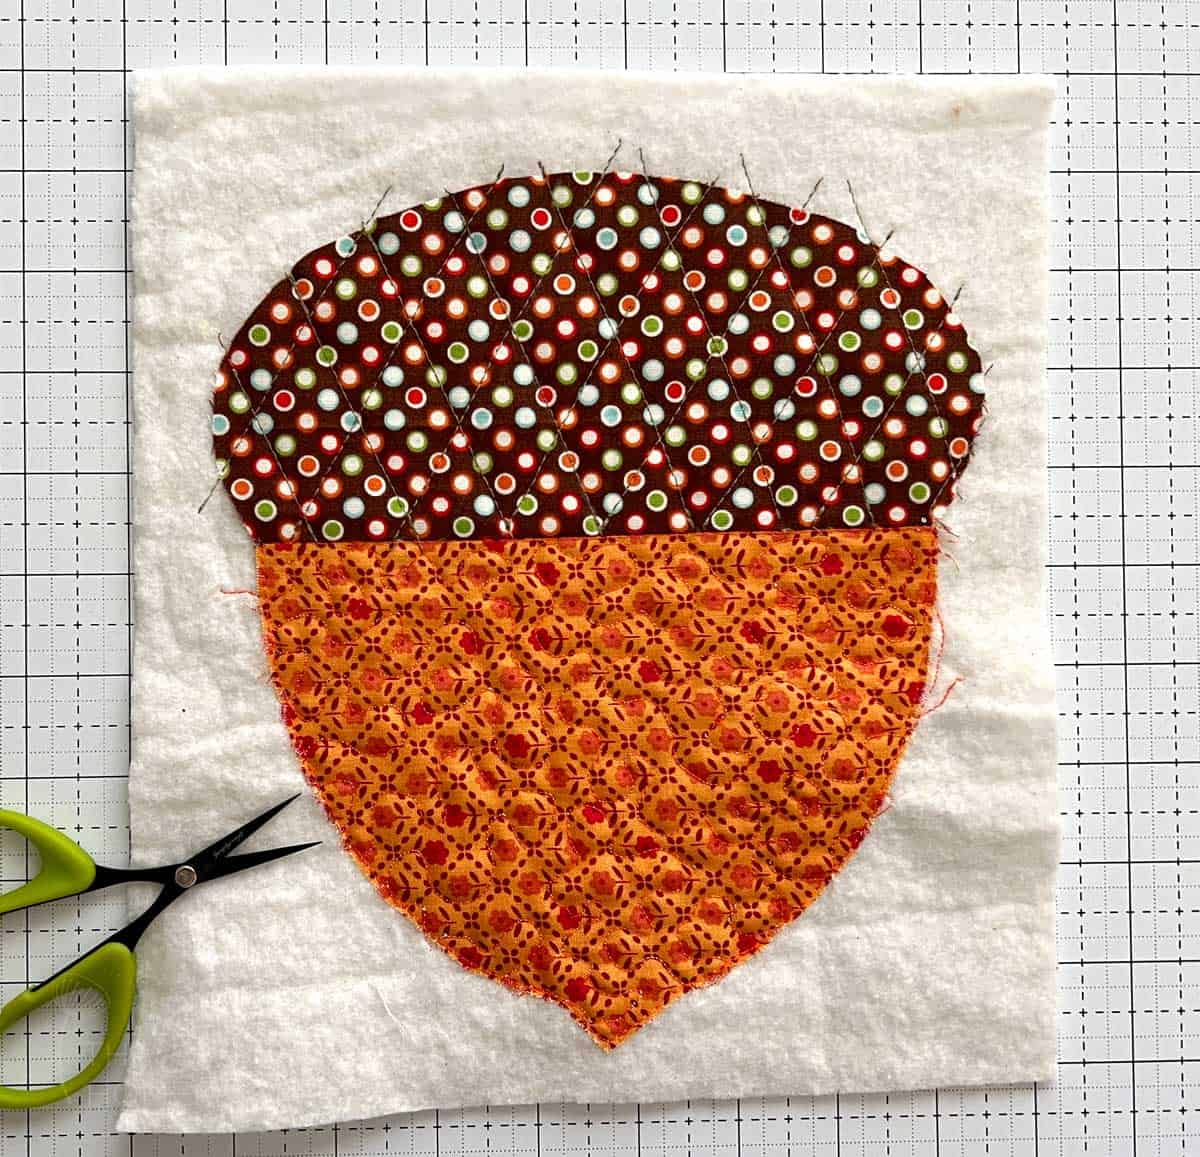
Step 5: Quilting the Coaster Top
In this step you will be quilting the acorn coaster to the batting. I recommend something simple like a diagonal or straight stitch quilting design.
- Place the Acorn Front onto the piece of 10″ x 10″ piece of quilt batting. Pin to hold in place.
- Quilt in any manner desired.
- Once quilting is finished, trim away excess batting.
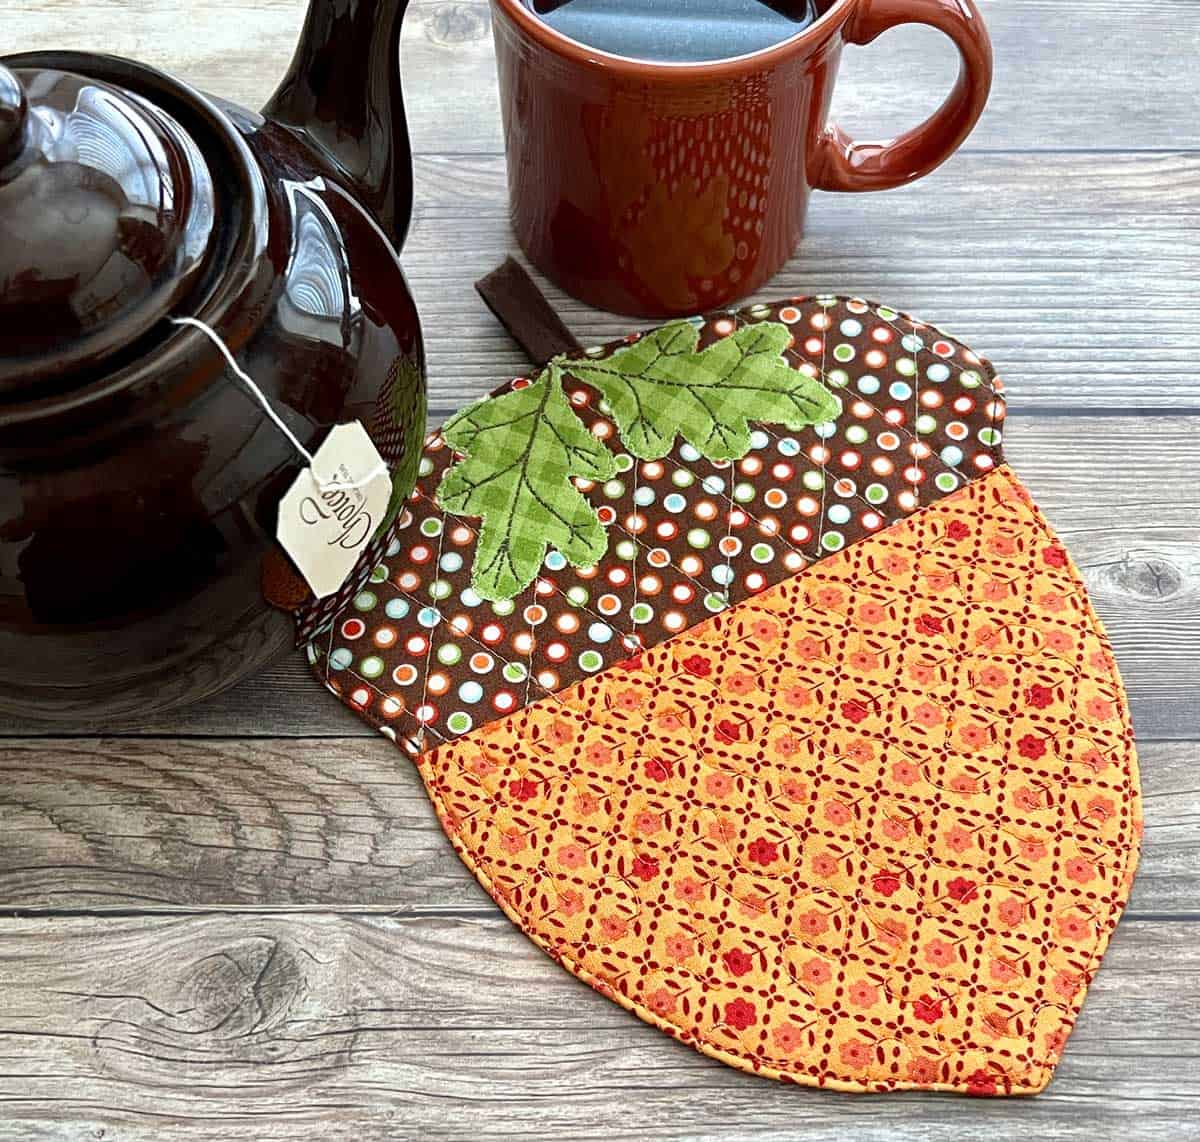
Note: Notice how I used two different types of quilting below. Have fun with this project and get creative!

Step 6: Applique the Oak Leaves
- You will be adding oak leaf appliqués to your acorn. If you’re new to applique I have several tutorials that demonstrate this. You can find them in the Applique section of the website. I also have an eBook with more details on applique.
- Cut out the Leaf templates.
- On the back of the Wonder Fuse, trace two leaves. Watch the direction, they may need to be reversed.
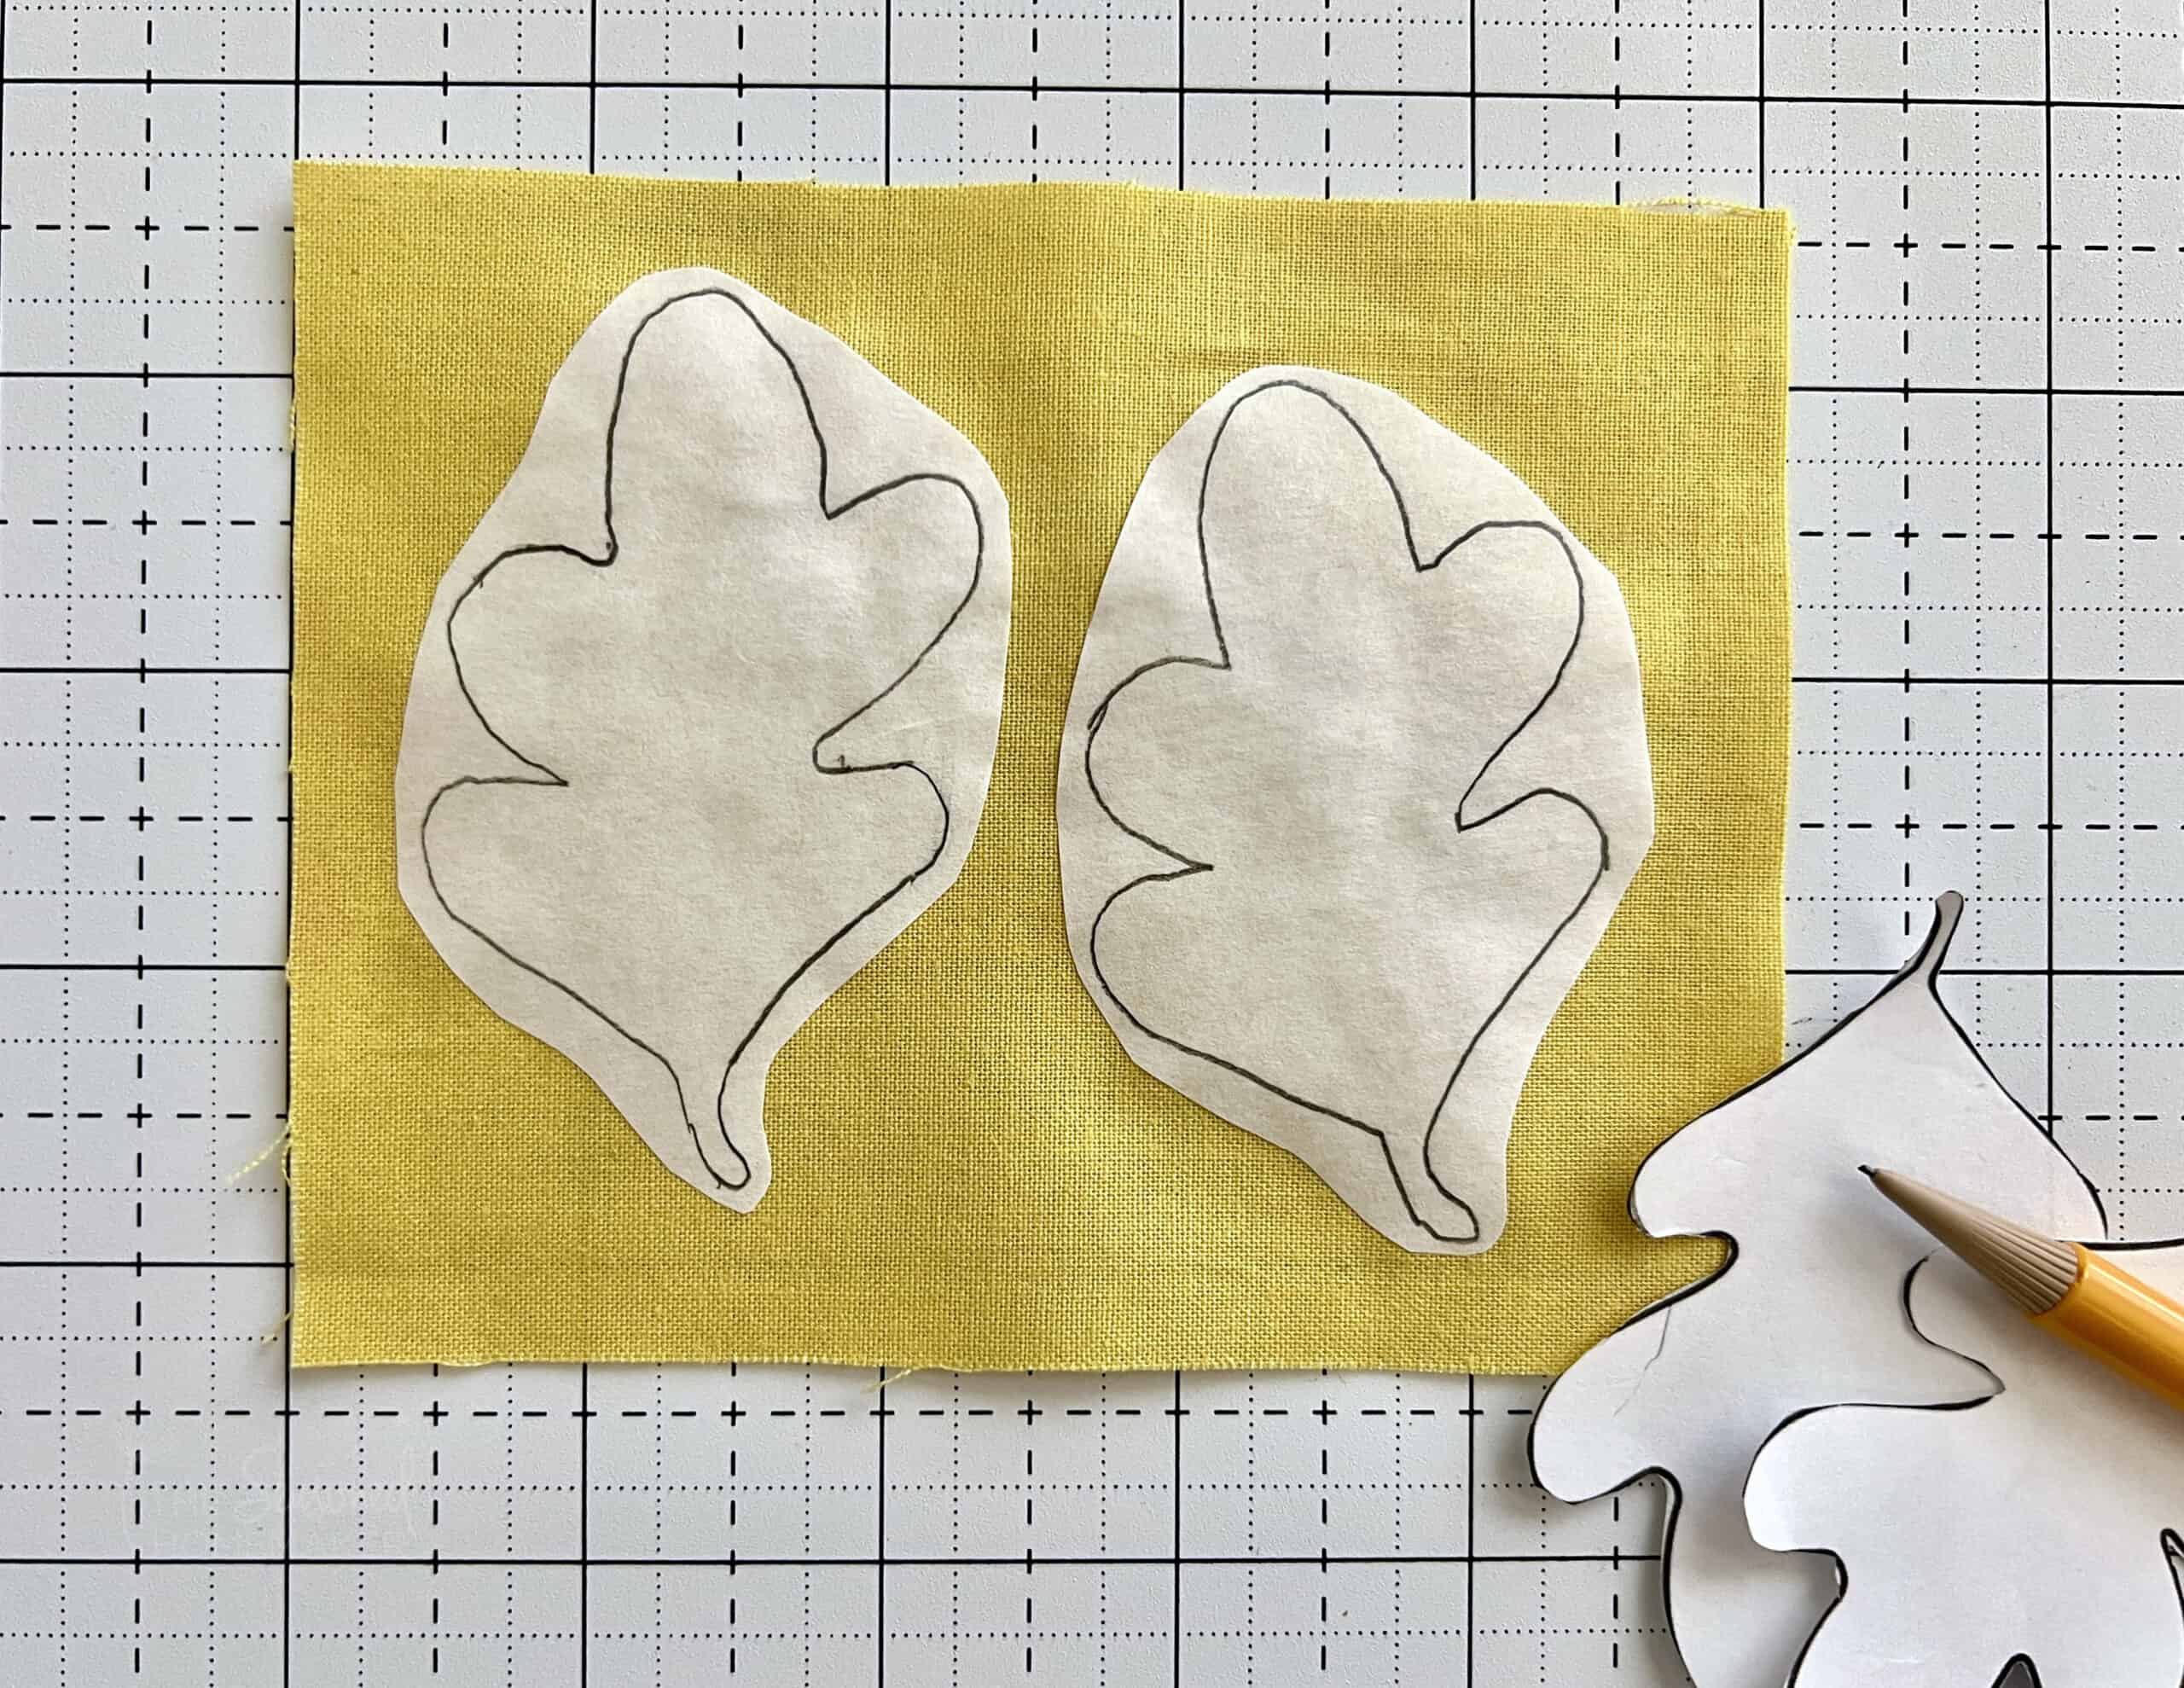
- Rough-cut around the leaves, leaving at least a ¼” margin.
- Fuse to the back of the leaf fabric. Let cool.
- Cut out leaves on the traced line and remove the paper backing.
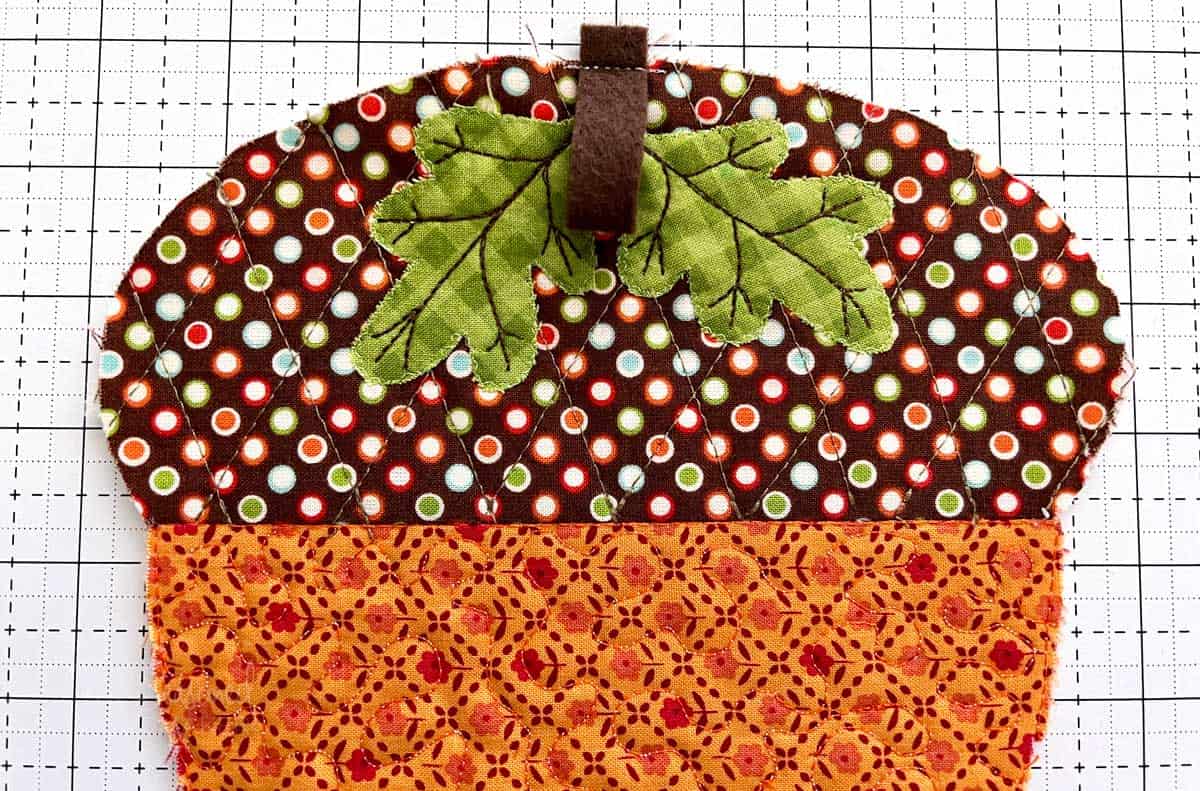
- Mark the center and fuse the leaves to the Acorn. Note: Be sure to place leaves below the 1/4″ stitching line so they don’t get sewn into the seam allowance.
- Using a water-erasable pen, draw leaf veins inside the leaves and stitch in a contrasting color.
- Straight stitch or micro-zigzag the leaves to the Acorn Top. Straight stitch on the leaf veins

Step 7: Making & Attaching the Stem
- For the stem I recommend a piece of wool felt which will give it a nice Fall feeling. Feel free to make a stem using a piece of brown fabric. It should be approximately 1/2″ wide.
- Take the stem piece and make into a loop by matching raw edges together.
- Pin the stem loop to the right side of the apple coaster top with raw edges matching. Be sure the stem raw edges extend about 1/4″ beyond the raw edges of the acorn. Baste to hold.
Step 8: Stitching the Layers Together
Note: After quilting the front you may notice that the back is slightly larger. Before attaching right sides together, line them up carefully and sew from the quilted side using a 1/4″ seam allowance.
- Place the Acorn Backing fabric right sides together with the quilted acorn coaster top. Pin or clip to hold.
- Leave a 1-1/2″ opening on the side for turning.
- Using a 1/4″ seam allowance stitch around the acorn. Be sure to backstitch at the start and stop.
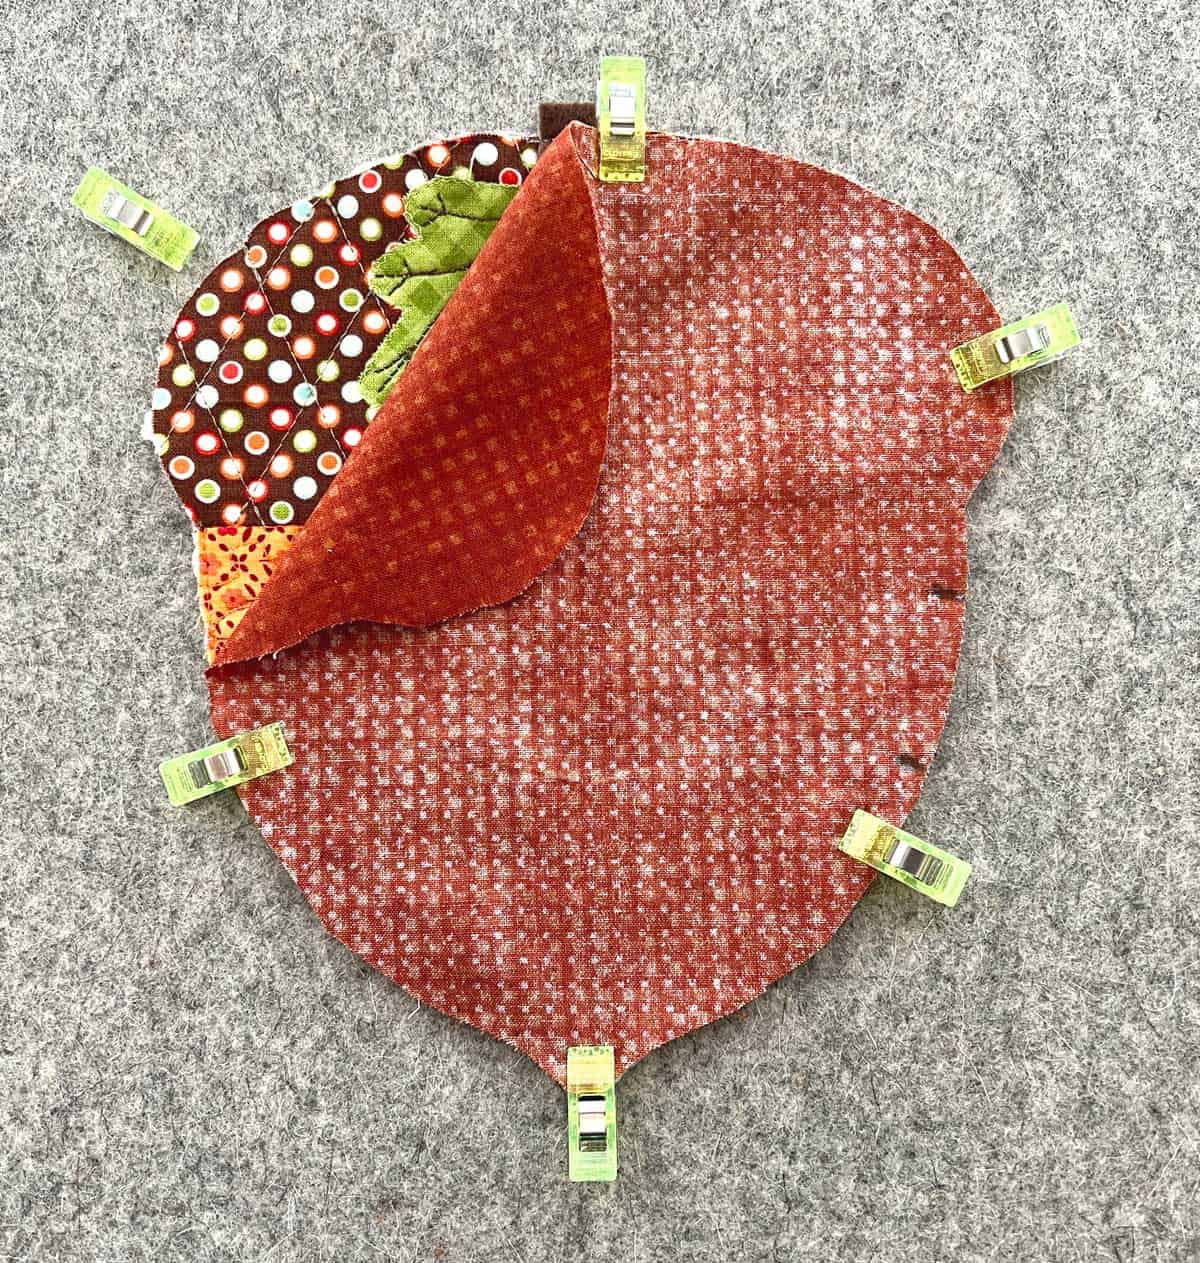
- Clip curves and turn right side out. Press.
- Blind stitch the opening closed.
- Top stitch around the acorn coaster using a 1/8″ seam allowance. Press one more time.
Wasn’t that easy! Create a collection of acorns in a variety of colors! And be sure to share with your friends!
>>> Want an ad-free, printable version of this post – including two sizes of Acorns? Click the pink button below and download the Printable PDF instructions .