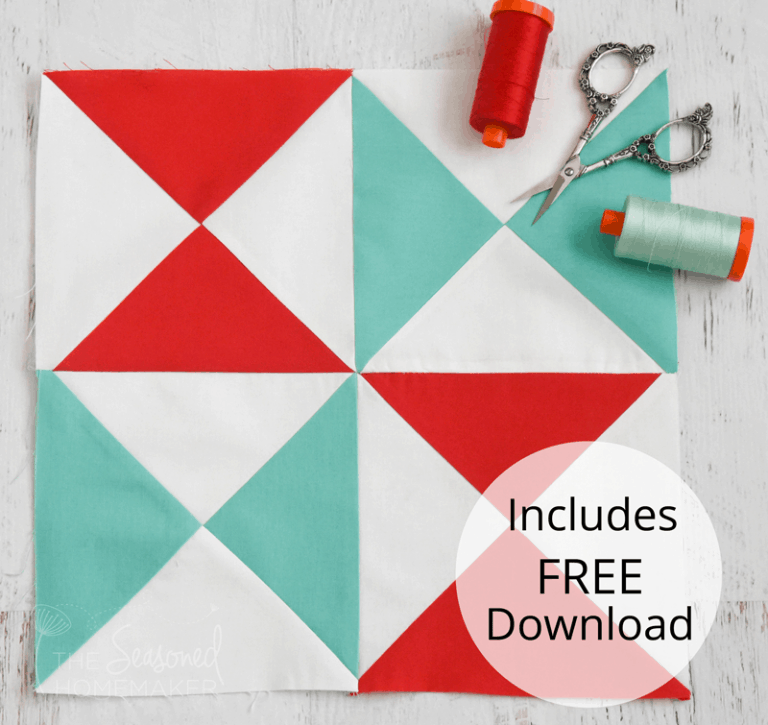
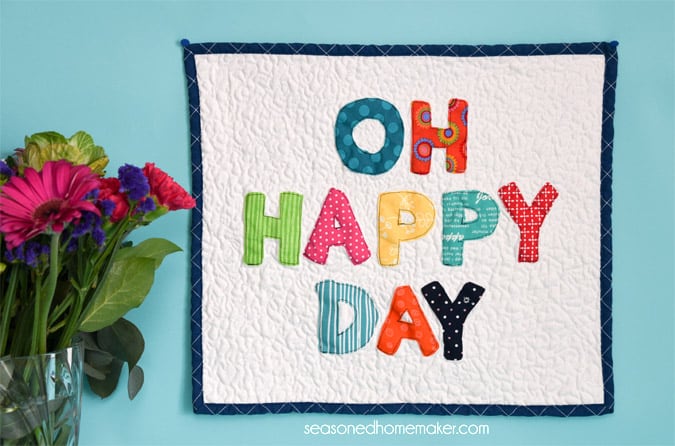
LOVE Mini Quilt
This post may contain affiliate links which won’t change your price but will share a commission.
Inside: LOVE Mini Quilt
I am a huge fan of quilts with lettering and sayings on them because you’re able to express a thought or say something clever on a quilt.
And, they’re also quick and easy to make. So that’s a double win!
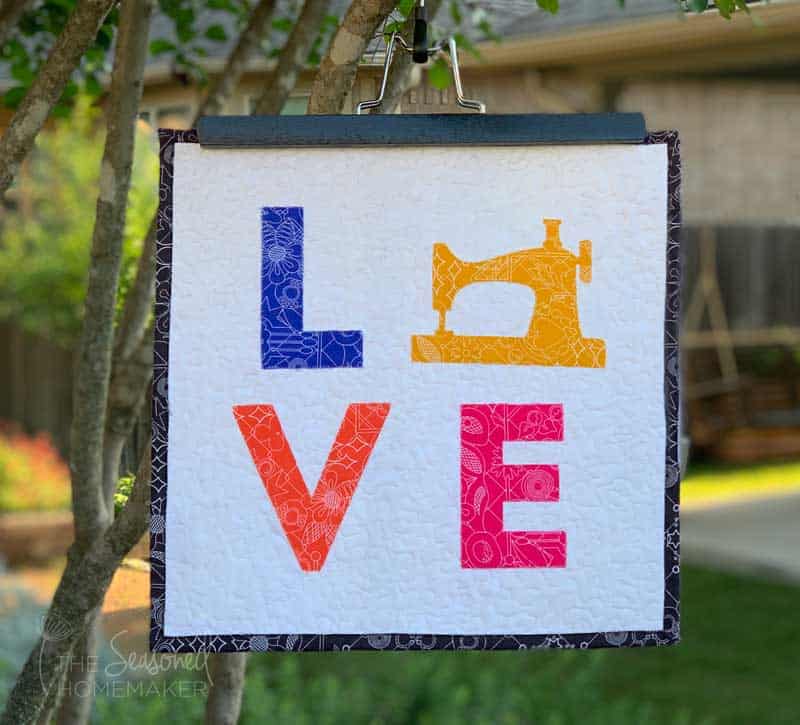
How to Make a LOVE Mini Quilt
For this tutorial I used my Cricut Maker to cut out the letters and the sewing machine design. For those of you who don’t have a Cricut, you can still make this project with a few adjustments. See Alternate Instructions for hand-cutting the design.
You will need to download a font [link below] for this project if it isn’t already on your computer. Once downloaded, the font will be accessible in Cricut’s Design Space software when opened. It will also be available in your computer word processing software.

Supplies:
- Sew Cute Applique Set for sewing machine applique
- INTRO Font
- Sewing Machine
- I recommend an Open Toe Foot
- Scissors (if you’re hand-cutting the letters)
- These Havel serrated-edge scissors are my favorite for hand-cutting appliqué designs!)
- Fusible Quilt Batting
- Water soluble marker
- Heat’n Bond Lite
- Superior Threads Mono-Poly Thread
- Wonder Clips
- Rotary Cutter with sharp blade
- Rotary Cutting Mat
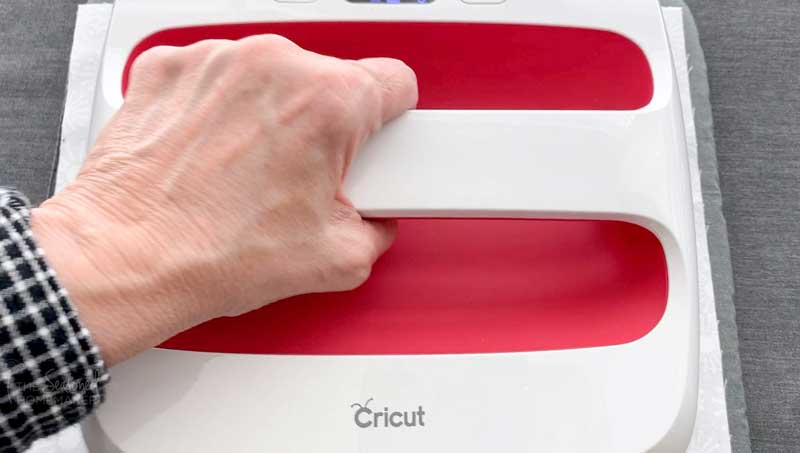
- Iron or Cricut EasyPress 2
- Cricut Maker with Cricut Rotary Blade (optional)
- Pink FabricGrip Mat (optional)
- Cricut Brayer (optional)
- Cricut EasyPress Mat or Thick Towel (optional)
Materials:
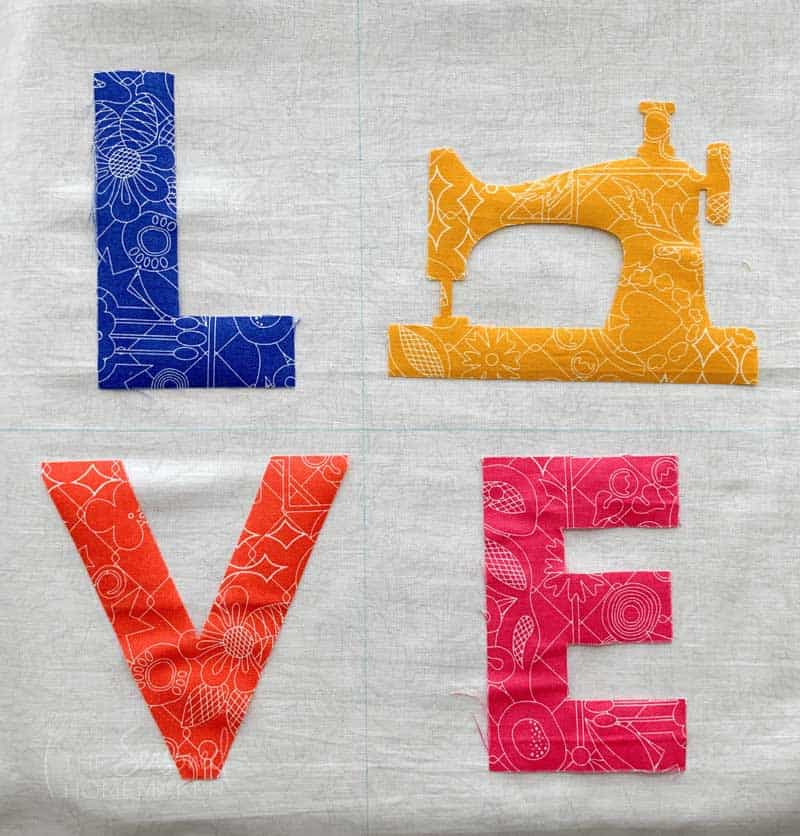
- (2) Fat Quarters in a light background fabric
- (1) 6″ x 6″ Square of Blue Fabric
- (1) 6″ x 6″ Square of Orange Fabric
- (1) 6″ x 6″ Square of Pink Fabric
- (1) 9″ x 9″ Square of Yellow Fabric
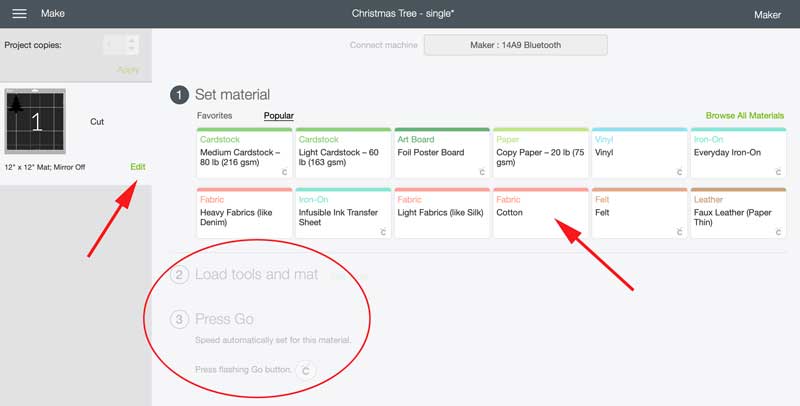
Step 1: Prepare the Design
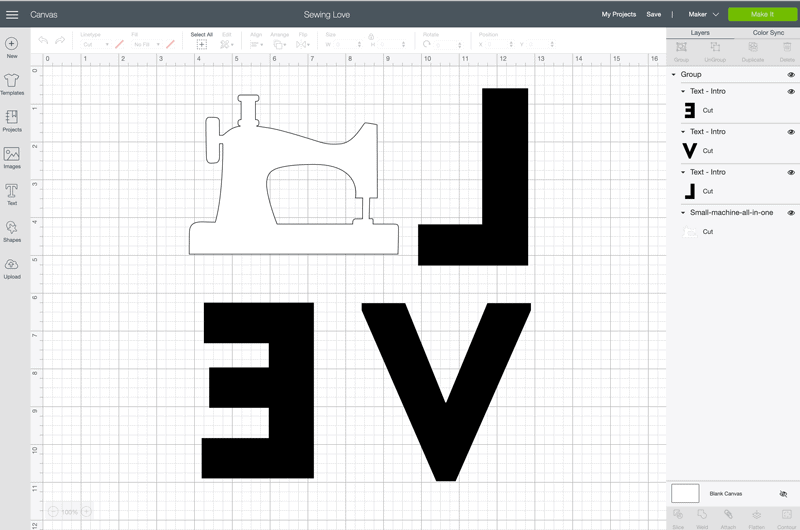
- Upload the 6″ sewing machine design from the Sew Cute Appliqué Set into Cricut Design Space.
- Type out the letters L V E in either Cricut Design Space or any word processing software.
- Size the letters to be about 5″ tall. Or, you can size the word up or down to your personal taste.
- REVERSE the letters and the sewing machine template.
OPTIONAL METHOD: If you’re not using a Cricut then size, print, and cut out your letters and the Sew Cute Sewing Machine design. Once these are printed and cut out, move to Step 2 to apply fusible product. Once this is done, then skip Steps 3 – 4. See this post for more detailed instructions on this process. There is also a short video at the end of the post showing these steps.
Step 2: Preparing the Fabric for Applique
Now that the letters and sizes are chosen, it’s time to prepare the appliqué fabric.
Apply Heat’n Bond Lite to the back of your pre-cut fabric squares. Be sure to place the textured side to the back of your fabric with the paper side facing up.
If using the EasyPress 2 with the EasyPress Mat, set the temperature to 305º F. and the timer for 10 seconds.
If using a regular iron, set iron on highest setting without steam. Press for 10 seconds.
Once cooled, remove the paper backing. The back of the fabric will now be shiny.
Step 3: Preparing to Cut the Design Out
- Since we’re using letters you will need to mirror the design. (See the Edit button in Design Space for Mirroring)
- Place your fabric right side down on the Pink FabricGrip Mat. The shiny side with the Heat’n Bond should be facing up.
- It is important for the fabric to be securely attached to the Pink FabricGrip Mat. Use a brayer to flatten the fabric to the mat. This will keep the fabric from stretching and secure it to the mat. Remember, when the machine is cutting, it’s going pretty fast over the fabric. Any place where fabric isn’t adhered to the mat could ruin the cut. Note: If your mat is starting to lose its stickiness, just add some blue painter’s tape to the edges.

Step 4: Cut Out the Designs
At this point, it’s time to cut the design. Follow the directions in Design Space. Be sure to choose “Cotton” for your Material.
IMPORTANT: Don’t forget to Mirror your design.
The software will instruct you when to load and unload the mat.
Once the design is cut out, carefully peel back the fabric at the corner and slowly pull away the excess fabric. The cut design will remain on the mat. Use a tweezers to carefully remove the design and set aside.
Step 5: Placing the Appliqué Designs
Determine where you want to place your letters by using a water soluble pen to mark a grid.
Keep in mind, you’ll be trimming this down after you quilt. Be sure to leave several inches at the top, bottom, and sides.
Place the designs shiny side down. Using a dry iron or the EasyPress 2 (305º for 10 seconds) with EasyPress Mat, fuse the designs to the top fabric. Let cool.
Step 6: Stitching down the Designs
For this step I used Superior Threads Mono-Poly Thread invisible thread.
This thread is nothing to be afraid of – the key is in changing the tension setting on your sewing machine and using your ZigZag Foot or an Open Toe Foot.
Here’s the secret to using the Mono-Poly thread. You have to lower your sewing machine tension. This will take a little fiddling around. For me I found that lowering my tension to 1.5 worked perfectly with Aufil 50 wt. thread in the bobbin.
Next, you’ll want to use a very narrow zigzag stitch. Lower your zigzag stitch length and stitch width to 1.5 – 2.0mm.
Before stitching down, I recommend you practice a little to make sure your tension is set correctly.
Of course, you could use a straight stitch, regular zigzag, or even a satin stitch. It’s up to you.

Step 7: Time to Quilt
Note: Quilting is really a matter of personal choice. For this project I did a micro-stipple.
Make a quilt sandwich using fusible batting. Fuse the batting by pressing the front and back with a dry iron or the EasyPress 2.
Quilt in your favorite style.
Once you’ve finished the quilting, be sure to remove any markings.
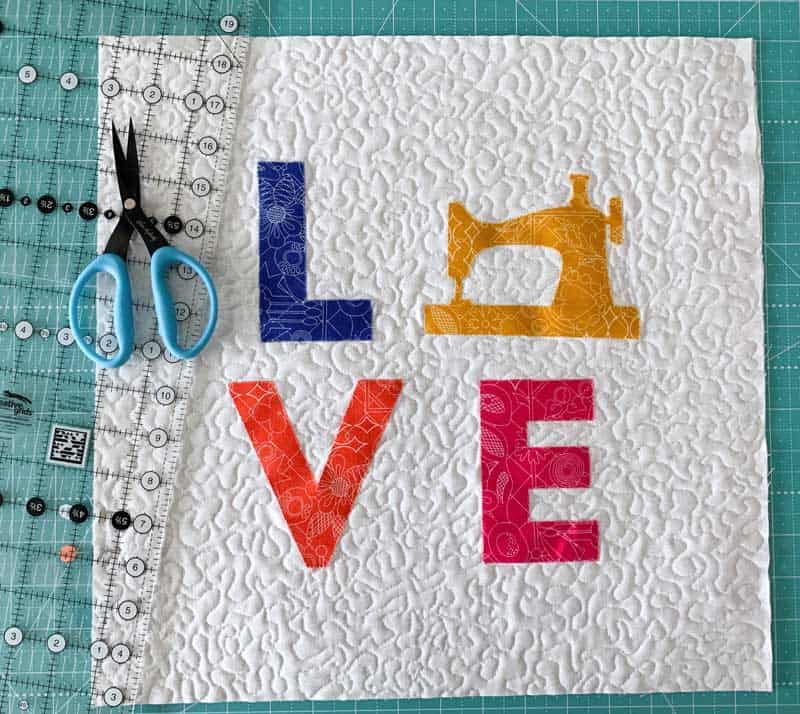
Step 8: Finishing the Mini Quilt
Once the quilting is finished, trim the wall hanging to approximately 14″ x 14″ (or your preferred size).
Make enough 2.25″ (or 2.5″) binding to finish the project. Attach the binding using this tutorial.
For those of you who like to learn with video, I have this How to Appliqué Tutorial.
Wasn’t that fun and easy! I think this simple project is ideal for last minute gifts or anything you want to personalize.
I can’t wait to see what you create!