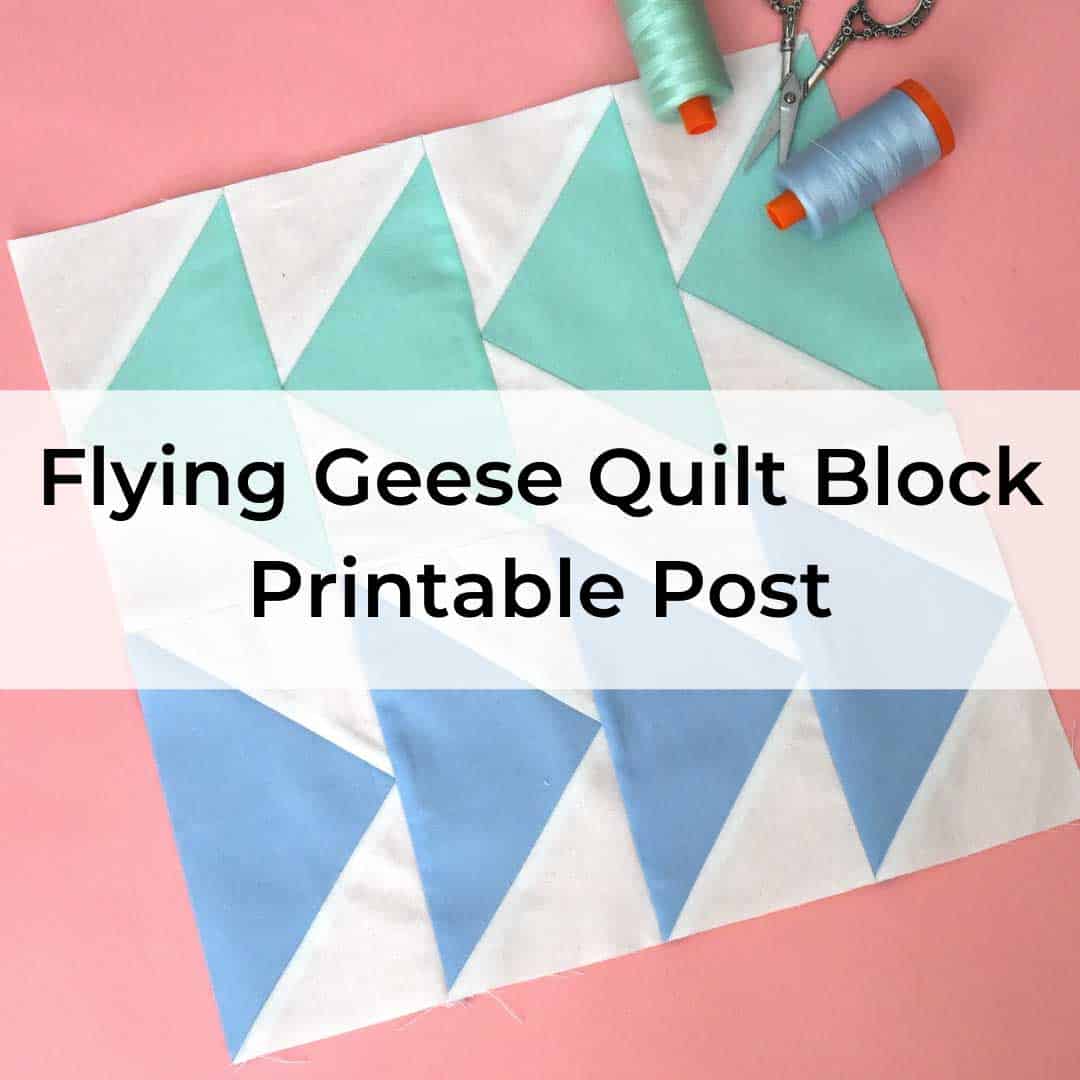
How to Make a Perfect Flying Geese Quilt Block
This post may contain affiliate links which won’t change your price but will share a commission.
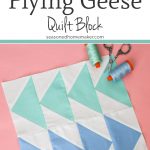
INSIDE: How to Make a Perfect Flying Geese Quilt Block
Want to perfect those flying geese units and make them four at a time? This technique comes in handy when you have a large number of Flying Geese to make.
When I typed the word Flying Geese into my EQ8 software it showed over 50 different blocks. So, I pulled out my Encyclopedia of Pieced Quilt Patterns to see if I could get clarification. As in, “Will the real Flying Geese Quilt Block please stand up!”
No dice. This is a block that’s been around so long and has been used in so many different ways it’s hard to define. I will tell you this, there is a definite difference in Flying Geese and Flock of Geese. After that, the waters are way too muddy.
Want an ad-free, printable copy of this tutorial? Scroll to the bottom of this post for more details!
How to Make a Perfect Flying Geese Quilt Block
This tutorial gives you basic directions on how to construct a Flying Geese Quilt Block. However, I’ve included additional information below on how to get more consistently-sized flying geese using the Wing Clipper Tool. I suggest you make a few practice flying geese so you understand the process. Then you can decide if you need the Wing Clipper Tool.
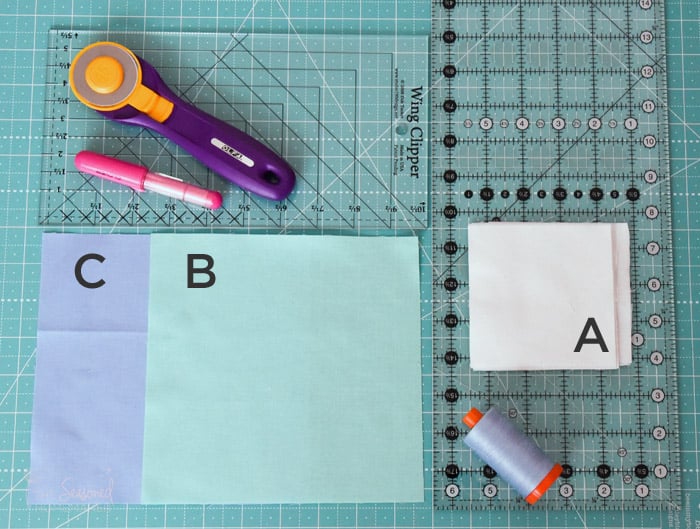
Supplies
- Eight 5″ x 5″ Squares of fabric – I’m using white quilting cotton
- Two 10″ x 10″ squares of contrasting fabric (mint green and baby blue)
- Wing Clipper Tool (highly recommended for this tutorial)
- Aurifil 50 wt. Cotton Thread
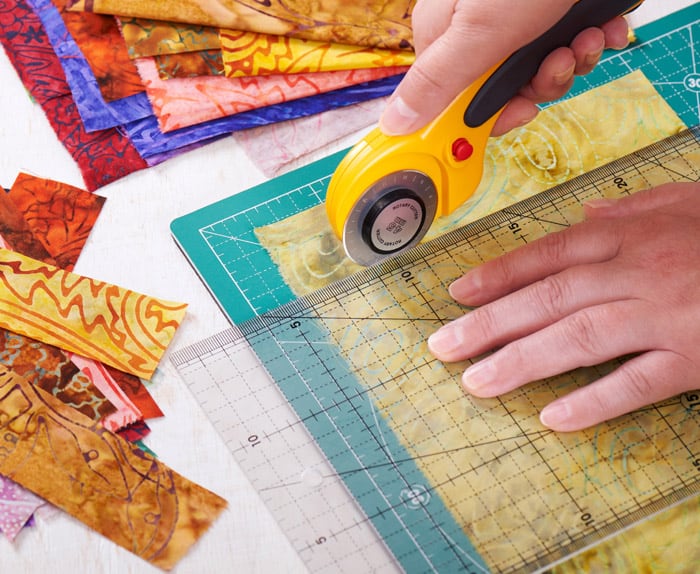
- Rotary Cutter with sharp blade
- Self Healing Rotary Cutting Mat
- Acrylic Ruler
- Marking Pen or Pencil
- Sewing Machine
- Iron & Ironing Board
Cutting the Flying Geese
Note: If using the Wing Clipper Tool, before cutting see my instructions below. This will slightly alter the sizes of the squares you will be cutting out.
- Qty (8) 4″ x 4″ (White) – Piece A
- Qty (1) 7 1/2″ x 7 1/2″ (Mint Green) – Piece B
- Qty (1) 7 1/2″ x 7 1/2″ (Lt. Blue) – Piece C – set aside for your second Flying Geese Unit
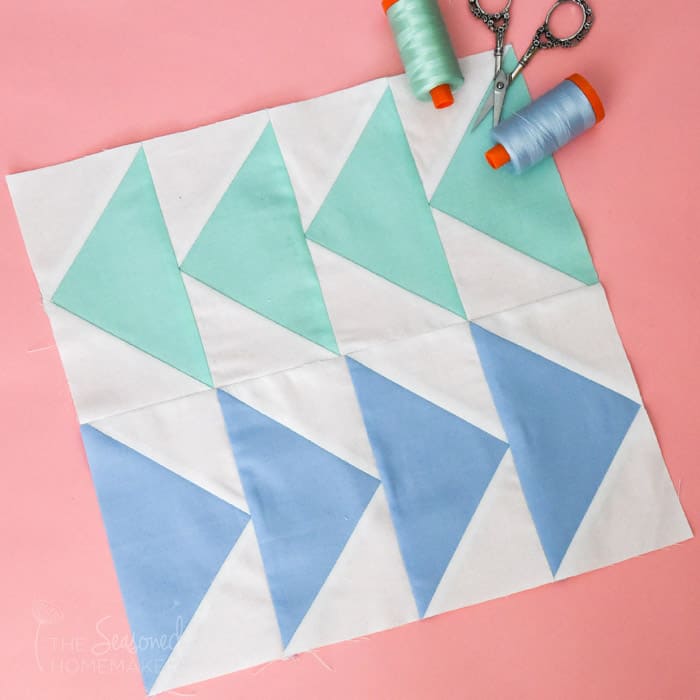
Flying Geese Units – Four at a Time
- Step 1: Begin by laying two Piece A squares right sides together diagonally in opposite corners of Piece B. Pin to hold in place. Mark a diagonal guideline from one corner to the other. This will overlap slightly where both Piece A’s intersect in the middle.
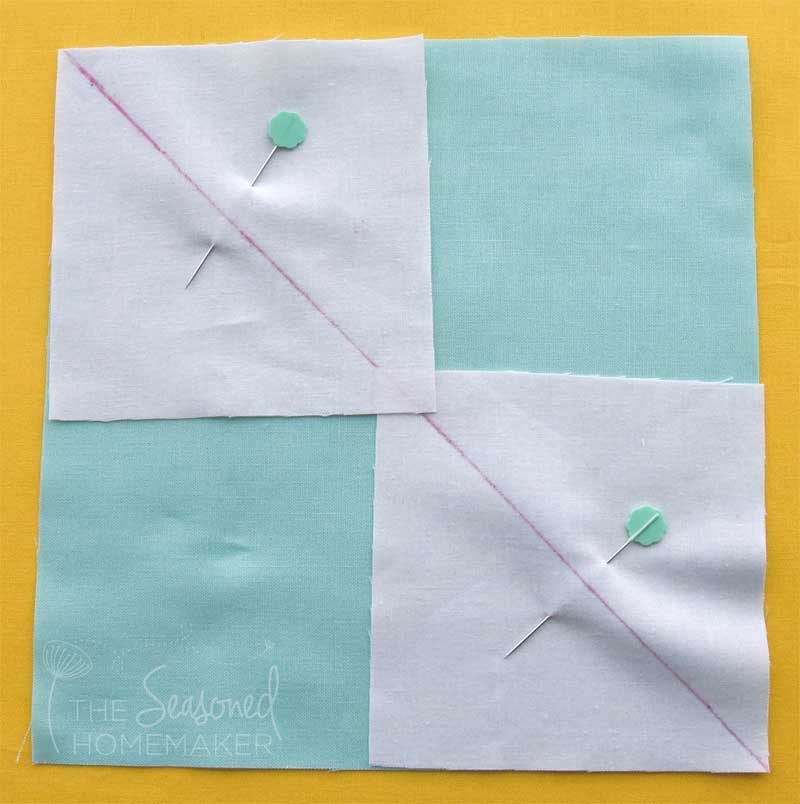
- Step 2: Stitch a scant 1/4″ seam allowance on both sides of the diagonal line. Cut apart on center line.
- Step 3: Press seams towards the smaller triangles.
- Step 4: Next, place another Piece A in the corner of one of the the previously pieced units. Mark a diagonal line from the corners. Stitch a scant 1/4″ seam allowance on both sides of the diagonal line.

- Step 5: Cut apart. Repeat for the other pieced unit. Press seams towards smaller triangles.
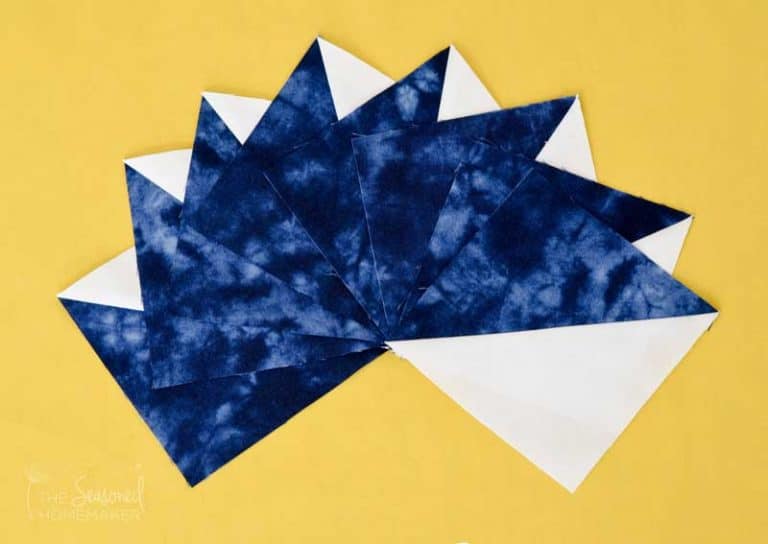
- Step 6: You now have four Flying Geese.
Below is a diagram to help you better understand the process. Note: The diagram does not show the slight nudge in from the corners that I mention below.

Trimming the Flying Geese Units
Notice how all of your Flying Geese Units have these little dog ears? If your starting squares are accurate and you’ve used a scant 1/4″ seam allowance, you can carefully trim away the dog ears and and trim the units down to 3 1/2″ x 6 1/2″.
There is one potential problem that can occur when trimming. It’s very easy to over-trim and not leave enough fabric for a 1/4″ seam allowance where the points meet. Your flying geese unit may be trimmed to the correct size, but when you go to attach it in the block, all of the sudden your geese don’t have points. This can be a huge problem if you’re making something like a sawtooth star quilt block.
There is an easy way to prevent this.

Alternate Method Using the Wing Clipper Tool
There is a way to avoid over-trimming but still trim down each of these flying geese units and get perfect seam allowances. It’s called the Wing Clipper. If you decide to use this tool (and I highly recommend it!) then you need to carefully read (and save!) the instructions that come with the Wing Clipper.
Basically, the instructions suggest you size up your squares by 1/4″. Then, when you add the smaller squares to the corners, don’t line them up with the edge, but nudge them in about 1/16″, leaving a small margin (there are illustrations showing this).
I’ve tried this method and found it to be more successful than starting with the exact square sizes listed in a quilt pattern. There can be so much variation between seam allowances and stitch width that you could end up with flying geese units that are undersized, or (gasp!) with the points are cut off when attached.

Great Skill Builder!
It seems like there are so many unique ways to use the Flying Geese Quilt Block.
The Flying Geese Quilt Block is a great skill building block and that is why I’m encouraging you to give this one a try. You’ll be surprised at it’s simplicity and versatility. It goes together quickly and is used to make more quilts than I have time to name.
>>> Want an ad-free, printable version of this post? Click the pink button below to get the Printable PDF instructions.
Did you like this post? Check out a few of the other Quilt Blocks in this Series.
>>> Click this link to see all of the Blocks of the Month