Finish Seams Without a Serger
This post may contain affiliate links which won’t change your price but will share a commission.
Isn’t it always about the details? This thought particularly applies with sewing. Especially in the area of finishing seams. Finished seams on any project prevent unraveling and make the inside look much nicer.
Using a serger is one of the best ways to get finished seams on a sewing project. What if you don’t own a serger? Well, there are many ways to Finish Seams Without a Serger.
Want an ad-free, printable copy of this tutorial? Scroll to the bottom of this post for more details!
Finish Seams Without a Serger
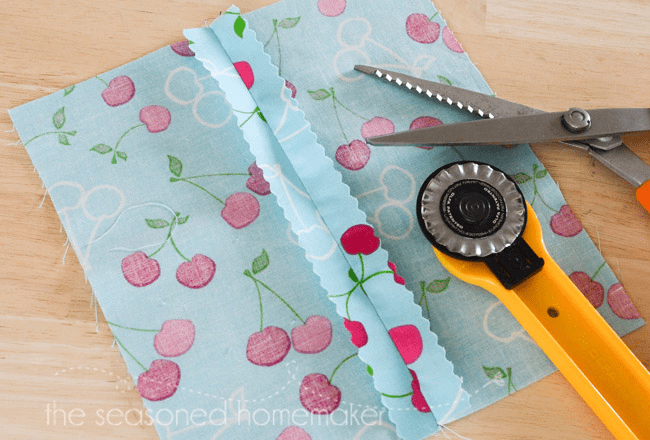
1. Pinked Seams
One of the simplest ways to prevent unraveling and finish seams would be to use pinking shears*. Once you’ve sewn your seam, just clip along the edges with the pinking shears before pressing. It’s that easy. A few years back pinking blades* became available for rotary cutters. (affiliate links) This makes pinking even faster and is my go-to pinking method.
Pinking works really well on woven fabrics that don’t get washed and dried too often. It is most effective on tightly woven fabrics, but not really recommended for something with a loose weave like linen.

2. ZigZag Seams
So you don’t own a pair of pinking shears and you still want finished seams. Zigzagging is a great option. Almost all machines come with a zigzag stitch with adjustable stitch width and stitch length. I use the default setting for my zigzag stitch (1.5 mm stitch length/3.5 mm stitch width). These setting will vary with machine manufacturers and the type of fabric you are using. Sew a few samples until you find the perfect zigzag finishing stitch then write it down.
There are two ways to finish seams using a zigzag stitch. The first would be to sew a seam using the correct seam allowance. Then go back and zigzag next to the seam allowance and trim away any excess fabric. This works really well for curves like princess seams and armholes.
This finish is fairly close to a serger seam and will eliminate most unraveling. Before I owned a serger, I used this method and had years of success with it. #itsawinner

The second way to finish a seam using a zigzag stitch is to zigzag the edges prior to sewing seams together. This works well on straight seams or applications that might prevent trimming.
Either way, zigzagging a seam finish is one of the most common ways to finish a seam without a serger.

3. Turn & Stitch
The turn and stitch method of seam finishing is something my grandmother used until she got a sewing machine that had a zigzag stitch. Visit any thrift store that carries vintage garments and look inside at the seam finish ~ I bet this is what you will see.
If you’ve inherited a Singer Featherweight (or any older machine) that still runs like a champ (and there a tons out there) you won’t have a zigzag stitch. Turn and stitch is a great way to get clean, finished seams.
All you do is sew your seam at the seam allowance. After sewing the seam, turn under the raw edge of the seam allowance 1/8″ fold on either side of the seam, press, and stitch down. It’s really that easy. Because this technique only uses straight stitching it doesn’t require much thread and I consider it a very economical way to finish a seam.

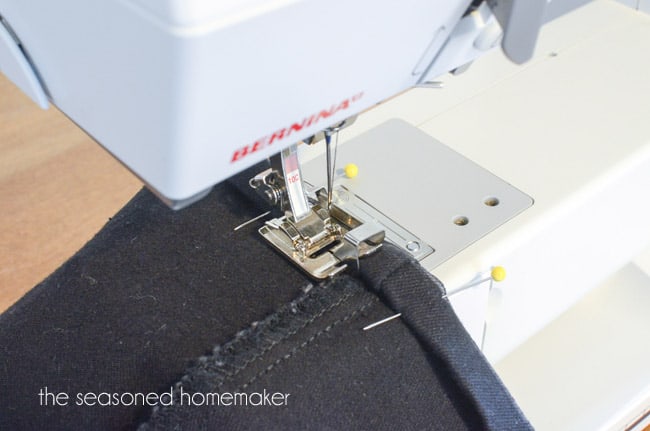
4. Machine Overcast
When I was a newlywed (39 years ago) my husband bought me a mechanical Kenmore sewing machine that had lots of options ~ one particular stitch was an overcast stitch that required an overcast foot. Most machines today come with something like this, no matter the price point.
It is designed to be sewn on the seam edge, however, I used an all-purpose foot and sewed the overcast stitch at the seam allowance, then I trimmed away the excess. I like this stitch because it allows me to sew my seam together and zigzag at the same time. The only added step is trimming the excess fabric {without cutting any of the overcast stitches}. This is a very clean and secure seam that can be done quickly and one of the best options if you don’t own a serger.

5. Hong Kong or Bound Seams
I’ve included the Hong Kong or Bound Seam into this collection because it’s not that difficult and is ideal for things like unlined jackets. If you plan to sew something like an unlined jacket then the four applications above are not going to be as clean. However, binding the seams is an ideal way to finish the inside of a garment and give it a little sass.
Hong Kong or Bound Seams are suitable for heavier weight woven fabrics because they will not change the way the fabric drapes.
I have a tutorial on Attaching Bias Tape. The same steps apply for this technique. In most cases you will finish the seam edges once it has been sewn. In this photo, I attached my bias tape to the wrong side of the seam and wrapped it over so the sewn edge is showing. Imagine the possibilities for unlined jackets. #kindofsassy

6. French Seams
French Seams have to be one of the best ways to finish the inside of any project. I think they are perfect for children’s clothing, making the garment sturdy because all seams are sewn twice. When my girls were little I used French Seams on most of their garments {until I purchased a serger}. French Seams were especially useful when my girls attended a school that required uniforms which I was able to sew. Their uniforms held up extremely well due to these sturdy seams.
French Seams are best used for straight seams and are not recommended for curved seams. They are work best on light weight woven fabrics and are ideal for sheer fabrics. See my detailed tutorial on how to make French Seams.

You don’t need a serger in order to sew beautiful things. Finishing seams without a serger can make any garment or home decor project have a finished look and last a lifetime. I think it is worth the effort to learn how to Finish Seams Without a Serger and make your projects special. After all, isn’t really about the handmade touch.
>>> Want an ad-free, printable version of this post? Click the pink button below and download the Printable PDF instructions.