Gingerbread Felt Christmas Ornament Pattern
This post may contain affiliate links which won’t change your price but will share a commission.

Inside: Gingerbread Felt Christmas Ornament Pattern
Handmade Christmas projects are one of the reasons I love to sew. I can create something simple, special, and handmade.
This year I decided I really wanted to make some felt Christmas ornaments. Of course, that meant I had to cut out super tiny pattern pieces by hand. No thanks!
Then I remembered, my Cricut Maker can cut out almost anything! I got to designing and created a gingerbread house felt Christmas ornament SVG.
I am super excited to share with you how easy cutting out fabric projects is on a Cricut. All those super tiny pieces cut out so crisp. And I don’t waste a bunch of felt because I am trying to cut them out by hand.

If you’ve never used a cutting machine or you aren’t familiar with the Cricut Maker. Check out this post All About the Cricut Maker.
Felt Christmas Ornament Pattern
Materials Needed
- Gingerbread House SVG cut file (see above)
- 1 Sheet of each of Blue, White, Tan, Red and Green Felt
- Poly Fiber Fill
- 3” of ribbon
- 505 Temporary Spray Adhesive
- Thread
- Cricut Maker
- Cricut Rotary Blade
- Pink FabricGrip Mat
- Sewing Machine

Step 1:
Load SVG cut design into Cricut Design Space. You can resize the design to whatever size you’d like. My ornament is 3.25” wide.
Click “Make” and you’ll get the chance to select what type of material to cut out.
If you select felt, you’ll be asked to use the deep cut blade. Depending on the felt’s thickness, you may need to do a couple of passes on the felt to have it cut clean.
If you have the rotary blade, instead of selecting felt, choose fleece. It will cut out each of your designs like a dream.

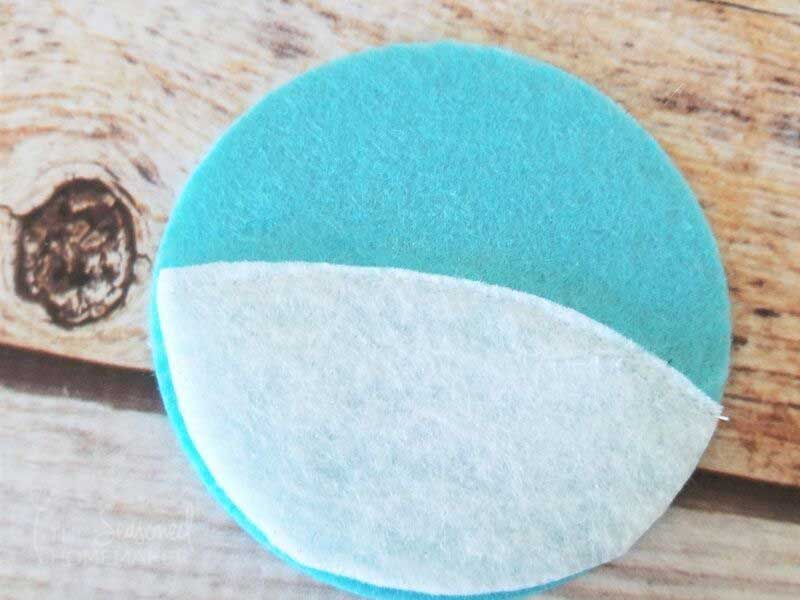
Step 2:
Take one of the circles of the felt Christmas ornament and use adhesive spray on the large white snow half circle. Place onto the felt circle. Stitch the snow down using your sewing machine.
Tip: Use temporary adhesive spray in each of the steps to help the smaller shapes to stay in place before stitching.
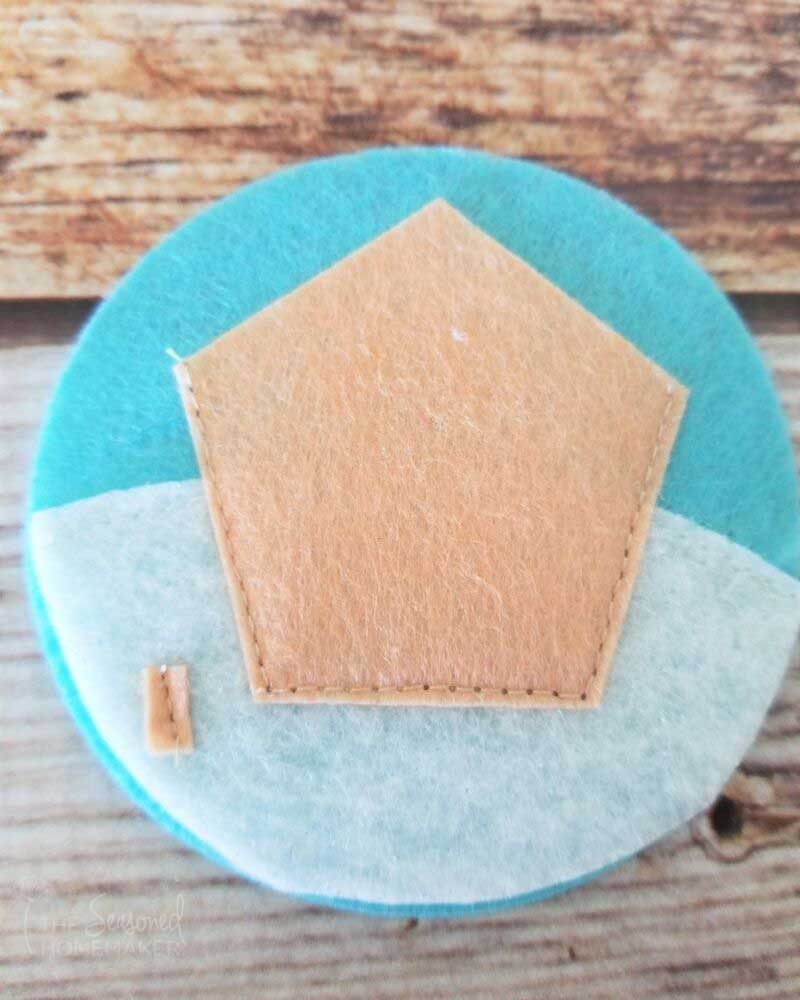
Step 3:
Next, add the tan house and the small tan tree trunk. Stitch around the two house sides and across the bottom. Stitch down the middle of the tree trunk.
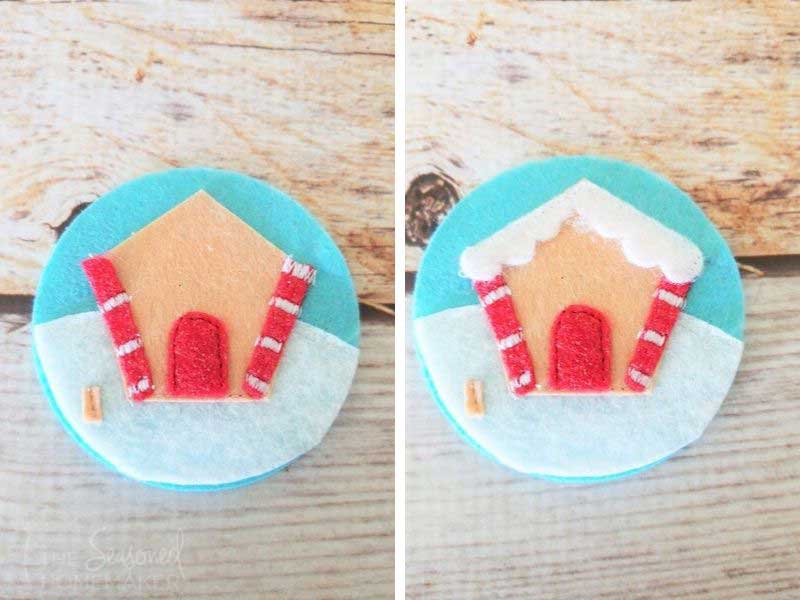
Step 4:
Add the red door and two candy cane sides. Stitch the door around the edge. For the candy canes, use white thread and a tight zig-zag or satin stitch. Stitch about every 1/8” .
Add the white snow on the top of the house. Stitch across the top diagonals.
Finally, add the green tree and holly. Machine stitch with green thread. See final images for example.
Step 5:
Loop the ribbon piece. On the inside of the back circle, tack down the ribbon.

Step 6:
Place the front and the back together. Thread a hand needle with white thread or embroidery floss. Stitch the two layers together with a blanket stitch.

Step 7:
About 2/3 of the way around the ornament, add fiberfill to the ornament. Finish stitching the remainder of the ornament closed.

Wasn’t that super easy? All those tiny pieces would have been such a pain to cut out by hand, but with the Cricut it was so fast and looks so great.

If you liked this felt Christmas ornament pattern, check out this adorable Gingerbread Girl and Boy ornament project.

What if you don’t have a Cricut?
No worries, I’ve made a PDF of the design.