How to Fill in Large Embroidery Spaces
This post may contain affiliate links which won’t change your price but will share a commission.
Inside: How to Fill in Large Embroidery Spaces
Are you avoiding adding embroidery to your crafty pursuits because you look at patterns and are daunted by filling in the large shapes and spaces with tiny embroidery stitches?
I’ve been there. Sometimes you just want to finish a piece in one or two sittings, right? Well, as much as I LOVE stitching, I’m a busy wife, mother, and small business owner and, while I love to sit down and work on a large piece over the course of a week or two; occasionally, I want to make a project that can be completed quickly, often because it’s a gift and I’m on a deadline.
Use Embroidery Stitches to Fill in Large Spaces
If you are an embroidery enthusiast, you might fill in the large areas with stitches. Satin Stitch or French Knots are two of my favorite stitches for filling in large spaces in embroidery patterns. But if you want to save time, there’s no shame in finding other ways to fill in those embroidery patterns!
Today, I want to talk to about using paint to fill in those spaces.
Use Paint to Fill in Embroidery Patterns
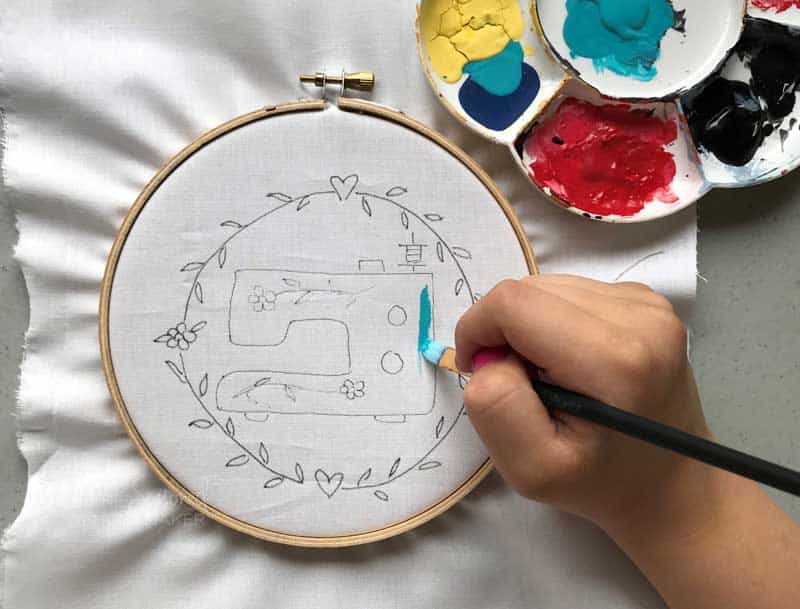
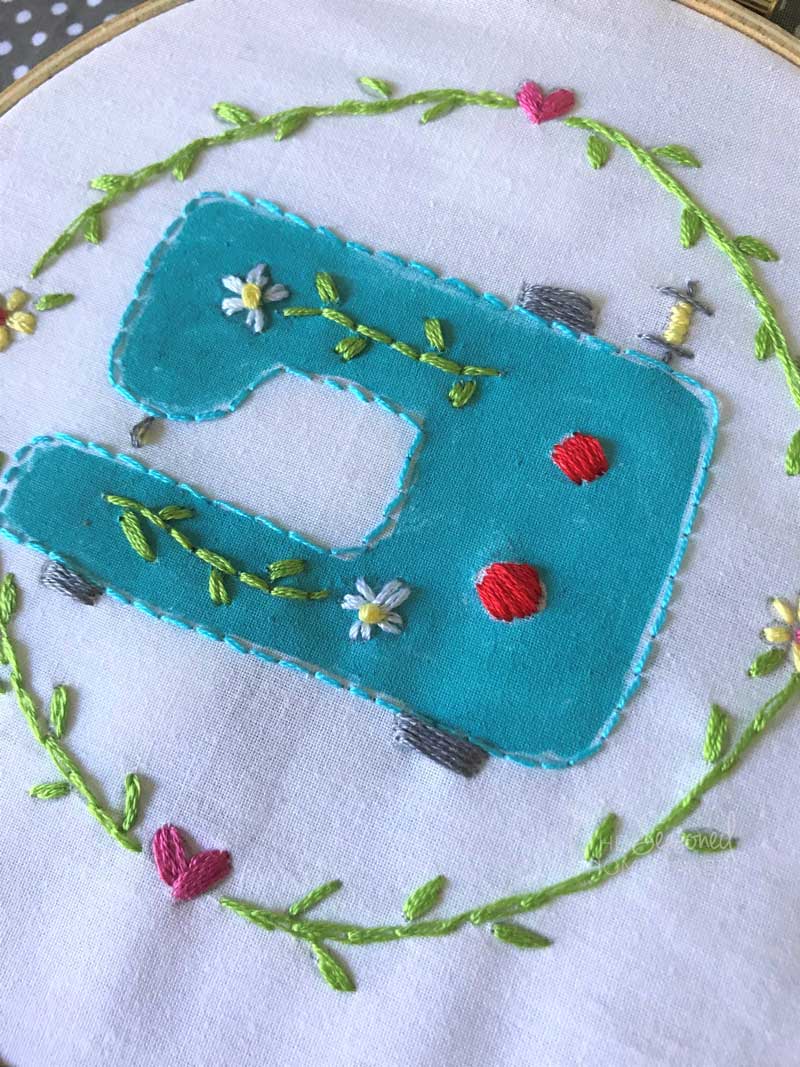
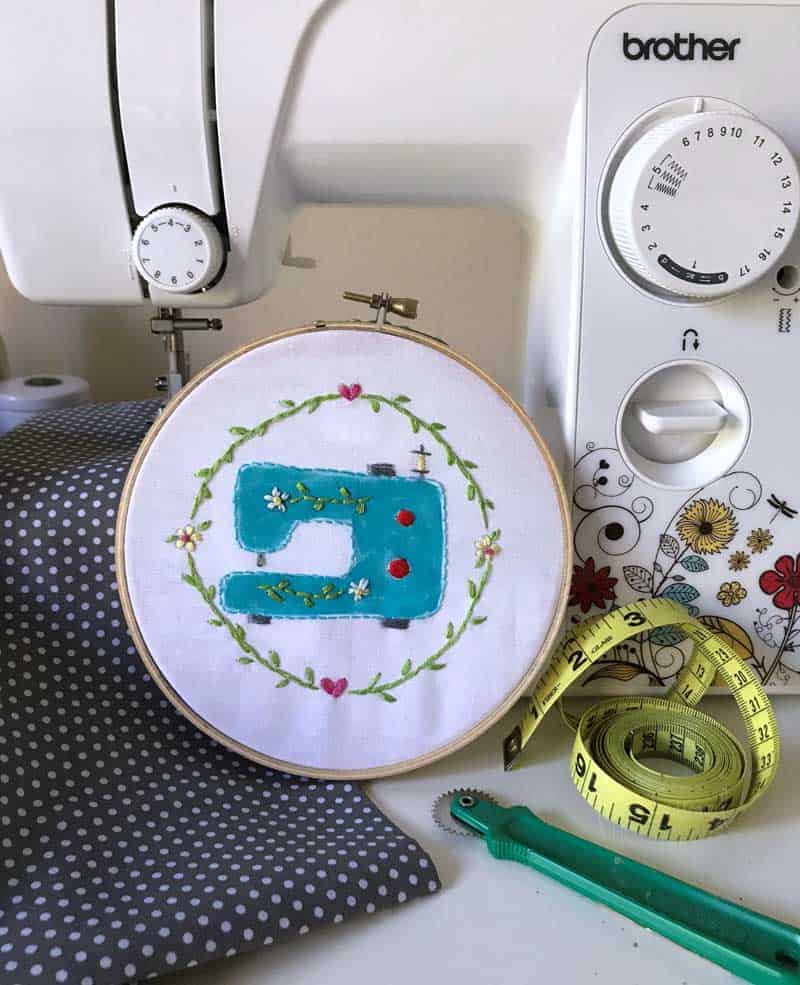
That’s right! I have been known to use paint in my patterns when I have a lot of space to fill and not a lot of time to fill it with stitches. You can see in the photos that I painted the sewing machine in my Sew Cute! Embroidery Pattern. I think it looks darling, don’t you? And I finished this piece in an afternoon. Here are some tips for incorporating paint into your next embroidery project:
- Test a swatch of your fabric. Cut a little piece of fabric and try out paints on it. Thicker fabrics like duck cloth and canvas take paint well. I used a cotton quilting fabric for my sewing machine piece and it worked great. The trick is the thinner the fabric, the thicker the paint. Diluted paint is likely going to run outside the lines on thinner fabrics.
- And speaking of paint. I used inexpensive, Apple Barrel craft paint. My design was for a piece of hoop art, so it won’t be getting washed or handled often. If you are planning to use your embroidery piece on something that will be washed often, you should consider using fabric paints.
- Once you get your fabric and paint picked out, transfer the embroidery pattern to the fabric. You can see how to use a heat transfer pencil to do this on my YouTube channel.
- Now it’s time to load your fabric into your embroidery hoop then paint the area you want to fill in. I like to have the fabric in the hoop before I paint because it lifts the fabric off the surface, so if the paint goes through the fabric, it won’t be sitting in a puddle of paint.
- Once you have added paint to the design, allow it to dry completely. Most craft paints will dry quickly. If you are using fabric paints, follow the instructions on the paint bottle to see if you need to heat set your piece.
Time to stitch! On my piece, I used a Back Stitch to outline the area I painted and then I stitched in the details like the flowers and knobs.
Make sure your embroidery needle is sharp so it easily goes through any painted areas, and it’s a good idea to throw away any needles you used to go through the painted areas once you are done. The needle will be dull and could transfer residual paint flakes onto your project.
I hope you’ll explore this quick and easy way to add a little color to your next stitching project!
Don’t forget to check out my other post on how to make an embroidery needle case.