Valentine’s Day LOVE Applique
This post may contain affiliate links which won’t change your price but will share a commission.

Need a Valentine’s Day idea? Since you know I love me some applique I’ve put together a fun tutorial that includes a Valentine’s Day idea, appliqué.

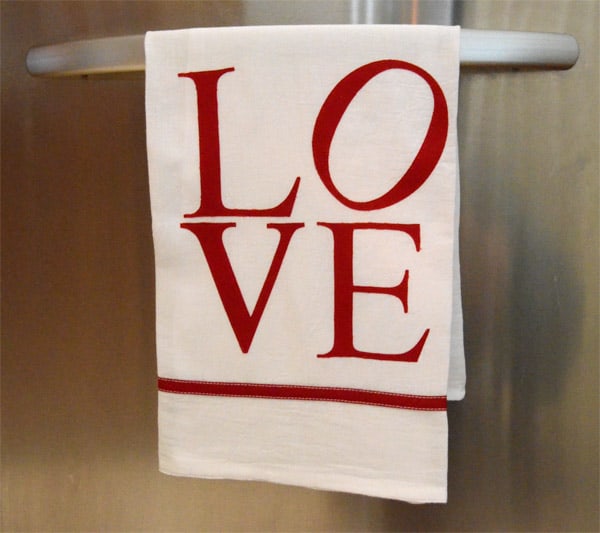
Are you familiar with the Love Sculpture by Robert Indiana? It sits in Love Park in Philadelphia. And, the Love Sculpture is one of my favorite pieces of urban sculpture.

Wouldn’t the Love Sculpture lettering look awesome appliqued on a kitchen towel? Can you see it hanging in your kitchen? Me, too.
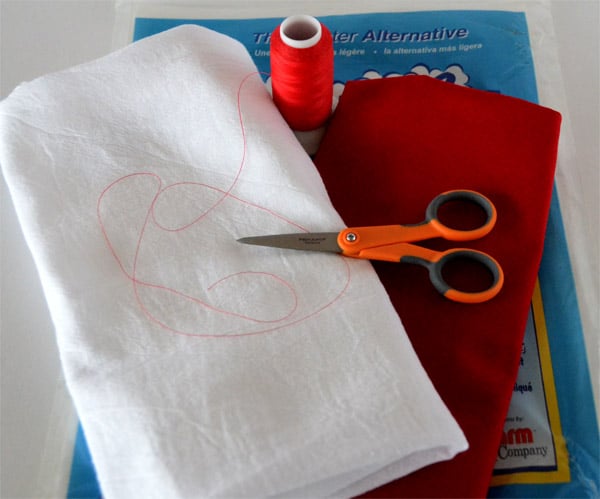
Making a LOVE Sculpture Towel is easy; here’s what you’ll need:
Love Sculpture Applique Supplies:
- 1 White Kitchen towel
- Red Fabric Scraps (1/4 yard)
- Fusible Web such as Heat ‘n Bond Lite
- Wright’s Red 1/2″ Single Fold Bias Tape
- Red Thread
- Scissors
Step #1:
Download and print the LOVE pdf with the reversed applique letters.
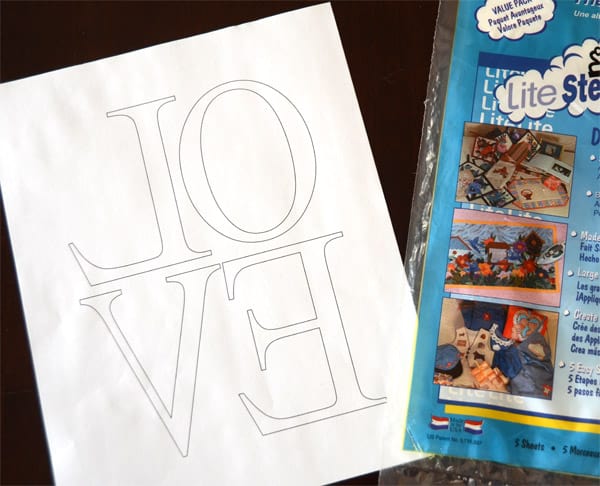
Step #2:
Lay the fusible web OVER the pdf that you’ve just printed. Trace each of the REVERSED letters onto the paper side of the fusible web. The ‘O’ isn’t reversed.

Step #3:
Rough cut around each letter that you’ve just traced. NOTE: You do not need to precisely cut each letter until all of the letters have been fused to the back of your fabric.

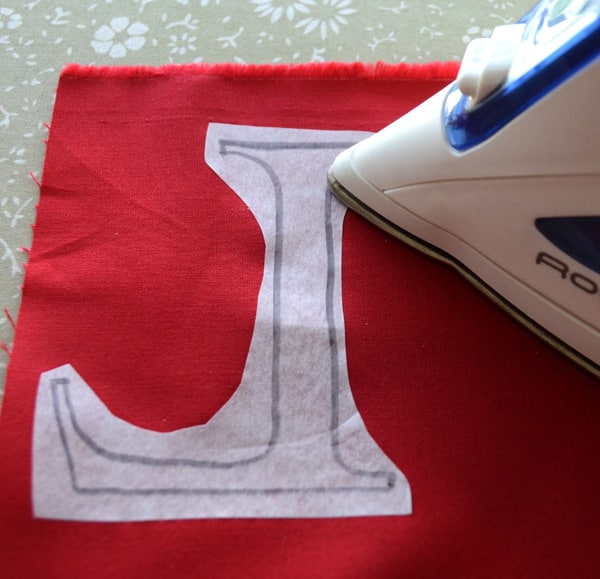
Step #4:
Fuse the letters to the back of your fabric according to the product’s directions. Be careful not to get any of the fusible web on your iron – the letters tend to curl at the edges.
Step #5:
Precisely cut out the letters on the lines you have drawn and set them aside.

Step #6:
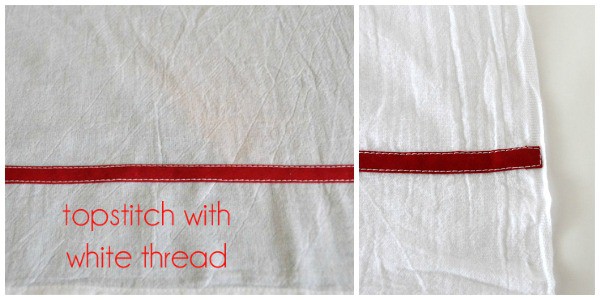
Add a piece of red bias tape 3″ from the bottom edge of your kitchen towel. Pin to hold.
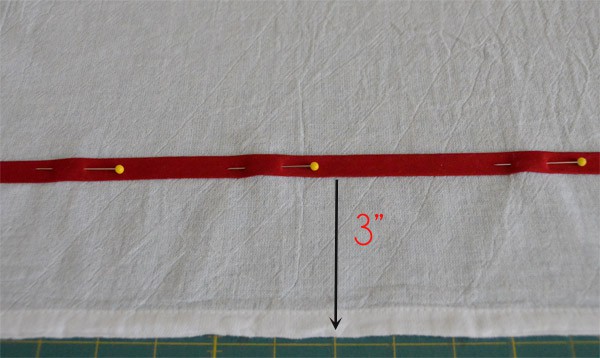
Topstitch with white thread on both edges of the bias tape. Fold under the bias tape at the sides of the towel.
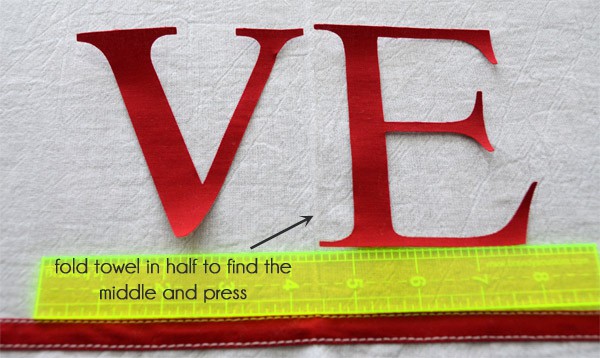
Next, line up the “L” above the “V”, but don’t fuse it to the towel, yet. Because the “O” is slanted, it is the last letter you want to place on the towel. You will need to work with it a little to get it exactly right.
Once the “L” and the “O” are lined up, press them with a hot iron to fuse.

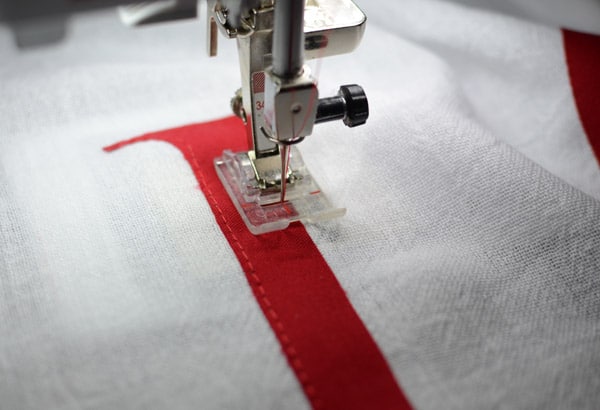
Step #7:
With matching thread, straight stitch carefully around each letter. Really take your time with the top stitching. Stitch just inside the cut edge. Use white thread in the bobbin for a clean back on the towel.

I made a second towel to see how this design would work on a thicker, textured towel. I used an inexpensive Ikea waffle-weave towel. If you use a textured towel, watch out for the puckers when you attach your lettering. It was a little tricky ~ but totally doable. I left the bias tape off of this towel ~ it was just too much with the textured pattern.
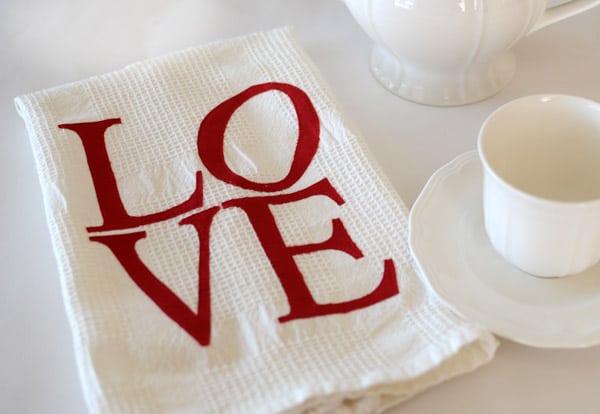
The design really stands out against a stainless steel dishwasher and I love how it adds a pop of style to my kitchen.

A Few Things to Note:
For this project I used two different methods for cutting out my letters. On one set, I hand cut letters. On another set, I used a Silhouette Cameo cutting machine. While the Silhouette was clearly much faster at cutting the letters, I did have to create the design in the Studio program. Because of this, both towels took about the same amount of time to make.
For the hand-cutting method, I highly recommend Heat ‘n Bond Lite. The product grabs onto the towel really well prior to fusing. Since alignment is crucial for this design, having a fusible web product that will stay put prior to fusing is a great feature.
For the Silhouette, I ironed the fusible web to the back of my fabric prior to putting it into the machine. It cut beautifully on the “Fabric Cotton Print” set at #3.
Either way, make a few LOVE Applique Towels and share some love this Valentine’s Day.
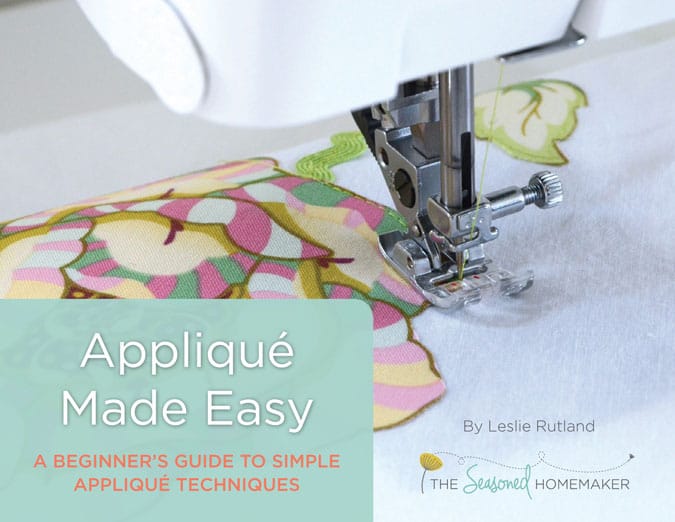
If you want to further develop your appliqué skills, check out my eBook:
Applique Made Easy: A Beginner’s Guide to Simple Appliqué Techniques
Below is a short applique video to help you better understand.