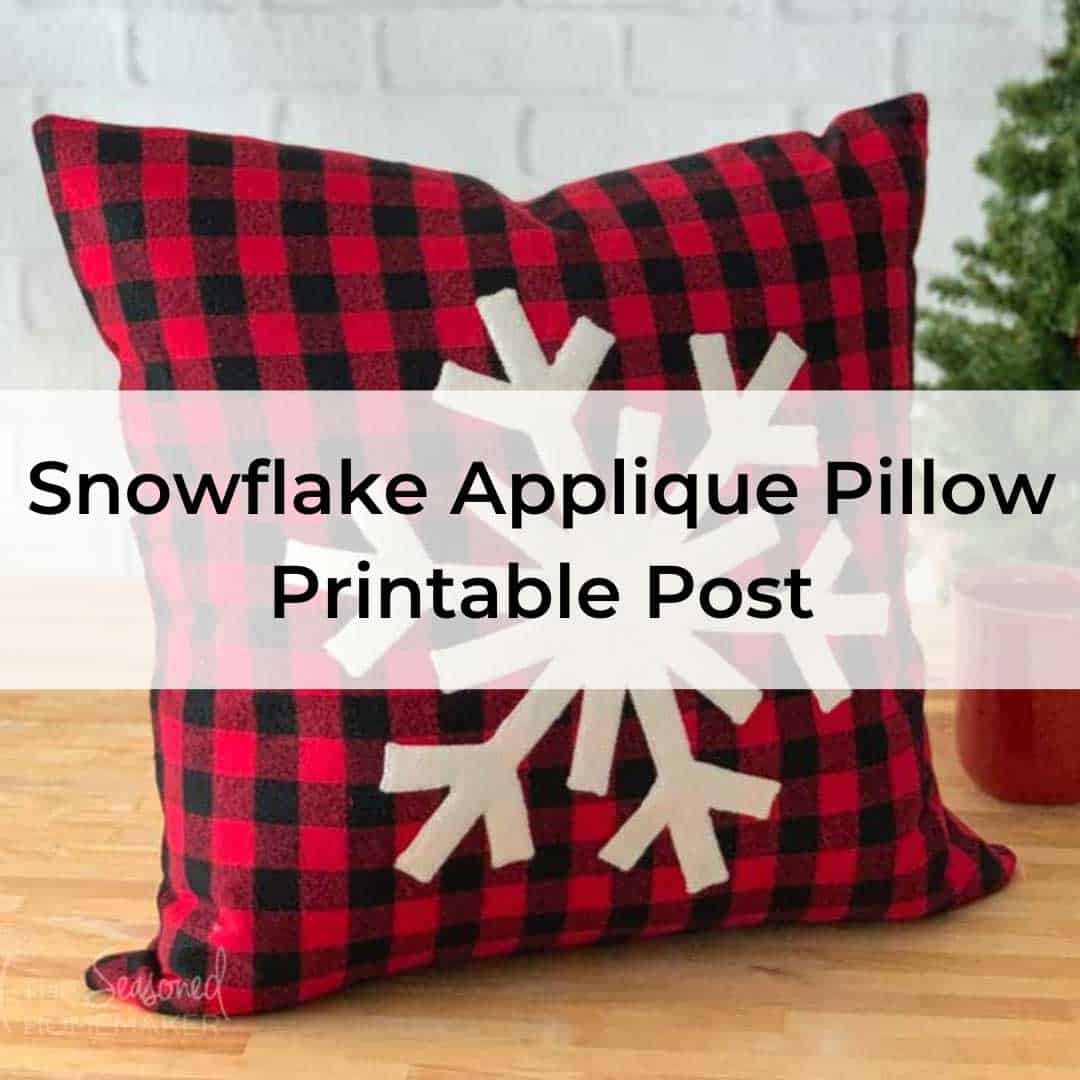
How to Make a Snowflake Christmas Pillow
This post may contain affiliate links which won’t change your price but will share a commission.
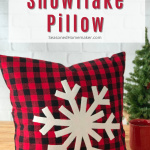
How to Make a Snowflake Christmas Pillow
Decorating for the holidays can be magical. Christmas trees and twinkly lights make everything so special. However, many home furnishings don’t go well with holiday decorations.
There is a way to make your everyday furnishings blend with all of the festive decorations in less than an hour. And it will make your furnishings have that holiday feel that you desire.
By sewing up a few envelope pillow covers you can make all of your furnishings blend with your holiday decor. And it is easy and inexpensive. If you can sew a straight stitch then you can sew these pillow covers.
Want an ad-free, printable copy of this tutorial? Scroll to the bottom of this post for more details!
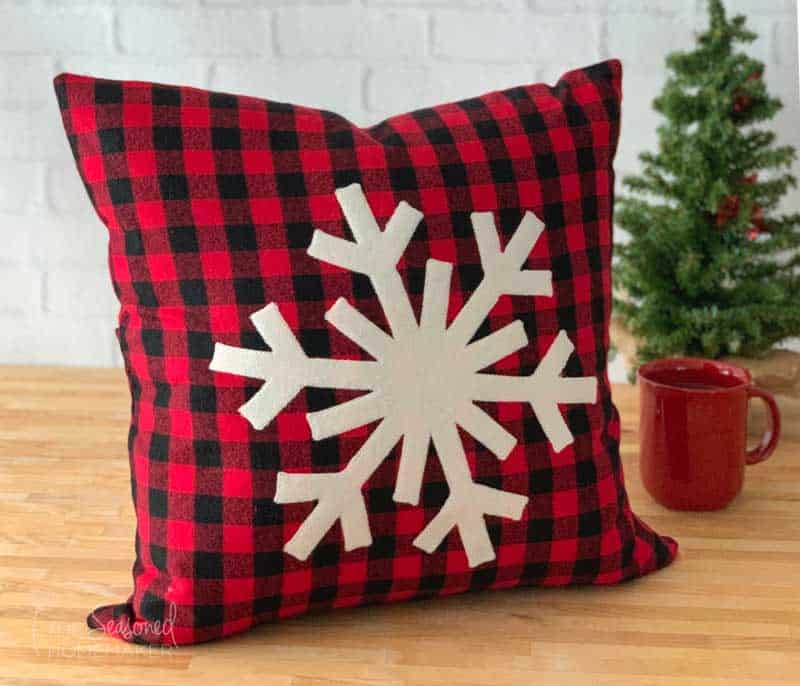
Materials
- Snowflake design (see below)
- 1 yard buffalo check or other holiday fabric
- (1) 12″ x 12″ piece of Felt (white or cream) – I used felted wool for my project, but craft felt works, too.
- Heat’n Bond Lite (or other fusible adhesive)
- Superior Threads Mono-Poly Thread
- Aurifil 50 wt. Cotton Thread
- 18″ x 18″ Pillow Insert
Supplies
- Sewing Machine
- Water-Erasable Pen
- Wonder Clips or Straight Pins
- Walking Foot
- Rotary Cutter with sharp blade
- Acrylic Ruler
- Self-Healing Rotary Cutting Mat
- Iron & Ironing Board
How to Make a Snowflake Christmas Pillow
Step 1: Prepare the Design
- Download the FREE Snowflake Template.
- Print and cut out a snowflake design.
- Trace the snowflake design onto the paper side of a piece of Heat’n Bond Lite.
- Rough cut around the design leaving a small margin about 1/4″. Set aside.
Note: If you need help learning how to applique, I have a blog post with more details. There is even a short demonstration video in the post. If the applique technique is still not clear, I recommend my applique eBook that has more details.
Step 2: Prepare the Applique
- Cut out a 12″ x 12″ piece of felt. Set aside.
- Fuse the Snowflake design onto the back of the felt. Be sure to place the textured side to the back of your felt with the paper side facing up.
- Set iron on highest setting without steam. Press for 15 seconds.
- Once cooled, cut out the Snowflake design.
- Remove the paper backing from the Heat’n Bond. The back of the fabric will now be shiny. Set aside.

Step 3: Making the Pillow Top
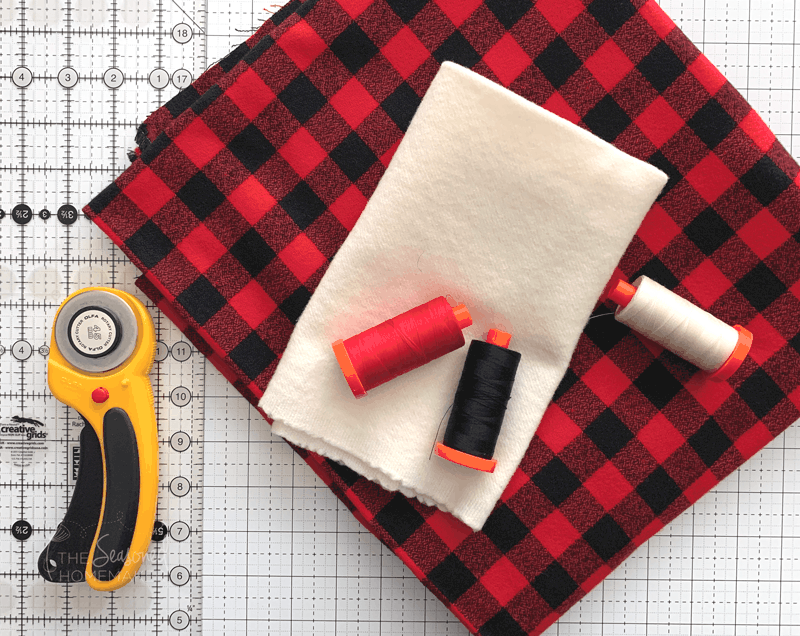
For the Pillow Top, cut a square from your fabric for your Pillow Front that is 1″ greater in length and 1″ greater in width than the pillow form. This tutorial uses an 18″ x 18″ pillow form, therefore you need to cut a 19″ square piece of fabric.
- Cut a 19″ x 19″ piece of fabric for pillow top.
- Find the center of the pillow front and mark with a water erasable pen or straight pins. Place the snowflake applique design to the center of the pillow front.
- Set iron on highest setting without steam.
- Follow the Heat’n Bond Lite directions and fuse the design to the pillow top using an iron. Press for 15 seconds.
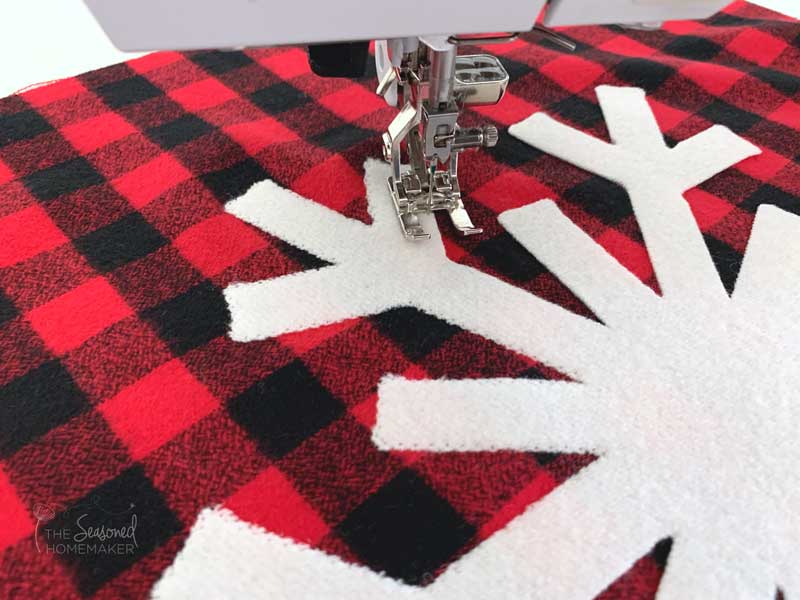
Step 4: Stitch Down the Design
For this step I used Superior Threads Mono-Poly Thread invisible thread on the top and Aurifil 50 wt. Cotton thread in the bobbin.
Invisible thread is nothing to be afraid of – the key is changing the tension setting on your sewing machine and using a ZigZag Foot or Open Toe Foot.
Here’s the secret to using the Mono-Poly thread. You may have to lower your sewing machine tension. Do a quick test, if all is well, no adjustment needed.
However, if your stitches are loose or pulling from the top you may have to adjust the tension. This will take a little fiddling around. For me I found that lowering my tension to 1.5 worked perfectly with Aurifil 50 wt. thread in the bobbin.
Next, you’ll want to use a very narrow zigzag stitch. Lower your zigzag stitch length and stitch width to 1.5 – 2.0mm.
Before stitching down, I recommend you do a practice piece to make sure your tension is set correctly.
Of course, you could use a straight stitch, regular zigzag, or even a satin stitch. It’s up to you.
Step 5: Making the Pillow Back
Since this is an Envelope Pillow, you are going to need a piece of fabric that is a little bit wider for your Pillow Back.
To make the envelope part, follow this simple formula: Take your pillow form dimensions and add 1″ to the length and 5″ to the width.
Cut out a piece of fabric that is 19″ x 23″ (because the pillow form is 18″ x 18″ and 18 + 5 = 23).
Cut the 19″ x 23″ Pillow Back in half so there are two pieces that are 19” x 11.5”.
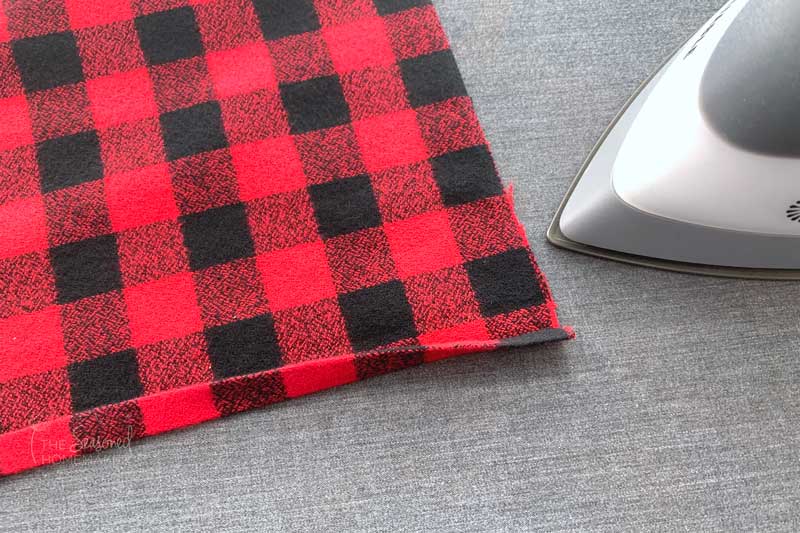
On each of the Pillow Back pieces double-fold under the long edge (19”) of both pieces. Press and top stitch.
Pro Tip: Use a Walking Foot to keep the checks lined up.
Place these two pieces rights sides up and overlap them until they are 19″ x 19″. Use pins to hold this shape.
Pro Tip: Stitch together at the top and bottom to keep the checks lined up.

Step 6: Finishing the Pillow
In this tutorial I’m using a buffalo check fabric which doesn’t have a right or wrong side. The snowflake applique makes the front the right side, but you will need to mark the back so you don’t get confused.
- Place pillow front and pillow back right sides together.
- Line up the checks and pin or clip to hold.
- Stitch around the pillow perimeter using a 3/8″ seam allowance.
- Clip the corners.
- Turn right side out and press seams.
Pro Tip: Use a Walking Foot when sewing the buffalo check fabric. Your seams will line up nicely!
Final Step
Insert your pillow form and enjoy your pillow!
>>> Want a printable version of the post? Click the pink button, and download the Printable PDF instructions.