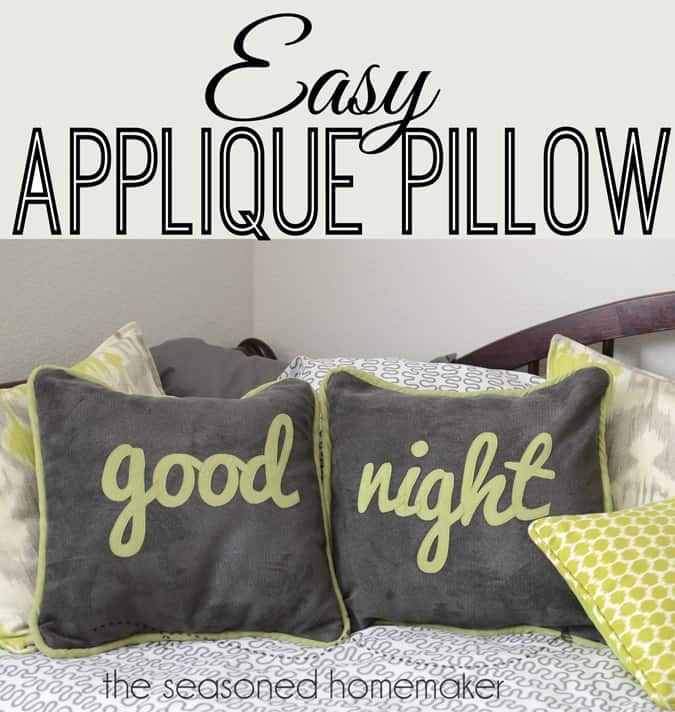
How to Applique Lettering to a Pillow
This post may contain affiliate links which won’t change your price but will share a commission.

When I began unpacking boxes after moving into our new home, I had a ton number of pillows that did not go with new bedding. For weeks and weeks they sat naked on different beds. You know, when you are unpacking, naked unmatched pillows get moved to the bottom of the pile on the ‘things that need doing’ list. For instance, I had a piece of fabric that I actually would lay across one pillow every time I made the bed. Pretty pathetic, huh!
Well not anymore, I’ve tackled that pile o’ pillows and had some fun doing it. Most are pretty unimpressive, just simple envelope pillows. However, I really liked how this pair turned out. And, they are super easy to make.
First, I had to find some fabric. I was at Joann’s over the Veteran’s Day weekend and they had a great sale. All of the clearance fabrics were 50% off of the marked down price. I found these two fabrics with little pieces on the end of the bolt so they gave me an additional 50% off the last of the yardage. I got 2 yards of the gray fabric for $7.00 and 2 yards of the grellow fabric for $6.00.
I used the Pacifico font (free from Dafont) which was loaded in my computer. Now, you do not need a Silhouette to make this pillow, all you need is a computer with the font.
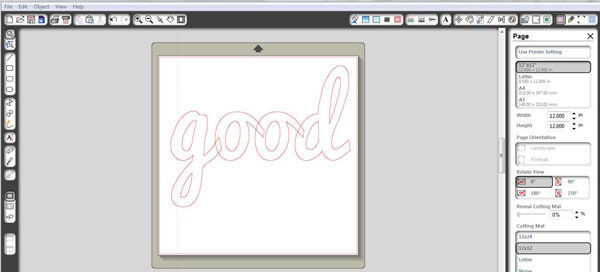
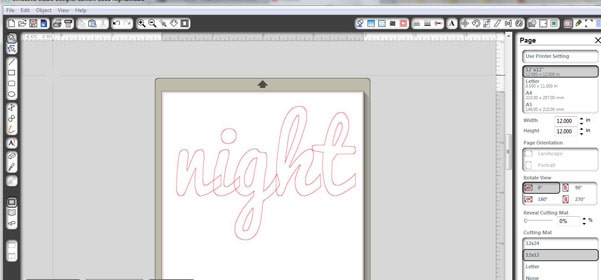
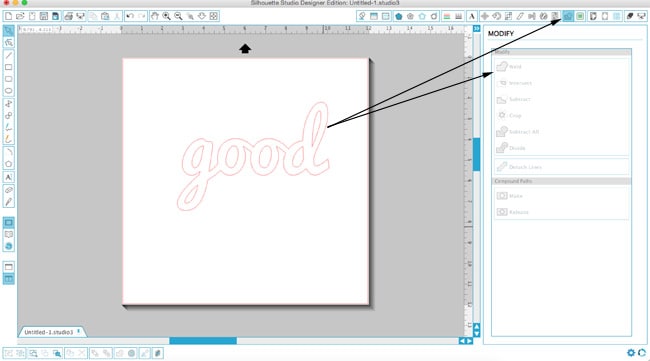
I kind of messed up a little where the letters overlap. Later, I figured out how to take those overlaps out – but not before making these pillows. It’s called ‘Welding’. Click on the Weld button the top and then click weld. It’s that easy. #liveandlearn Note: The software updated after I figured this out ~ that’s why the screen shot looks different.
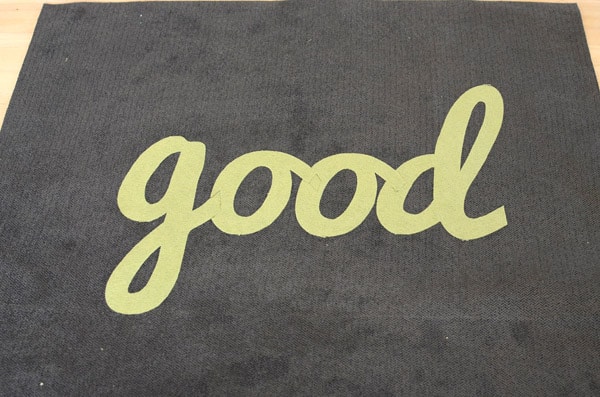
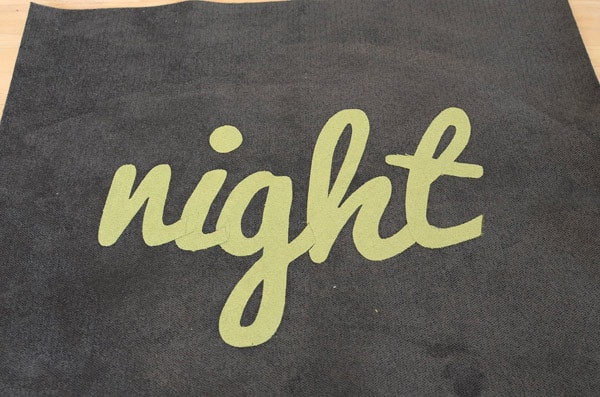
Since my fabric is pseudo-suede, it didn’t really matter. I stitched it down and it works fine.
I am using this tutorial on How to Make an Envelope Pillow. I cut out my pillow fronts and pillow backs ahead of time. From there I decided on how large I wanted my lettering. When doing a project like this it is important to print out the lettering and set it on the place you plan to appliqué. That way it won’t be over-scale or under-scale.
I applied fusible web to the back of my fabric and then cut out my phrases on the Silhouette. Then, I placed them on the pillow fronts and ironed them before stitching them down.
One thing I might do on my next project is draw lines with chalk across both pillow fronts. This would’ve made matching a little easier. #liveandlearn
At this point, I could’ve finished making the envelope pillows but I thought a little piping would look good. Adding piping to a pillow is simple. I have a tutorial called How to Add Piping to a Pillow ~ I assure you, anyone can do this.
After that I finished my pillows by sewing the back to the front and then inserted my naked pillow forms.
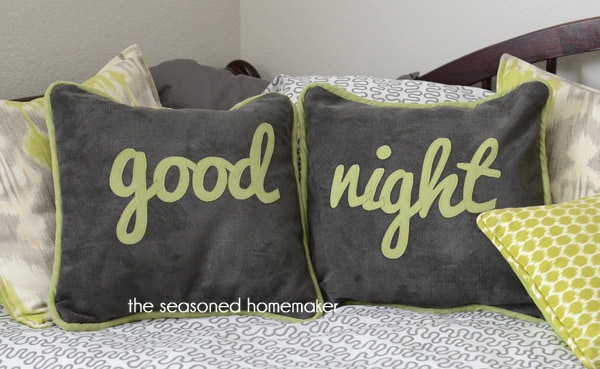
And no more naked pillows!
If you want to further develop your appliqué skills, check out my eBook:
Applique Made Easy: A Beginner’s Guide to Simple Appliqué Techniques
I’ve included this short video overview of applique to better explain.