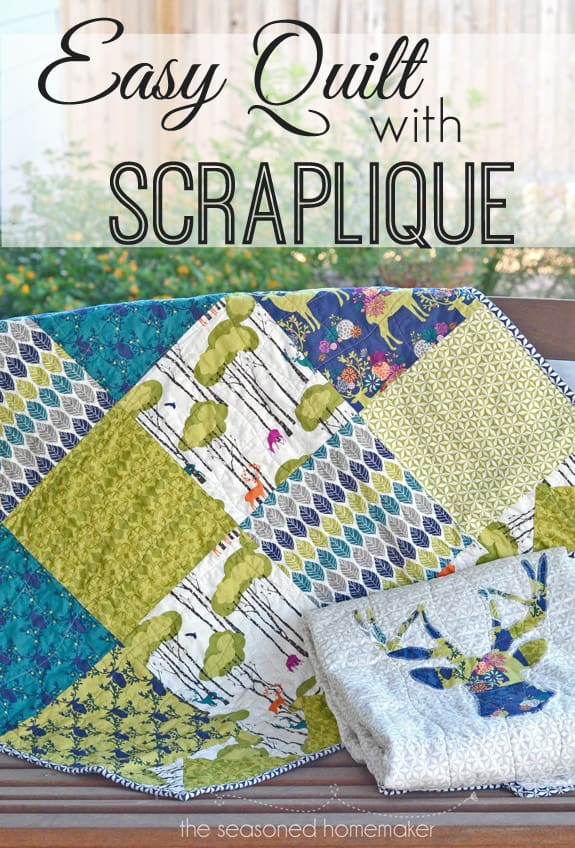
Deer Head Quilt
This post may contain affiliate links which won’t change your price but will share a commission.
I believe I can officially call myself a quilter. Yep, I have found my quilting mojo. And I can honestly say that Accuquilt has made me a quilter. Like my last quilting adventure, it began with fabric. I had seen this fabric on Fat Quarter Shop and fell in love.
For some time I had been wanting to make two small quilts for my grandsons when they sleep over. This seemed like the perfect fabric; it is masculine and trendy. And it didn’t hurt that the colors matched the guest room.
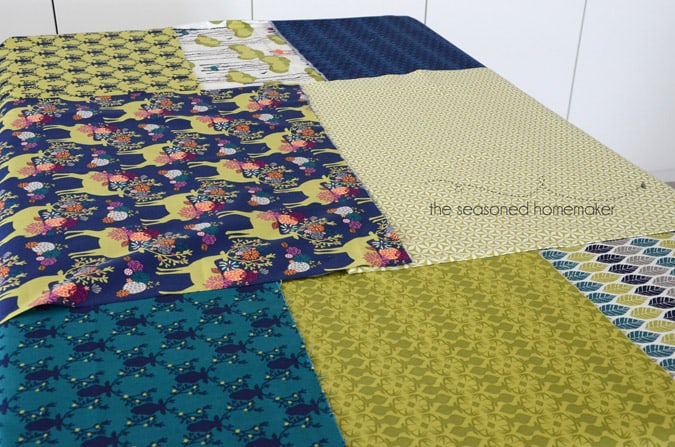
Since I am not a seasoned quilter, getting started is always the hardest part. One of my biggest challenges is never knowing exactly how much fabric to buy. That alone stalls me every time. I had thought about doing another strip quilt, but I loved this fabric and wanted the designs in the fabric to stand out as part of my quilt.
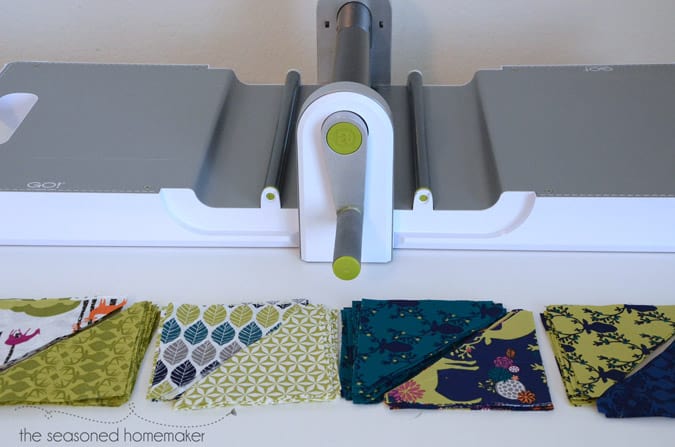
The Accuquilt 8 1/2″ Square Die is the perfect place to start. Because it will produce exact sized squares I could rely on my yardage calculations for two quilts that each have at least twenty 8″ squares.
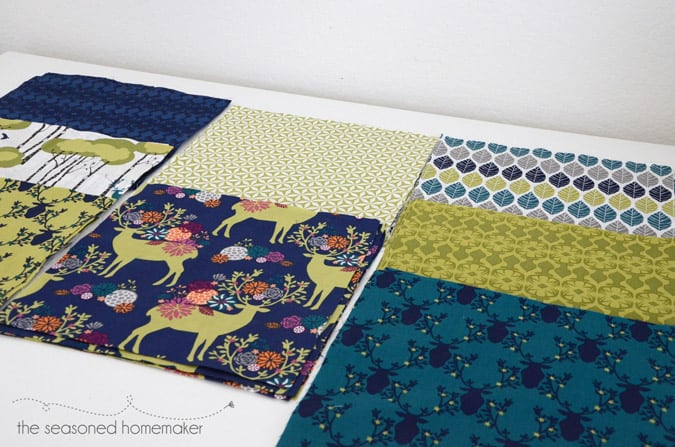
I fan folded the fabric and cut out 40 different squares from the my fabric collection. This is why I love the Accuquilt ~ it gives me a place to start and squashes my unfounded quilting fears. Plus it’s fast and produces consistent results. As a quilting novice, this is huge.

In no time at all I had all of these squares ready to be pieced. Fears abated; confidence restored and a bunch of quilt squares ready to sew. We’re talking minutes, here. Not hours.
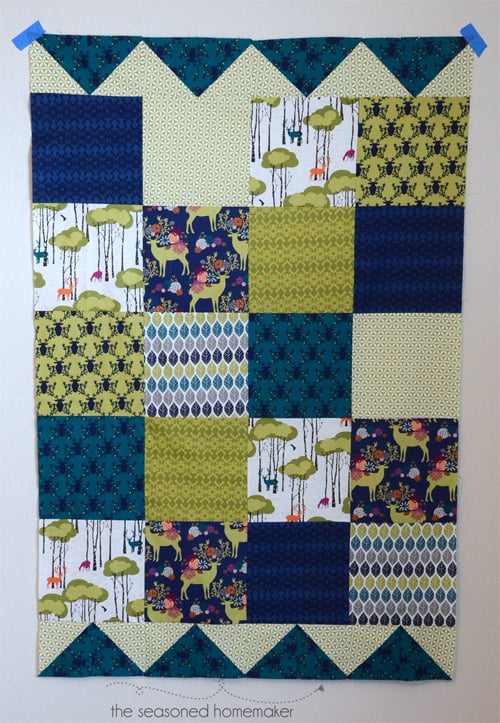
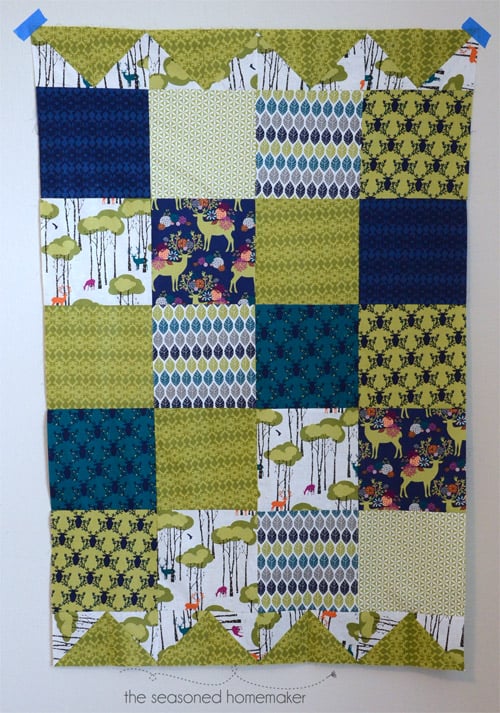
I have this one wall in my sewing room that I have purposely left blank. It is an ideal place to lay out a quilt. I used washi tape to attach the squares to the wall. The tape is ideal for moving the blocks around until I like the way they look.
Truthfully, this took me longer to figure out than the whole cutting process. I can get a little OCD about these things.
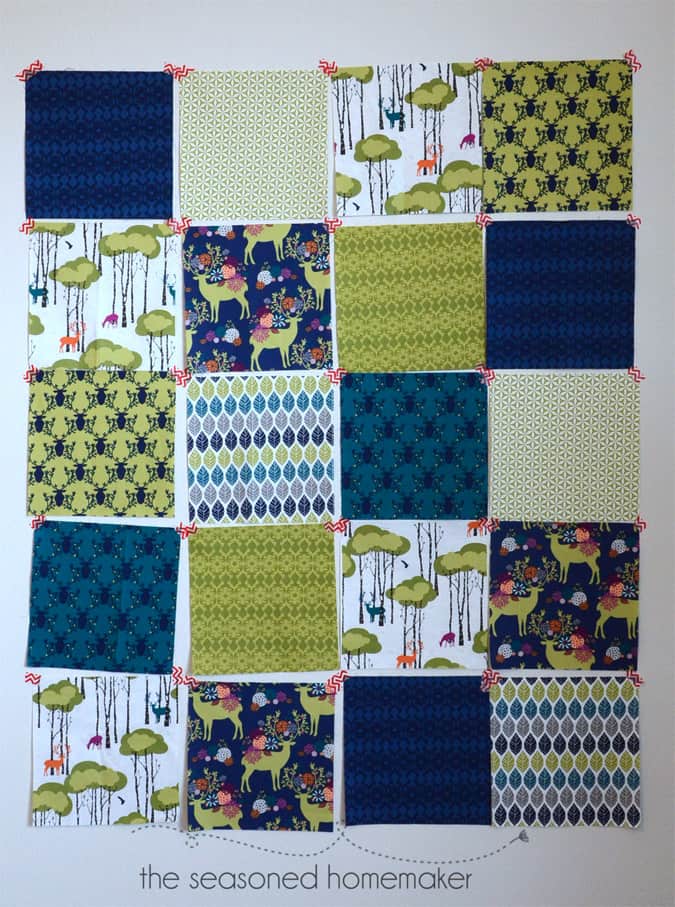
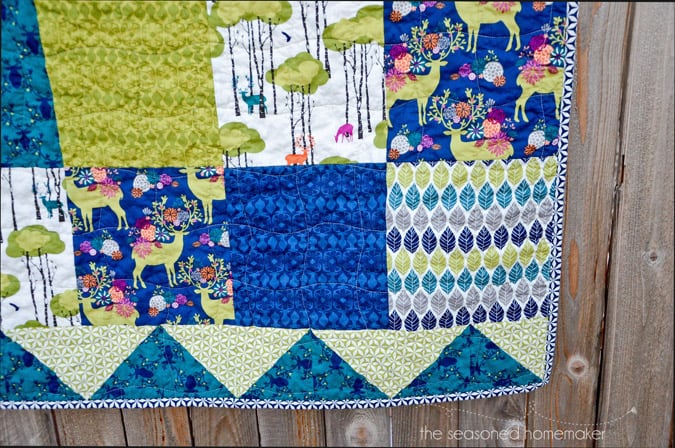
After I arranged my blocks I realized that a little more length would be nice. I also had some remaining fabric. I used this Half Square Triangle die and the rest of the remaining fabric to cut out a bunch of triangles.
Literally, there were only teeny-tiny little scraps once I had finished cutting. Being a very practical person, this makes me happy to have almost no fabric waste.
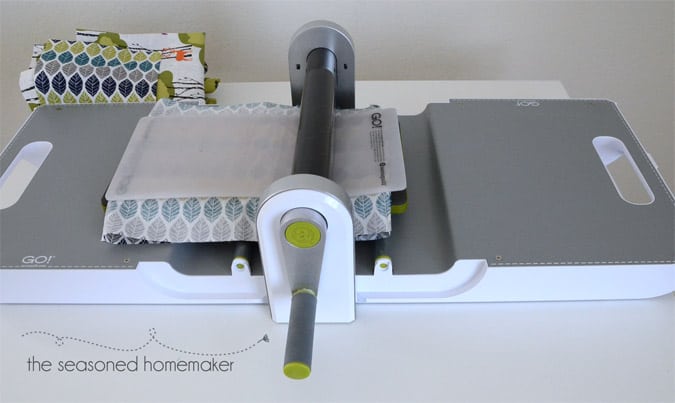
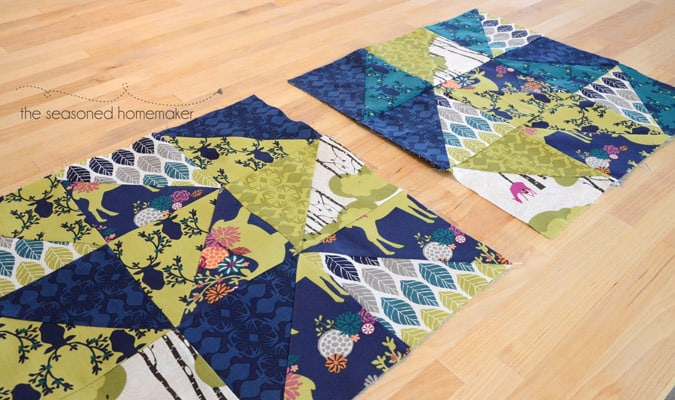
One thing I love about the Accuquilt dies is the built in 1/4″ seam allowance. On a half-square triangle it makes the cutting and piecing process simple. All these perfect little triangles ready to sew. #goosebumps
I separated out the triangles by colors into light and dark values. Because there were uneven amounts of fabric I ended up with triangle stacks that had uneven triangle amounts. This left me with only a couple of triangle combination choices.
However this limitation made what seems to be identical quilts turn out to be an easy way to distinguish each of them. This is a good thing because, I can assure you, my two grandsons will know which quilt it theirs to use when they sleep over. There will be no confusing of quilts.
Notice how they are different, but the same. The top one I consider the Blue Quilt and the bottom one I consider the Green Quilt.
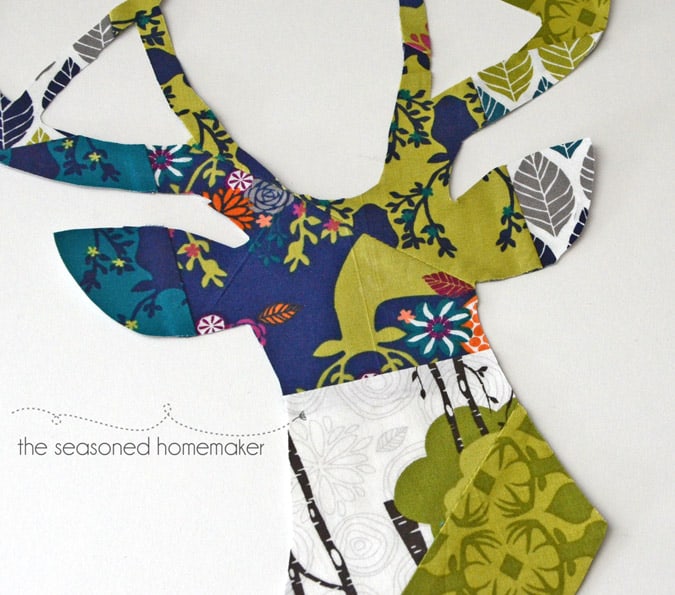
I still had a ton of half-square triangles left over so I decided to do a little scraplique for the back of the quilt. In no particular order I sewed together the squares until I had two 12″ x 12″ squares.
I then applied some Heat ‘n Bond fusible web to the back of each square. You can barely see the seams from the back of the square.
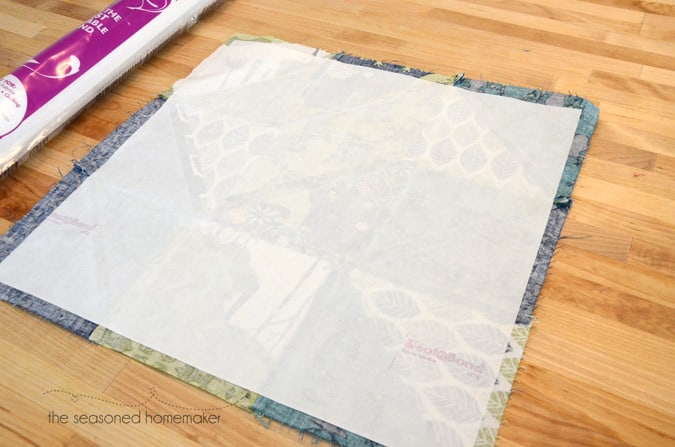
I used a deer head design from the Silhouette store and enlarged it. Then I cut it out in card stock. I didn’t want to try to cut out the design on the Silhouette because of all the seaming. I traced it onto the back of the paper side of the fusible web.
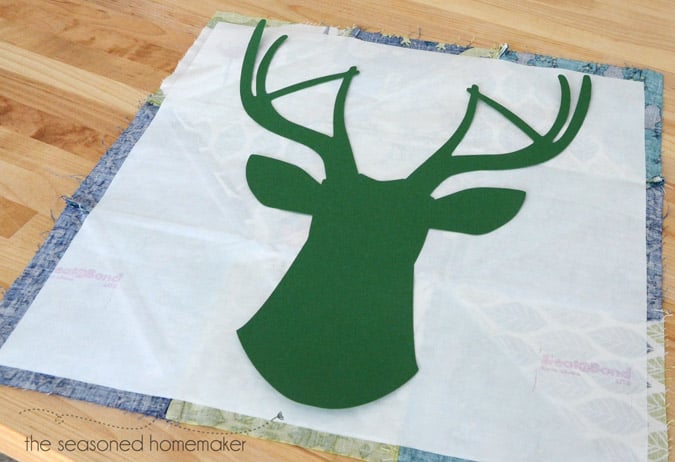
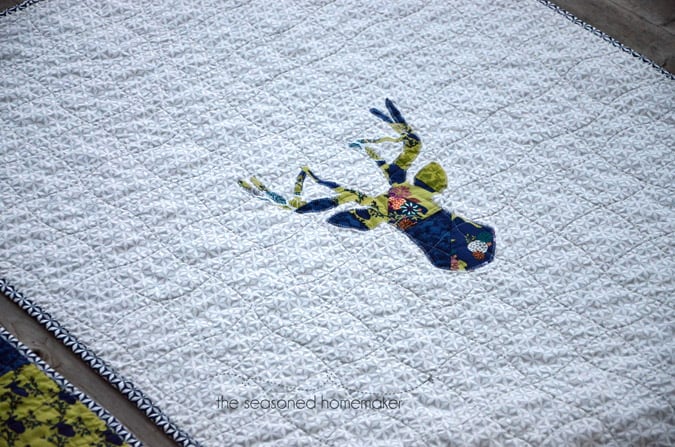
Then I cut out the two deer heads and appliquéd them in the center of my back fabric. Isn’t he adorable.
For me, the most terrifying part of quilting is putting the quilt together and then doing the actual quilting. Up to this point, I didn’t have a good way to put my quilt layers together. It usually required a large area and some moving of furniture. Well, I’ve learned a better way and you’re going to love it. I’ve created a two-minute video that demonstrates a simplified way to baste your quilt.
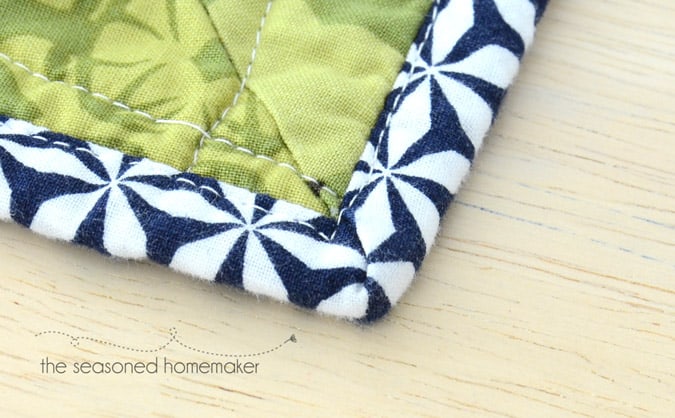
As far as the actual quilting is concerned, I am a free-motion quilting disaster. This time I decided to try something different. I have this Wave Edge Ruler so, using a Frixion pen, I marked my wavy quilting lines and stitched away using a walking foot.
For my binding I went to Fat Quarter Shop for a tutorial. This time I was determined to use a straight stitch to sew down my binding. Every other time I’ve used a wavy stitch. The tutorial isn’t overly long, but it completely explains how to cut, attach, and machine-sew binding. #missionaccomplished
The last time I attempted two small quilts it took forever. This time, I went with a simple block style and relied on my fabric for design. This made cutting and piecing a snap. I also used a simple method for my quilting and I was able to do the majority of my machine quilting while dinner was in the oven.
I’m starting to think I can call myself a quilter.