Simple Christmas Mug Rug
This post may contain affiliate links which won’t change your price but will share a commission.
This is a sponsored conversation written by me on behalf of Cricut. The opinions and text are all mine.
Inside: Simple Christmas Mug Rug
One of the reasons I wanted a Cricut Maker was its ability to cut out lots of applique projects.
Like Christmas appliqués for simple mug rugs. Or any holiday or special event.
Having a Cricut Maker simplifies the entire cutting process and saves me time (and heartache).
Now, think of some of your favorite things that would be great on a mug rug!
How to Make a Simple Christmas Mug Rug
Materials Needed

- SVG Christmas Tree Design
- (2) White Fabric (9″ x 12″) – Front and Back of Mug Rug
- 1/4 yard Binding Fabric
- Fabric Scraps
- Thread
- Heat’n Bond Lite
- Cricut Maker
- Cricut Rotary Blade
- Pink FabricGrip Mat
- Cricut EasyPress 2 or Iron
- Cricut EasyPress Mat or Thick Towel
- Fusible Quilt Batting
- Sewing Machine
- Water soluble marker (optional)
Choose a Design
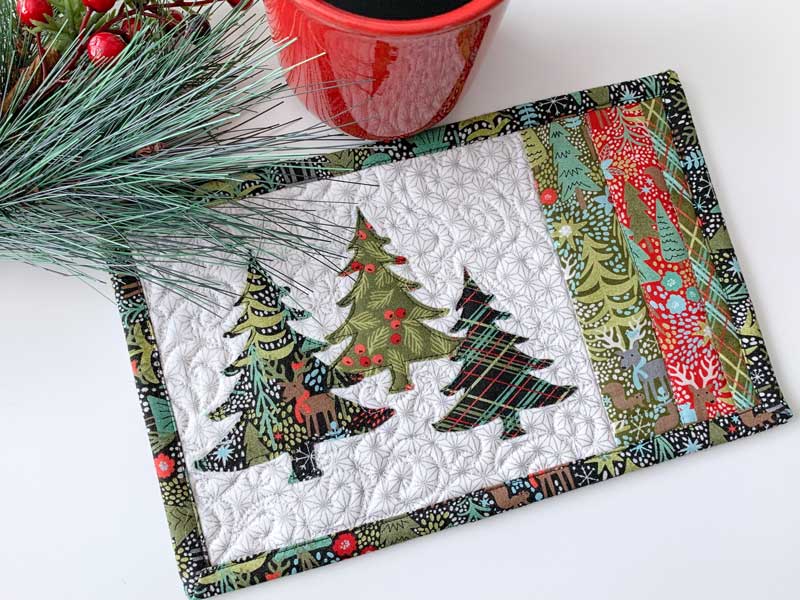
The first thing needed to make this design is an SVG Christmas Tree design (or any design you choose) which will get loaded into Cricut Design Space. For my design I chose the Pine Tree Silhouette from the the Images tab (on the left) in Design Space.
Once the design has been selected, open the SVG file in the Design Space software and resize the image.
Since I plan to cut three different sized trees on three different fabrics I made three individual cut files. Although I used the same design, I resized each tree so I could cut it individually. Note: Using the 24″ FabricGrip Mat eliminates having to make three separate files, but fabric placement on the mat would need to be factored in.
Prepare the Fabric for Applique
Now that the design and sizes are chosen, it’s time to prepare the appliqué fabric.
Cut Fabric Scraps larger than the tree size. Use the Design Space software to determine where to place the fabric. The software ruler markings match the markings on the cutting mat.
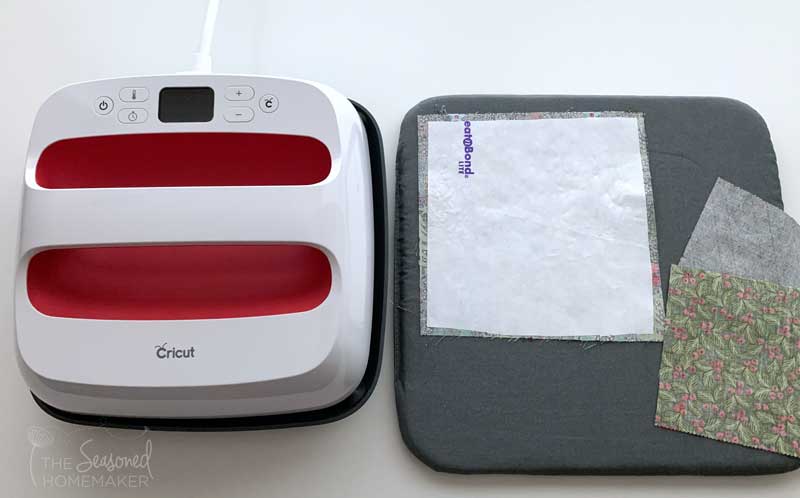
Apply Heat’n Bond Lite to the back of the fabric scraps. If using the EasyPress 2 with the EasyPress Mat, set the temperature to 305º F. and the timer for 20 seconds.
Once cooled, remove the paper backing. The back of the fabric will now be shiny.
Preparing to Cut the Design Out
- Since we’re using a symmetrical design there is no reason to mirror the image. However, using a direction-specific design (like lettering) may require mirroring the design. (See the Edit button for Mirroring)
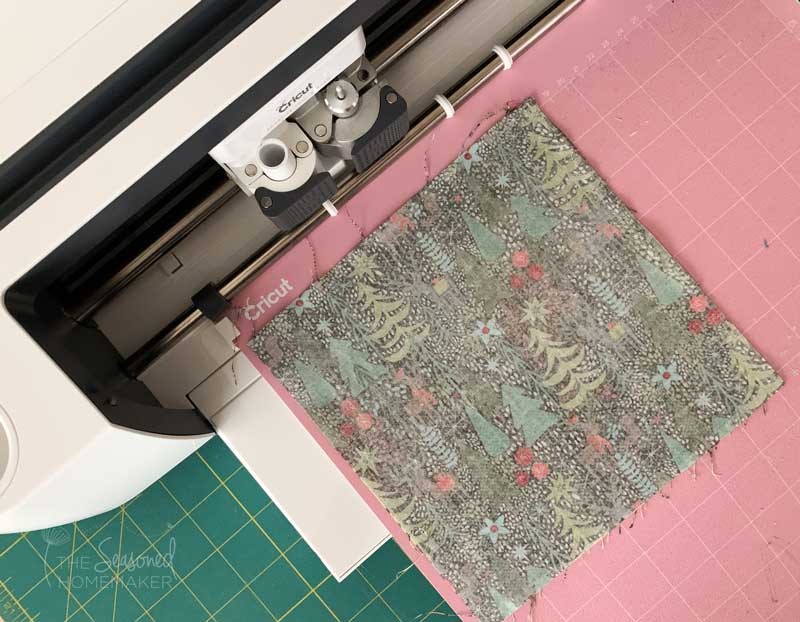
- Place your fabric right side down on the Pink FabricGrip Mat. The shiny side with the Heat’n Bond should be facing up.
- It is important for the fabric to be securely attached to the Pink FabricGrip Mat. Use a brayer to flatten the fabric to the mat. This will keep the fabric from stretching and secure it to the mat. Remember, when the machine is cutting, it’s going pretty fast over the fabric. Any place where fabric isn’t adhered to the mat could ruin the cut.
Cut Out the Designs
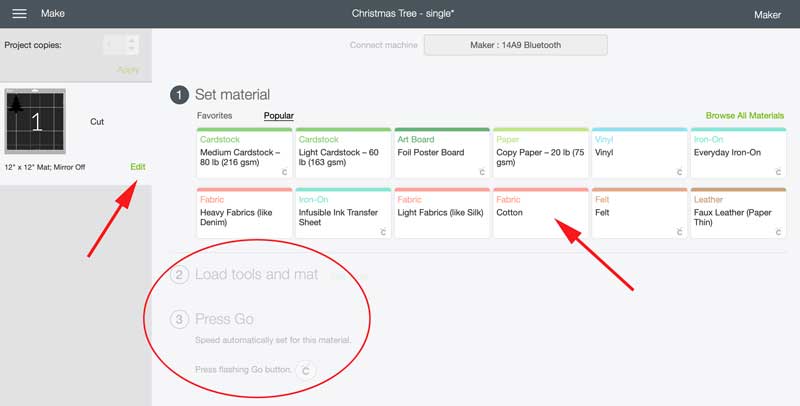
At this point, it’s time to cut the design. Follow the directions in Design Space. Be sure to choose “Cotton” for your Material. The software will instruct you when to load and unload the mat.
Once the design is cut out, carefully peel back the fabric at the corner and slowly pull away the excess fabric. The cut design will remain on the mat. Use a scraper to carefully remove the design and set aside. Finish cutting out the other two trees in the same manner.
Assembling the Mug Rug
Mug rugs don’t really have a standard size, but 6″ x 10″ is a good place to start. If you scroll up, you’ll notice the Materials List calls for 9″ x 12″ for the quilt front and back fabric. I purposely made this over-sized to account for denser quilting and personal creativity.
Placing the Appliqué Designs
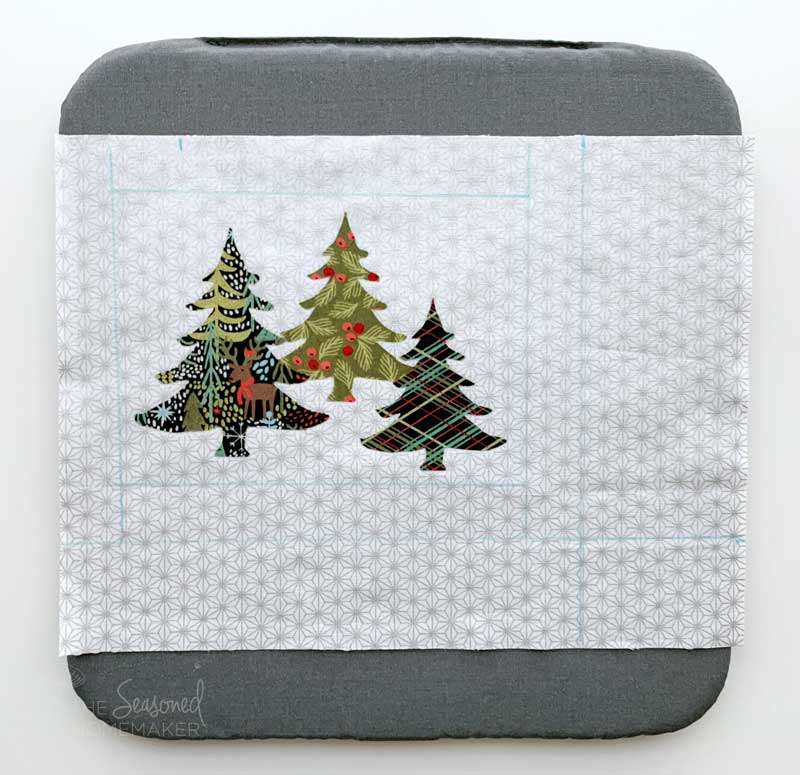
I recommend using a water soluble marker to map out tree placement on the quilt top fabric.
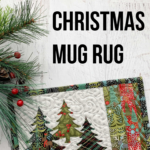
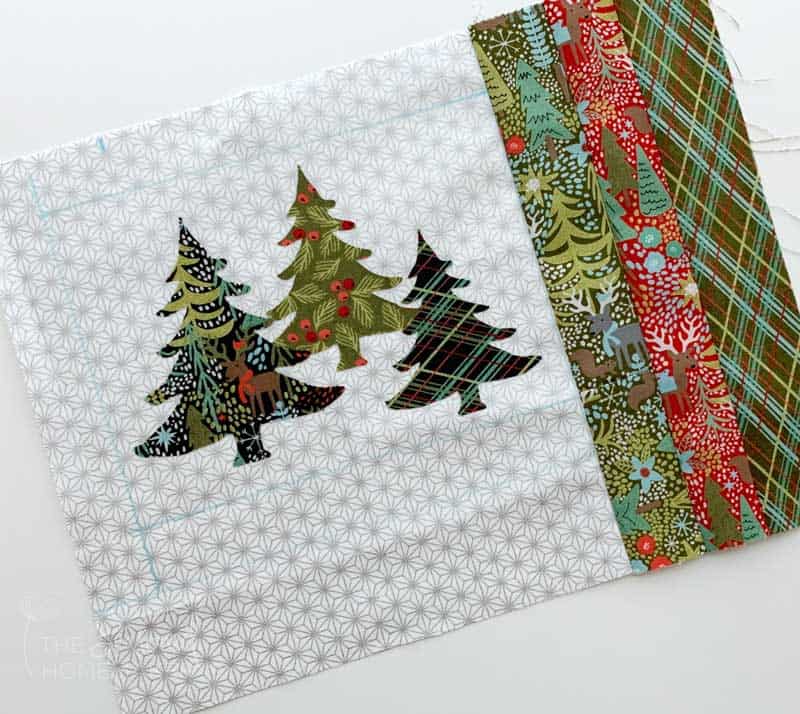
Next, determine where you want to place your trees. They can slightly overlap for a nice look. Keep in mind, you’ll be trimming this down after you quilt. Be sure to leave about 1.5″ – 2″ at the top, bottom, and sides of the trees.
Place the designs shiny side down. Using a dry iron or the EasyPress 2 (305º for 20 seconds), fuse the designs to the top fabric. Let cool.
For this mug rug, I decided to take a few leftover scraps to make three strips that will embellish the right side.
I cut each strip 1.5″ x 9″. This allows room for seam allowances and trimming.
Stitch these strips together using a 1/4″ seam allowance. Trim away 3″ from the right side of the quilt top and attach strips. The mug rug should still be approximately 9″ x 12″.
Time to Quilt
Make a quilt sandwich using fusible batting. Fuse the batting by pressing the front and back.
For quilting the trees, use a matching thread and straight stitch close to the tree’s edge. This will secure the design and add quilting.
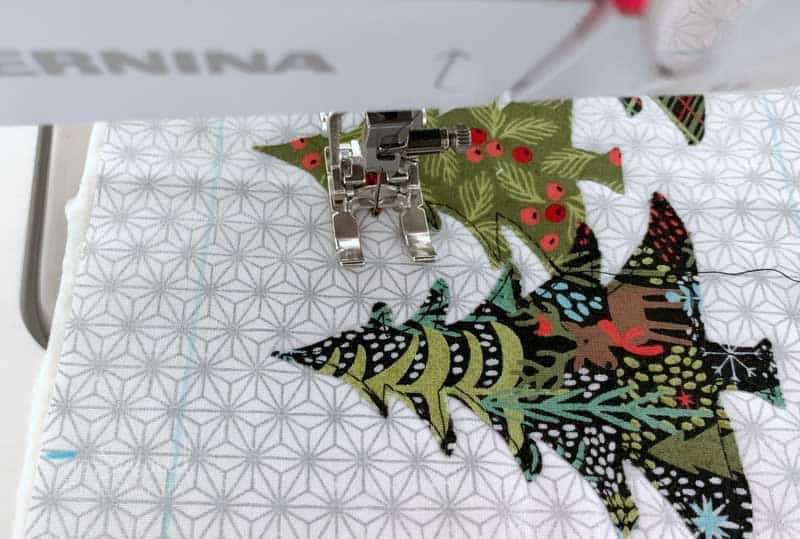
Quilt the rest of the mug rug using your favorite method. Simple straight-stitch quilting is a fast and easy way to quilt this design. Or, add some interest by quilting swirls for a snowy effect.
Be sure to remove any markings.
Finishing the Mug Rug
Once the quilting is finished, trim the mug rug to approximately 6″ x 10″ (or your preferred size).
Make enough 2.25″ (or 2.5″) binding to finish the project. Attach the binding using this tutorial.
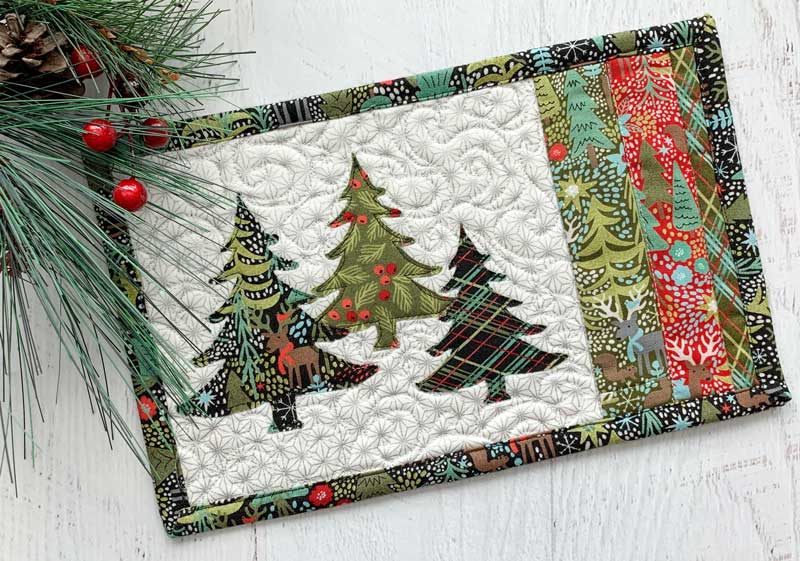
Wasn’t that fun and easy!
Using the Cricut Maker to cut out appliqué designs opens all sorts of creative possibilities.
I can’t wait to see what you create!