

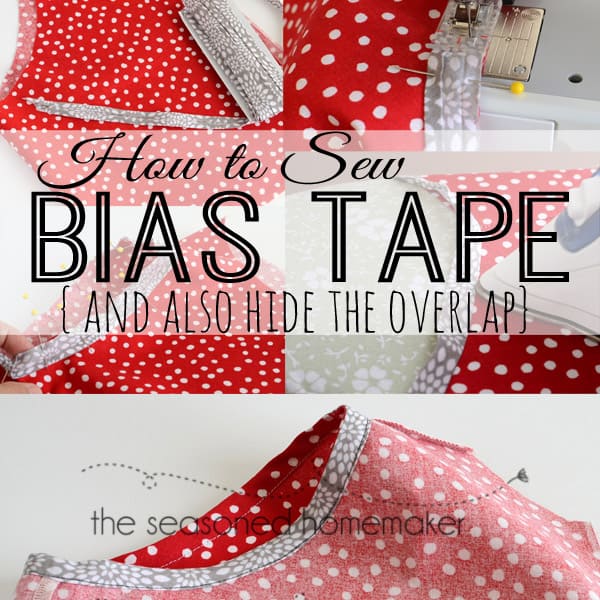
How to Make Bias Tape
This post may contain affiliate links which won’t change your price but will share a commission.
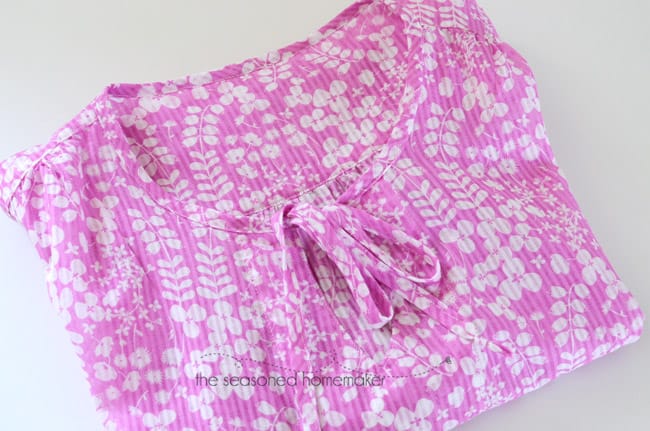
On Monday I wrote about a top I had made which used bias tape. Today I am going to show you how I made my bias tape. On Friday I will be back with instructions for attaching bias tape.

What is Bias Tape?
Just a quick review. Bias tape is used to finish raw edges on sewing projects. It’s cut on the bias which means it has a little stretch, making it perfect for sewing around curves such as necklines or armholes.
Note: Curious about fabric cut on the bias? Check out this blog post >>Learn more about fabric grain.
If you’ve ever been to a sewing store you’ve likely seen bias tape in packages that look like the ones in the image below. It comes in a variety of widths, styles, and solid colors. The two most common found in sewing stores are Single Fold and Double Fold Bias Tapes.

What is Single Fold Bias Tape?
Single Fold bias tape is a single wide bias strip that is perfect for securing the raw edge on a lightweight project such as an apron. Because it’s Single Fold, it doesn’t add any weight to the garment or project.
This bias tape is also great when you’re finishing an edge where the bias tape doesn’t show from the outside of the project. An example of this would be a neckline or armhole. Both are on curves and would need something cut on the bias to go around the curves.
When I was making and selling aprons on Etsy (before I converted them to patterns) I went through several thousand yards of Wright’s Single Fold solid-colored bias tape.
Purchased bias tape works fine until you want your bias tape to match your sewing project. In order to get the bias tape to be a perfect match you’ll have to make it from scratch.
What is Double Fold Bias Tape
Double Fold Bias Tape is double the size of Single Fold Bias Tape. It’s ideally suited for thicker projects such as the edge of a baby blanket.
It can still be used for hems and necklines, but will have a thicker appearance that stands out and adds weight to a project.
Double fold bias tape is also easier for people new to using this product.
How to Make Bias Tape
What happens when you have a project but there is no bias tape to purchase that matches? You make your own!
Making bias tape couldn’t be easier. You only need a few simple tools: an iron, ironing board, and a bias tape maker like the one’s below. A rotary cutter and mat are really nice, but you can still make bias tape without them. I owned the blue and red bias tape makers long before I had a rotary cutter and mat.

Notice how each of these bias tape makers have different openings. The opening size determines how wide you will cut your bias strips. I used the one with the yellow plastic handle for my shirt. To make my bias tape, I cut 1″ wide strips.
Step 1: Prepare the Fabric
Here’s how I make bias tape. I had a piece of leftover fabric from my top that was 22″ x 28″. I spray starched to give the fabric body and ironed out the wrinkles.

Step 2: Fold the Fabric on the Bias
I took the bottom right corner and folded it up towards the top edge of my fabric. This created a bias fold line.

Then I folded the top right corner down to the edge of the bias fold.

This gave me a new bias fold line that now is my cutting edge. Then I rotated my fabric until the folded bias edge lined up with a cutting line on my {really filthy and needs to be replaced} cutting mat.

Step 3: Trim away the fold
Next, I trimmed 1/8″ off the fold.

Step 4: Cut bias strips
I realigned my cut edge with a cutting line on the mat and began cutting 1″ strips. I chose 1″ because that is the size that fits best with my 1/2″ bias maker.

I made 5 cuts and got 10 strips that are 1″ x 20″.

Step 5: Attaching the bias strips
Now I will need to sew all of these strips together before putting them through the bias tape maker. Nothing could be easier. There are a couple of ways to do this. I am going to show you one that I think is very fast. The other way requires a more exact matching. In my opinion that method takes too long. However, my method does waste a little fabric.
Place the bias strips right sides together at a right angle with the top left corner of one edge matching the bottom right corner.

{Note: I always pin mine ~ just didn’t put a pin in the photo}

Pin the pieces together and line up the raw edge with the 5/8″ seam guide on your sewing machine. The guide will keep your seam straight and at a 45-degree angle.

Trim away the excess fabric.

Press the seams open and it is ready to put into the bias tape maker.

Step 6: How to use the bias tape maker
Cut a 45-degree angle on one end and slide the fabric into the bias tape maker.


Pull the fabric through the bias tape make, pressing as you go. Notice the almost non-existent seam.

That little 22″ x 28″ piece of fabric is now 9 yards of bias tape.

I find the process of making bias tape simple and rewarding. How about you?
Thank You so much. I plan on opening up an etsy shoppe soon and just bought alot of bias tape. Now I can make mine own and save money. Thanks again for sharing.
Good luck with your Etsy shop. I’ve been an Etsy seller since 2008. My Etsy sales have purchase me 3 sewing machines, a new computer, and a nice camera. Etsy Rocks!
OK, I got miles of bias cuts done. I have the tools to pass the pieces through, but, after 2 hrs, I could NOT get the strips to connect correctly. Thanks to YOU, I am going right now back to my sewing. I’m going to connect my miles & all will be right with the world. THANX SO MUCH!!!
Thanks for sharing. It is really nice to know that I’ve helped someone with a problem. Good luck with all that bias!
I have been sewing for most of my life and didn’t use self bias because it was a pain. you have opened my eyes and i will definitely bookmark this page for then next time I need self bias.
You have definitely opened my 77 yr old eyes. Thank you so very much.
Hi Leslie! What a wonderful tutorial on bias tape-making! I feel like I can accomplish this now, as long as I have this post to follow! Thank you so much for sharing! Blessings from Bama!
It is really easy ~ I wish you lots of luck.
Thanks so much for this tutorial! I’ve never attempted making my own bias tape before – It always seems really tricky and scary. But I’m totally going to do it now with this great tute! Pinning! 🙂
very nice demonstration for making bias tape. When I make bias tape the first thing I do is to spray starch the fabric and then iron it dry. I use steam in my iron when I iron the bias tape as it comes out of the bias tape maker. This gives it a nice tight crease that doesn’t flop open when it spray starched. It makes the tape so much easier to handle. I make a lot of quilts so the tape takes a beating when I’m sewing because the tape can sometimes be 4 x 100″ long and the tape still has nice creases. I do this for smaller projects too.
You make your tape the same way I do except for the way you fold the fabric to cut the strips. I love the way you do that. It could be done with a yard or fat quarter or what ever. Thanks for the info I’ll be using your folding method and letting my quilt pals in on your secret. Irene
Smacking my forehead right now. I did spray starch the fabric but failed to mention this in the post. I’ve corrected the error. Thanks for sharing this idea ~ it was shared with me by a friend.
What a great tutorial. You make it look much easier than I thought it would be.
This was interesting. I didn’t know about those bias tape makers.
I had no idea. What an easy to understand tutorial. I will do this!!
What a handy gadget!
These bias tape gadgets are about as handy as they get.
Thanks for the super clear tutorial, I’ve been wanting to try to make my own bias tape for a while but have been a little intimidated!
I can’t sew but wish I did! Thanks for sharing at DIY Sunday Showcase.
This is a great tutorial, love the pics. Now, I can do this. Thanks!
I have to get this gadget! lovely clear tutorial thanks 🙂
This is perfect! I almost bought one of these the other day but wasn’t sure what size I would need and how to use it exactly. Thanks so much for sharing!
I never really knew what bias tape was, but your tutorial is so good I feel like I have a good knowledge of it now! Thanks for linking this up to Frugal Crafty Home Blog Hop. I hope to see you back next Sunday night!
Thanks for posting this! I am still a little scared of bias tape (mostly the cutting part), but your tutorial makes it look so easy. I’ll definitely try it now!
Great tutorial! Always nice to know how to make your own bias tape to match any project you are doing.
Thanks for linking up to this week’s Catch a Glimpse party. I’ll be featuring this tomorrow. 🙂
Really appreciate the clarity and simplicity of your tutorial. I have always avoided making my own bias tape but I believe you have cured me. Thanks so much
Dr. Leslie ~ at your service.
OMG! Thank you! I have been sewing for almost a year and a half and couldn’t wrap my head around the process. Today, I made loads of bias tape. LOADS. For the first time! 🙂
Hold onto that bias tape. I have an idea!
i bought the bias maker and cannot get it to work — did as you showed but the fold would not stay even .I loved cutting the bias strip sooo easy . I used starch, steam iron but the fold kept slidng one side to the other
It may take a little more practice. There is a little trick to it.
Nakisha linked to this post of yours that, gasp, I had never read! Gosh I might need to make my own bias tape now.
What a good tutorial Leslie. I’m definitely going to order a bias tape maker. So great to have the pretty printed tapes!
Val
What happens if I don’t have enough fabric to cut on the 45*? Can I still make ‘almost on the bias’ tape? Thanks, Sarah
I’d try it first on muslin and see what you get.
Thank you for this tutorial! It is much less complicated than the tube technique I’ve seen. I haven’t made bias tape yet, but used the method for piping a welt on a chair cushion. It came out perfect and was very quick!
What a great tutorial! I always avoided making bias tape because it took me so long to cut the strips. Your method is so much faster. Thanks for sharing!
Julia
Will this method make bias tape that is slightly wider on one side so that it’s easy to topstitch on one side and catch the other side?
Absolutely the best instructions on bias tape making I have found! Now I just need to figure out how to do it for a leftie. Do you think I could just do the opposite ?
I’m not sure. Can a few of you “lefties” chime in and help out a fellow sewist.
I am a lefty, and these instructions worked great for me (I position my ruler OVER the part that I am cutting off, rather than having that part hanging out). If having the ‘cutting edge’ to your right, as Leslie shows, is awkward for you, just flip the folded fabric horizontally to put that cutting edge to your left. No need to try and fold it differently.
Leslie, thank you so much for these instructions — especially about folding the fabric! I made some bias tape yesterday by laboriously cutting strips along the whole length of my fabric . . . and it was so tedious! This morning I was able to cut ~1 1/2 yards of fabric in just a matter of minutes using your method. You are awesome!
Thank you SO much for this. Was making a blouse at the weekend and suddenly found myself needing to make some bias tape. I don’t have a tape maker so did the folding manually, but the rest of the method is perfect!
Thanks again!
Elizabeth
Hi Leslie, when you use bias tape for matching cord for for the pyjama how do you finish off the ends. I always seem to have some of the raw edge poking out
I just tie a knot in the end. I never have trouble with unraveling.
This is a wonderful tutorial. I recently needed bias tape for a project and didn’t have time to run to the store, so I made some of my own. I didn’t know exactly how to do it, but I knew it was cut on the bias and was folded in on both sides, so I made mine manually, not an easy thing to do. How I wish I had seen this first. I’m headed to my favorite craft store today to pick up the gadget. I’m thinking I will be using a lot more bias tape now! Thanks so much! I have an Etsy store that I just recently opened and I aspire to be as successful as you have been. Do you ever post any of your tips?
I have been making and using bias tape for years and have read or watched lots of bias instructions. This is the best one I have seen, clear instructions, pictures and I learned something!
Thank you so much for this tutorial! So easy to follow, and the photos are fantastic!
I never thought of making bias tape! Thanks for sharing this very detailed tutorial:)
I bought on of the little gadgets once but couldn’t figure out how to get the fabric trough it when you start. Can youhelp me? Thanks, Kathy
Thank You! Thank You! This is one of easiest instructions PLUS photos for Bias Binding. When I taught 4-H and Girl Scouts how to sew I used a pattern for Girl Scouts and this had the best directions, that all my sewers figured out with VERY little assistance. And best of all they enjoyed themselves.
Kat Jakee
Where do you get your bias tape makers? I’ve looked for a 2.5 inch to make 1.25 wide tape (final). I’ve had no luck. Simplicity sells a 2.5 but it only folds in in half. I can easily do that with my iron. Thank You…June in N.C.
Amazon sells a complete set here: http://amzn.to/1NzOdBK (affiliate)
What is the reason for folding the fabric that way? does it keep the tape from stretching?
Thanks
Quicker cuts. You need stretch for true bias tape.
It is possible to iron in the folds without a gadget – just use a long pin in your ironing board cover. Should be pinned in – out – in – out with the middle being the final width you want your tape to be. Learned this in 4-H years ago. Will try to find a picture. Works very well.
I have always made my own bias tape and have never used any gadgets. I simply followed the steps that you did to prepare the fabric strips. I always make my strips 2 1/2 ” wide since I do the double French binding on my quilts. It holds up a lot longer. Anyway, I simply folde the 2 1/2 ” strip in half and iron it with wrong sides together the length of the entire strip. I roll the binding around an empty toilet paper roll to keep it neat. it is a lot of fun making your own bias tape since you can make it scrappy or all one color but you can choose whatever fabric you want to bind your quilt. I like to choose stripes and polka dots as I bindings since they add an interesting final touch to the quilt.
Great tutorial. I need one of these babies! Is there any formula to figure how much fabric gives a set amount of bias tape and vice-versa?
Cute little gadgets!!! Where do you get them?
Clover Bias Tape Makers available here. (affiliate)
Thanks so much for posting this. This is the best description I’ve found for how to join the ends of the bias strips.
TY for the great instructions on Bias tape making. Did you cut off the extra strip at bottom after folding the square? How long was your finished bias from this size square?
I’m not sure I completely understand the question but here goes. When attaching the two bias strips together a small square is formed. I trim this down to 1/4″ and cut away any excess. Usually, one fat quarter will yield around 4 yards of bias tape.
Thanks for this. I followed your instructions while making bias binding for the first time, and all went well. 🙂
My scrap is 18×22 but I think I’m going to give this a whirl….I think I need about 3 yards of bias strips for piping and knew you had a tutorial on continuous bias that I could use! Thanks Leslie!
http://www.makeit-loveit.com/2015/05/how-to-make-one-continuous-strip-of-bias-tape-from-one-square-of-fabric.html
I’ve made my own bias tape for years, using a trick that my mom in law taught me. I just found a detailed tutorial on-line which explains how to make it; the nice thing with it is that you can save yourself having to sew all the pieces together, as you sew a ‘tube’ and cut a continuous line.
Thank you so much! This is the best bias tape making tutorial ever! I just made one using this method and it works perfectly to me! im so happy!
Just purchased these to make bias tape. I am new to sewing and making pillowcase dresses for granddaughter. I hope to make some for children in Africa. Bias tape on the arm hole looks so much better to me.
I couldn’t do any sewing without the help of people like you. Thanks for taking the time to share your talent!
Awww.
Love this tutorial! I have made my own bias tape before, I was using a scrap fabric to try and eke out enough bias tape to bind the armholes on a nightgown for one of my granddaughters. Because of the fabric size and shape, I couldn’t fold and cut as I normally would, so my ends were not angled properly. I went through all of my sewing books, looking for pictures that would show me what it “should” look like, but found none! Then I spent some time experimentally sewing two strips together, but could never get them right. One look at your tutorial and the excellent pictures, and bam! my tape is made :-). Thank you – I’ve also subscribed so I can learn more from you!
Thank you so much for this tutorial. I make cloth dolls and don’t like raw edges on their necks for turning under and gathering. Am going out to buy a bias maker so l can have matching bias on the dolls neckline. your post is the best l have found
Great tutorial, I ‘m new at sewing and like to finish neckline and armholes with bias tapes. It’s been below average . Now I hope to make my work more professional. Thank you.
I love this sight and learned a lot of new tips and tricks.Thank you for sharing.I also want to know How to get some tools ,threads etc for Quilting and Sewing from London? Will you Please guide me by telling about some specific shops there? Thank u.
Have you heard of the site: Tilly and the Buttons. She’s London based and is sponsored by many London sellers.
I’ve started to make my bias binding…ironing it…with my hair straightening iron. Works like a charm!!!!
I am covering a pillow and needed to know how to sew the strips of fabric together for my piping.
Very helpful!
Thank you!
I love bias tape. I think it looks so good. I bought a bias tape maker I think it is 2 inch size. This is so easy to follow. Thank you so much.
My aunt sent my grandmother’s old button box to me recently & in it I found some interesting things! One is made of metal & no one seems to know what it is. Someone suggested it may be to make bias tape.
Could I please send you a photo somehow & see if you can identify this article? She had 5 of them in her button box.
Thanks!
I’m new to biased tape so thanks for the tutorial! I have a question… I know that cutting fabric on the bias can make it get deformed since that is where there is the most stretch (which is why you need to stay stitch a collar, for example). So do I need to worry about that with the bias tape?
You only want to use bias tape when you need it to have a little give or stretch. For instance, you would make straight-grain tape for binding a quilt because it is square, but use bias tape for binding the hem of an apron that is curved.
Just wanted to thank you immensely for the fantastic tutorial on bias tape.
What size tape do I cut for 18 mm bias tape maker, used some cotton polyester fabric and cut 1.5 inch strips on continuos method, did not starch but the folds were not briliant on some. Have an adjustable bias foot for Husqvarna Viking machine and it did not go thorough well, first time I tried but is the width of fabric strips correct please.
Will need to get better but I hope this fooot will help to sew on easier.
Putting this out there. Anyone with a Viking machine know the answer?
My main concern is how wide to cut the material strips to go through the bias tape makers which I have in 6mm 12mm 18mm and 25mm.
The one I tried did not fold over neatly and hence problem going through the adjustable bias binder foot.
Your tutorial was, by far, the best one online. Very easy to follow. Thank you for doing it.
Thank you! Making my own bias tape is just what I needed to know how to do, but I didn’t realize it until I ran across this tutorial. Very clear and easy to understand.
If I can make bias tape anybody can . Love your blouse.
Just made 7 yards of 2.5 inch wide bias binding for QUILT –stripe on the bias, very cool Thank you!
Thank you for these instructions. You’ve helped me finish a stack of supplemental face masks for health care workers during the Great Elastic and Bias Tape Shortage of 2020!
Just a tip, when pulling the fabric through the bias maker, have the metal side uppermost. In other words turn it over. The pressed edges are now underneath and I have found this way is so much easier when making narrow binding such as 1/4
Hi Leslie,
I am a seasoned sewer myself and have made bias tape in all kinds of different modes. I have always had issues with the seams connecting the pieces of tape. It catches in the bias tape maker and will not pull through. The last batch I made, I went so far as to fuse wonder under to fuse the seams to the main piece so it would pull through the bias tape maker. Even then I had to really pull to get it through. I tried cutting the seams straight with the edge AND also, tried cutting the seams at an angle. What am I missing/doing wrong?