How to Make a Fabric Storage Basket
This post may contain affiliate links which won’t change your price but will share a commission.

Inside: How to Make a Fabric Storage Basket
Fabric storage baskets are a great way to organize your scraps and stash. They are also a great way to use up some of your scraps.
This tutorial will show you how to make a fabric storage basket using a patchwork quilting technique. However, you can also make them out of a single piece of fabric and eliminate the optional quilting.
I recommend you use a single fabric color theme to make a series of baskets to hold your scraps. For instance, use red scraps to make a basket that will hold your red fabric scraps, use blue scraps to make a basket to hold your blue fabrics, etc.
Want an ad-free, printable copy of this tutorial? Scroll to the bottom of this post for more details!
Materials
- (1) 18″ x 22″ piece of Patchwork Fabric (or Fat Quarter) for Basket Exterior
- (1) Fat Quarter for Basket Interior (18″ x 22″)
- Aurifil 50 wt. Cotton Thread
- Interfacing
- Single-sided Fusible Foam Interfacing – For soft, but firm sides (my preference and what is demonstrated in this tutorial)
- Peltex 71F Single-sided Fusible Interfacing – For stiff sides (not shown in tutorial)
- Water Erasable Pen
Supplies:
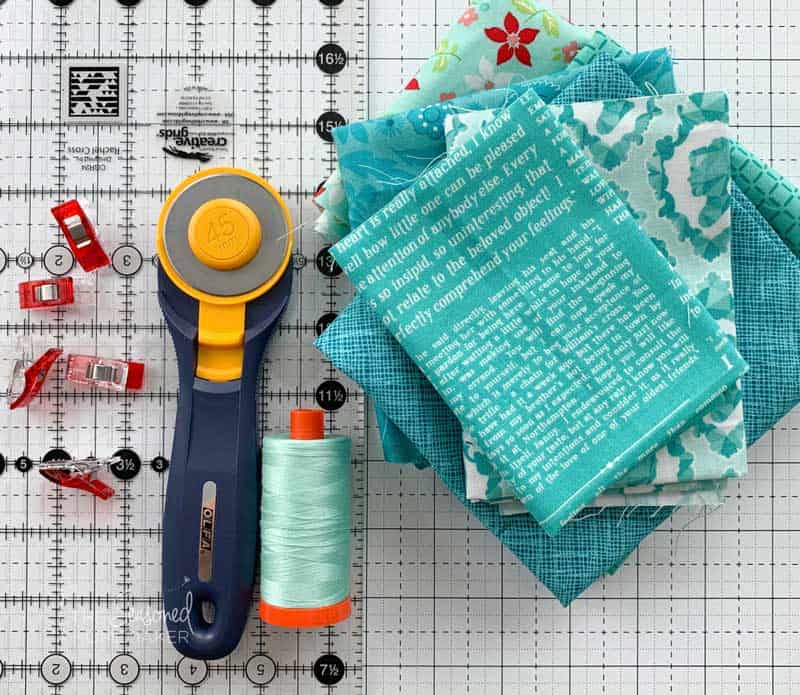
- Sewing Machine
- 1/4″ Foot for your sewing machine
- Wonder Clips
- Rotary Cutter with sharp blade
- Acrylic Ruler
- Self-Healing Rotary Cutting Mat
- Iron & Ironing Board
- Stripology Ruler (optional)
Fabric Storage Baskets Tutorial
Step 1: Cutting Instructions

Basket Exterior Cutting Instructions
- Cut one piece of fabric 18″ x 22″ for Basket Exterior. This can be from a fat quarter or a patchwork piece you create. See Patchwork Option below for ideas.
Patchwork Option:
Straight-cut a variety of fabric pieces in different widths and randomly piece together in a manner that is pleasing to your eye. Trim down to 18″ x 22″.
Pro Tip: I find the Stripology Ruler the perfect tool for cutting strips that will be pieced together. You can stack several layers of fabric together making it really fast to cut a variety of strips. Feel free to cut strips in a variety of sizes to give your patchwork a unique look.
Basket Lining Cutting Instructions
Cut one piece of fabric 18″ x 22″ for Basket Lining.
Note: The Basket Lining is designed to wrap over the top about 1/4″ to give the appearance of binding. If you prefer to have a wider “binding”, cut your fabric piece to 18.5″ x 22″. If you are using a fat quarter as your lining piece you can also trim down the top edge of the basket 1/4″ once it is constructed. Either method will give you the appearance of a wider binding.
Flexible Foam Cutting Instructions
- Cut one piece of single-sided fusible flexible foam 20″ x 24″.
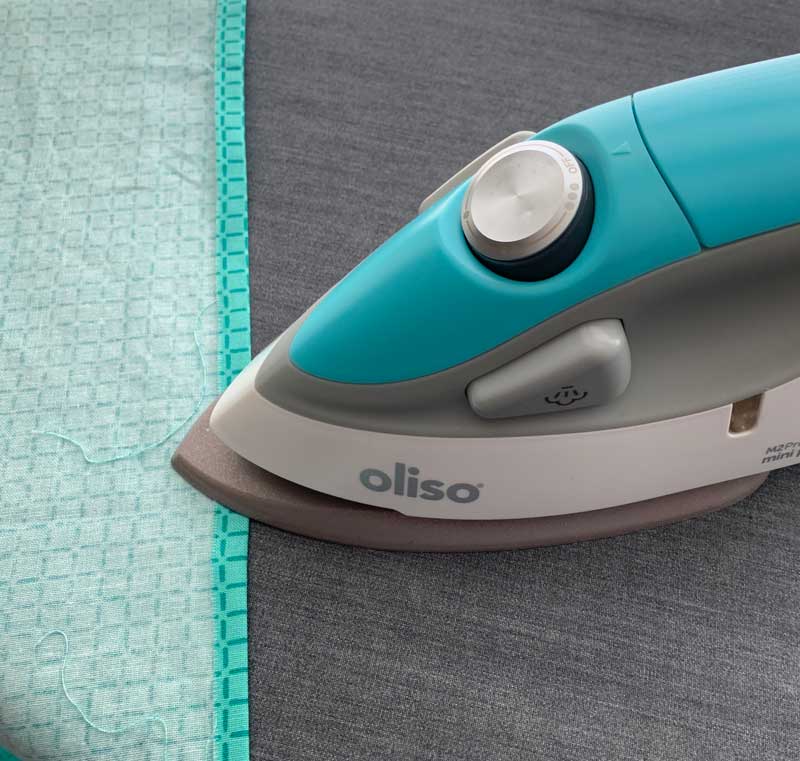
Step 2: Quilting Basket Exterior
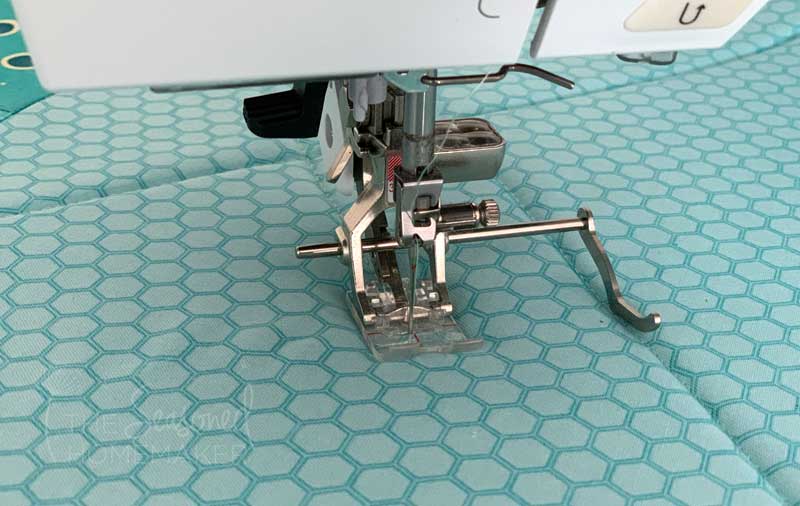
- Fuse the flexible foam interfacing to the wrong side of the Basket Exterior fabric. Note: To quilt a diagonal design, mark from corner to corner to create a starting line. Turn and mark from the opposite side corner to corner. Use a guide to quilt 1.5″ apart using a 3.5mm stitch length.
- Quilt the Exterior Fabric to the Flexible Foam. This will make your basket a little stiffer and it will make it sit more upright and slouch less.
- Trim down to 18″ x 22″
- Zigzag around the perimeter. This makes it easier when you’re putting everything together.
- With right sides together, fold the fabric in half matching up the 18″ sides. Stitch together with a 3/8″ seam allowance.
Step 3: Making the Bottom of the Basket
- In order for the basket to have a flat bottom you will need to create a pleat for both the Exterior and Lining fabrics. To do this, fold the bottom corner of your basket so it creates a triangle in the corner. Make sure that the triangle is centered with basket bottom. Pro Tip: Pressing the bottom edge flat will help you line up the seam for making your pleat.
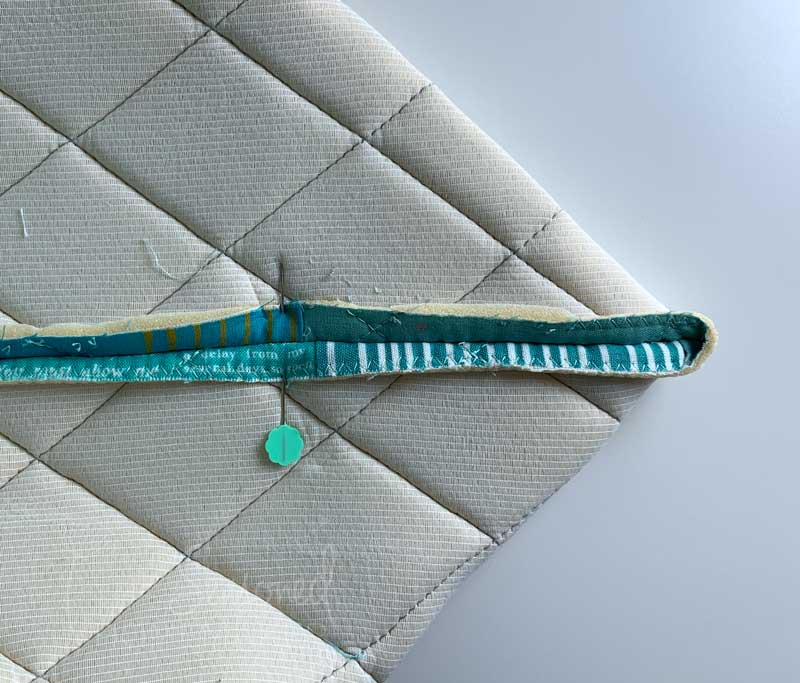
- Pin the corner. Using a water erasable pen, make a mark 2.5” away from the corner. Draw a stitching line and then stitch across to create a pleat.
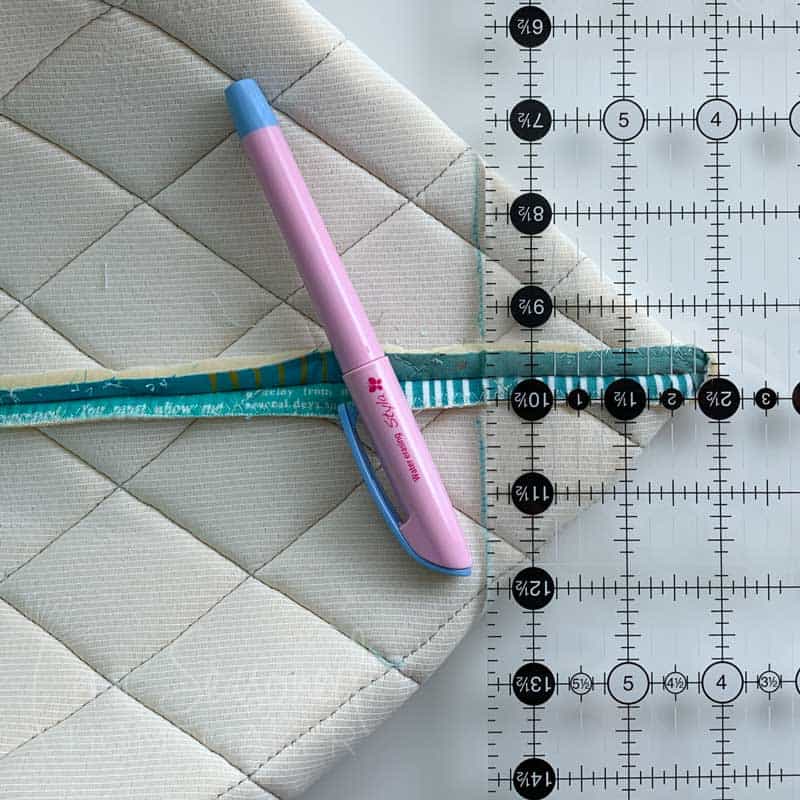
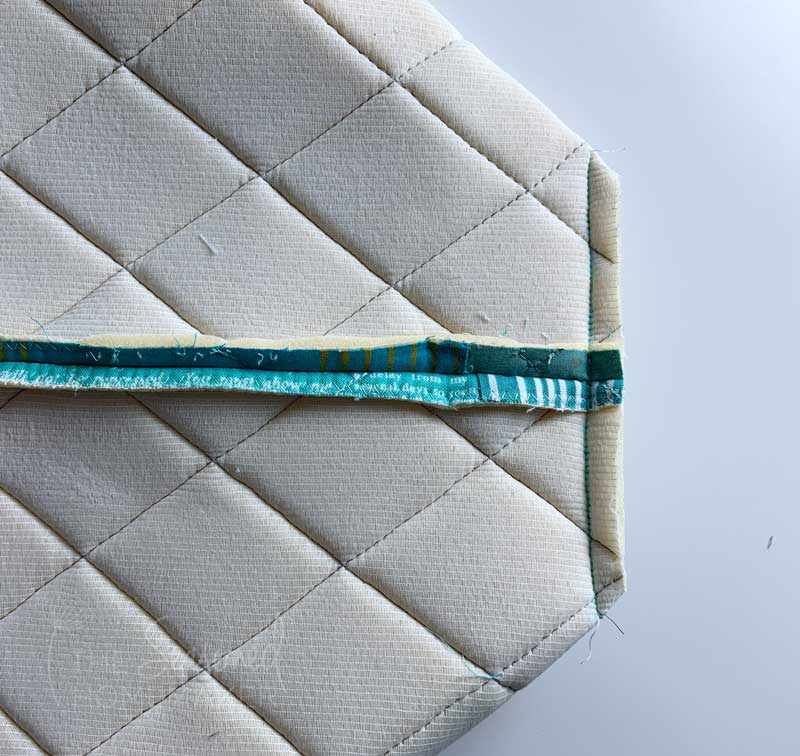
- Clip away the triangle, leaving a 1/4” seam allowance. Be sure to remove the markings.
- Repeat on opposite Exterior corner.
Step 4: Make the Lining
Note: See Step 3 for image examples.
- With right sides together, fold the Lining fabric in half matching up the 18″ sides. Stitch the two side seams together with a 3/8″ seam allowance.
- Pin the corner and with a water erasable pen, make a mark 2.5” away from the corner.
- Draw a stitching line and then stitch across to create a pleat.
- Clip away the triangle, leaving a 1/4” seam allowance. Be sure to remove the markings.
- Repeat on opposite Lining corner.
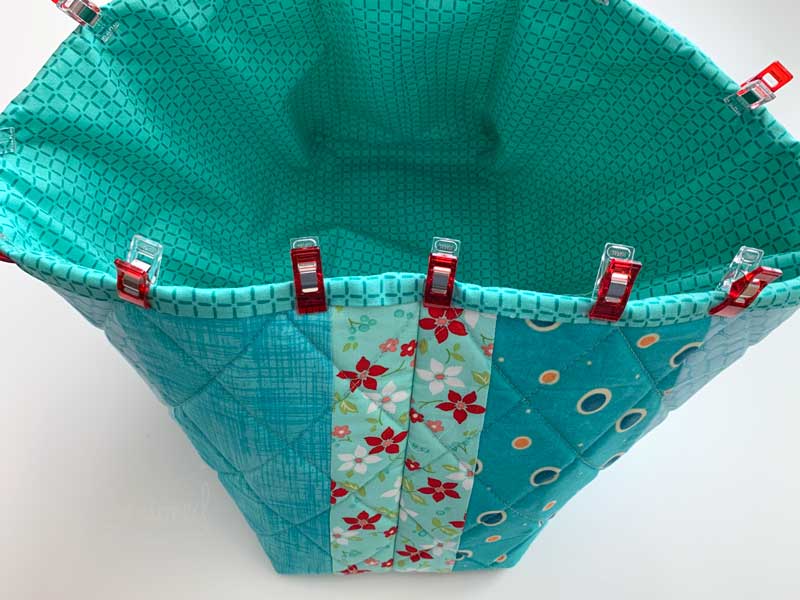
Step 5: Finishing the Basket
- Press under a 1/4″ hem on Basket Lining.
- Insert Basket Lining wrong sides together into the Basket Exterior.
- Be sure to line up the side seams.
- Fold over the turned hem 1/4″ and pin or clip to hold.
- Stitch down 1/8″ from folded edge.
Pro Tip: A little bit of basting glue will help hold this in place.
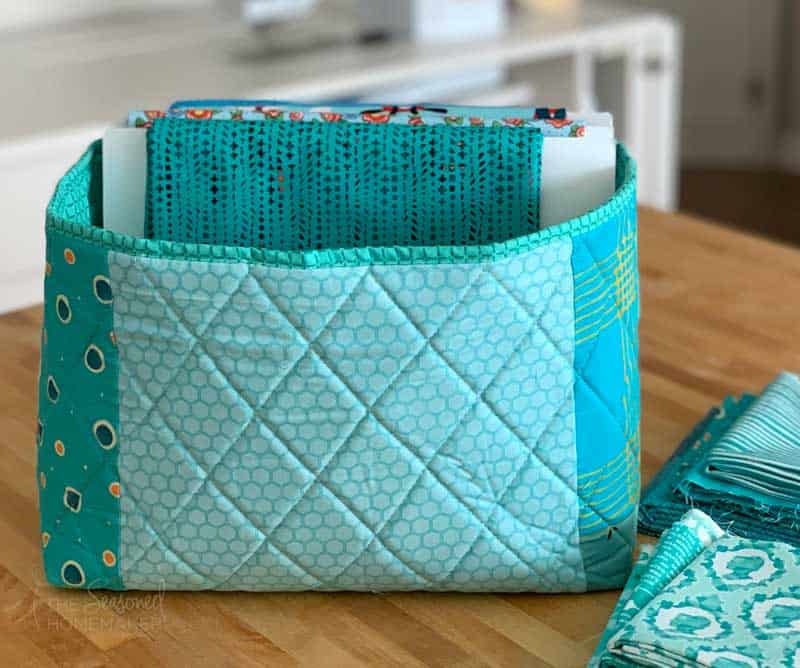
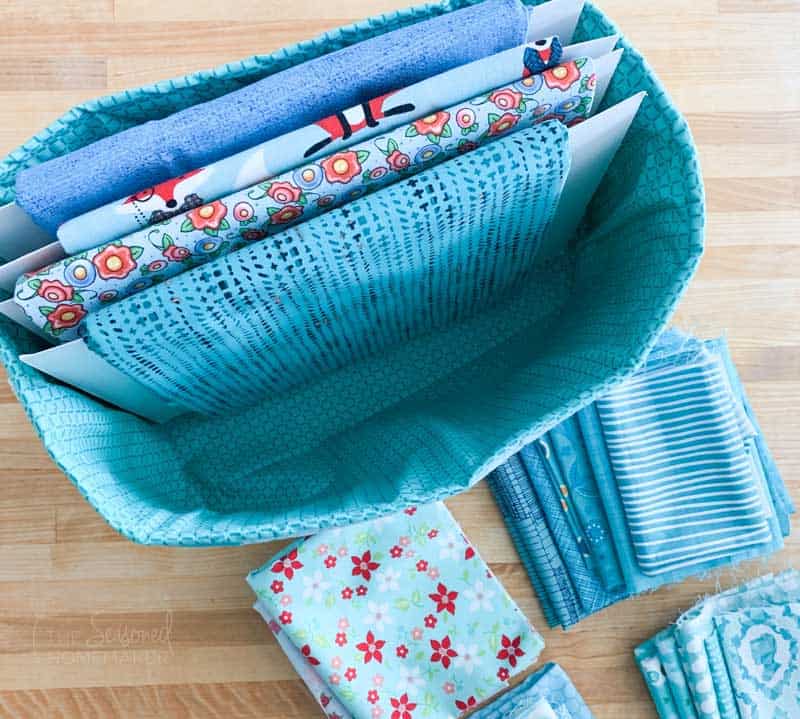
Step 6: Fill Your Basket
The finished size of this fabric basket is approximately 12″ W x 6″ D X 8″ H. This makes it the perfect size for wrapped fabric on comic book storage boards, fat quarters, or leftovers project scraps.
>>> Want a printable version of the post? Click the pink button, and download the Printable PDF instructions.
>>> Pin for later!