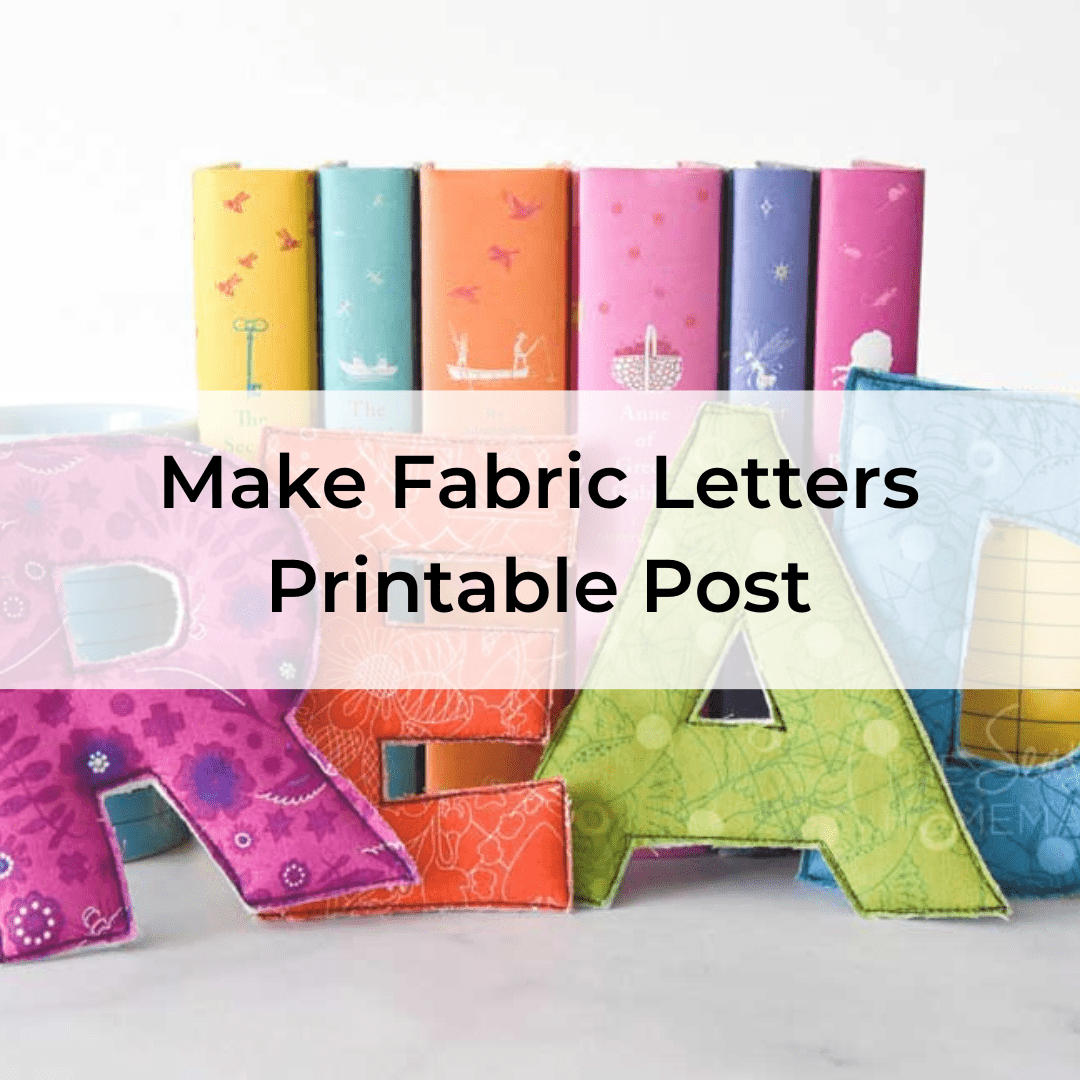
How to Make Fabric Alphabet Letters
This post may contain affiliate links which won’t change your price but will share a commission.
Inside: How to Make Fabric Alphabet Letters
Sometimes we need a simple sewing project that qualifies as self-care. This type of project should allow you to do some sewing but not leave you frustrated because the project is too large or complicated.
It’s a way to get you into your sewing space and have a quick win. If it’s a great scrap buster, even better because the pressure of using up scraps has just been eliminated.
That’s why I created this perfect self-care project. It’s fast. It’s easy. It uses scraps. And, it has the potential to make a great gift (which I’ll talk more about below).
Want an ad-free, printable copy of this tutorial? Scroll to the bottom of this post for more details!
How to Make Fabric Alphabet Letters
Fabric Alphabet Letters couldn’t be easier. You don’t need a lot of skills or a ton of fabric. Here’s the best part: If you can sew a straight stitch then you can make these fabric letters.
Ideally, this project is perfect for 5″ charm squares, but you could cut the scrap squares a little larger (6″ x 6″) for slightly larger letters.
Materials
- Assorted Fabric Scraps
- Sewing Machine
- Aurifil 50 wt. Cotton Thread
- Extra Loft Polyester Batting
- Fabric Marking tool (Frixion Pen)
- Rotary Cutter with sharp blade
- Self Healing Rotary Cutting Mat
- Acrylic Ruler
- Havel’s Serrated Embroidery Scissors
- Computer Letter Fonts
- Printer/Printer Paper
- Paper Cutting Scissors
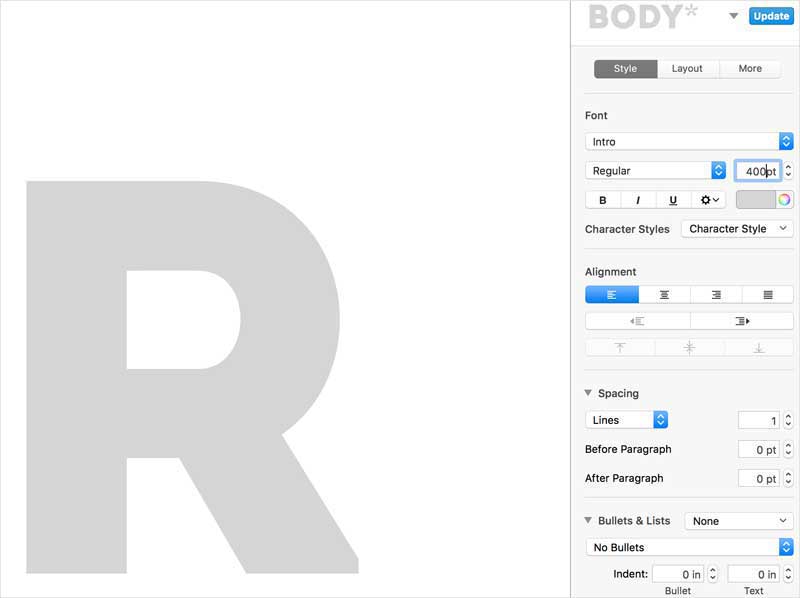
Step 1: Printing Alphabet Letters
Choose an appropriate font on your computer. In this tutorial I’ve used a free font called Intro. Each letter was sized to 400 px. Other fonts would work for this project.
Experiment with a few until you come up with one that works best for your project. Stay away from script fonts or ones with any type of flourish.
Print out the letters, trim, and set aside.
Step 2: Making the Fabric Alphabet Letters
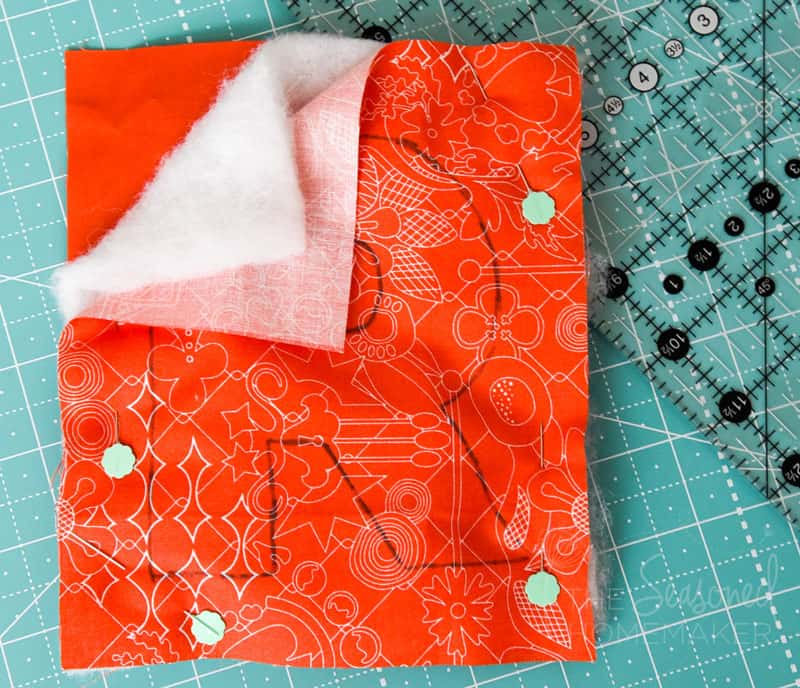
Charm squares are ideal for this project; however, if you’re not using 5″ charm squares you will need to cut out squares of fabric from your Letter Front fabric, Letter Back fabric, and the batting.

This will ultimately depend on the size of your letters and font so it’s best to audition the letters on top of a quilt sandwich. Leave at least 1″ around each letter for sewing and trimming.
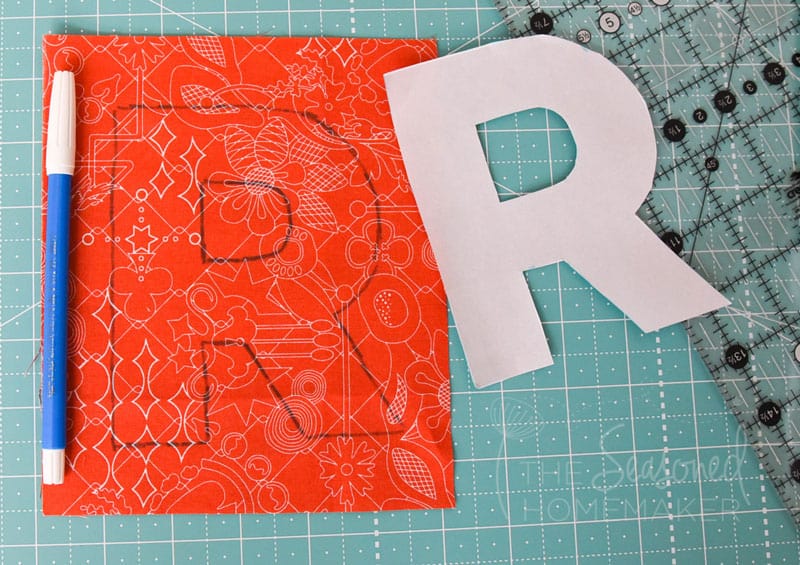
Once you have the squares cut out, trace the letter onto Letter Front fabric and then pin around the sides.
Step 3: Make a Quilt Sandwich
Create a quilt sandwich with the Letter Front fabric, batting, and Letter Back fabric.
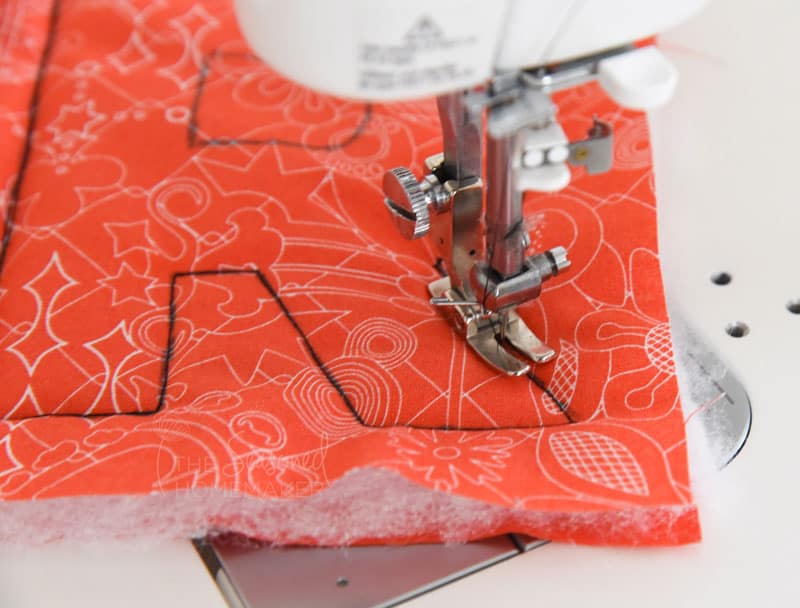
Using a contrasting thread, stitch on the traced line. There is one place you might run into an issue: Because you’ll be trimming close to the edge I recommend sewing around each letter two or three times.
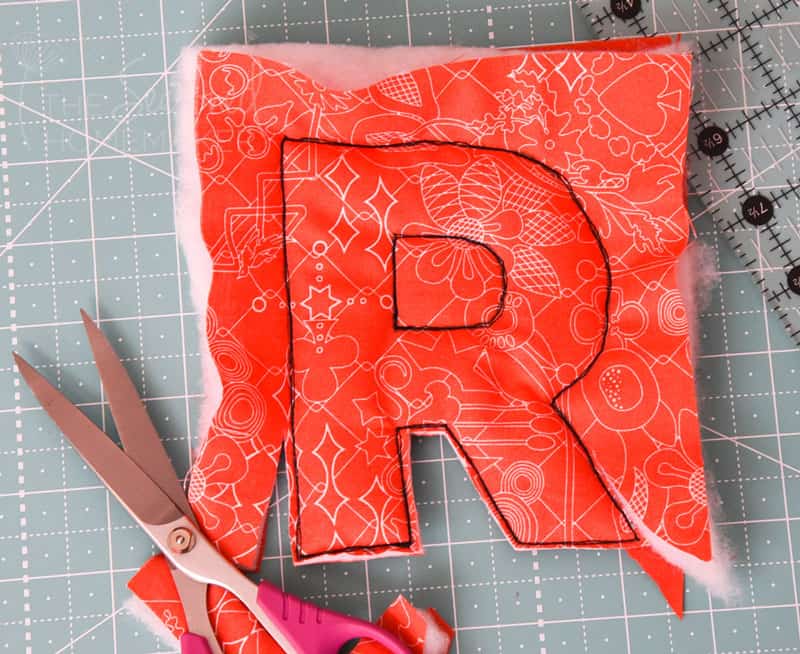
Trim close to the stitching. I recommend using really sharp scissors for trimming, especially the cut outs.
Step 4: How to Use the Fabric Alphabet Letters
Now here’s the best part. The possibilities are endless.
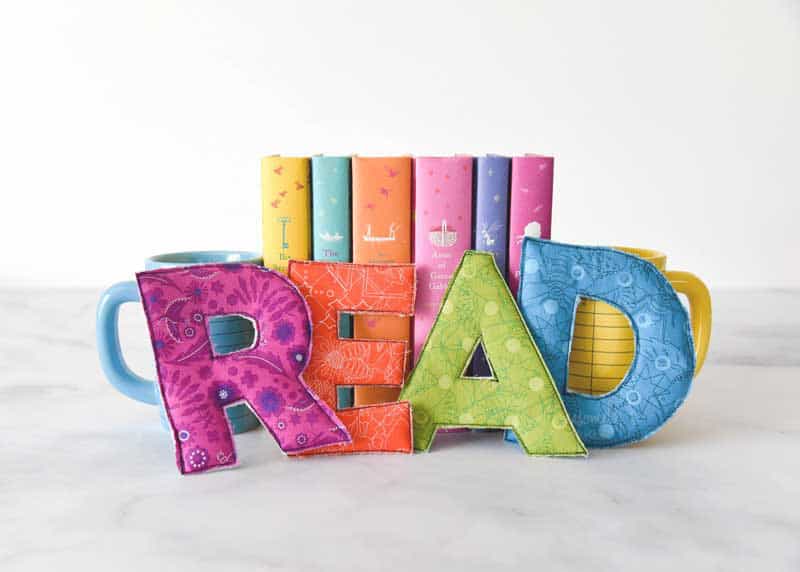
- You can create an assortment of words that spell out a child’s name.
- Create an entire alphabet for babies or toddlers. Add in a matching fabric basket and you have a unique shower gift.
- Spell out special days like Happy Birthday, Merry Christmas, etc. A simple way to display these would be to make a banner using a piece of bias tape and clip on the letters with mini-clothespins.
- Wash and dry them so they get a little frayed for an even better look!
Can you see the possibilities?
Pull some scraps, print a few letters, and have an awesome self-care sewing moment.
>>> Want an ad-free, printable version of this post? Click the pink button below and download the Printable PDF instructions.