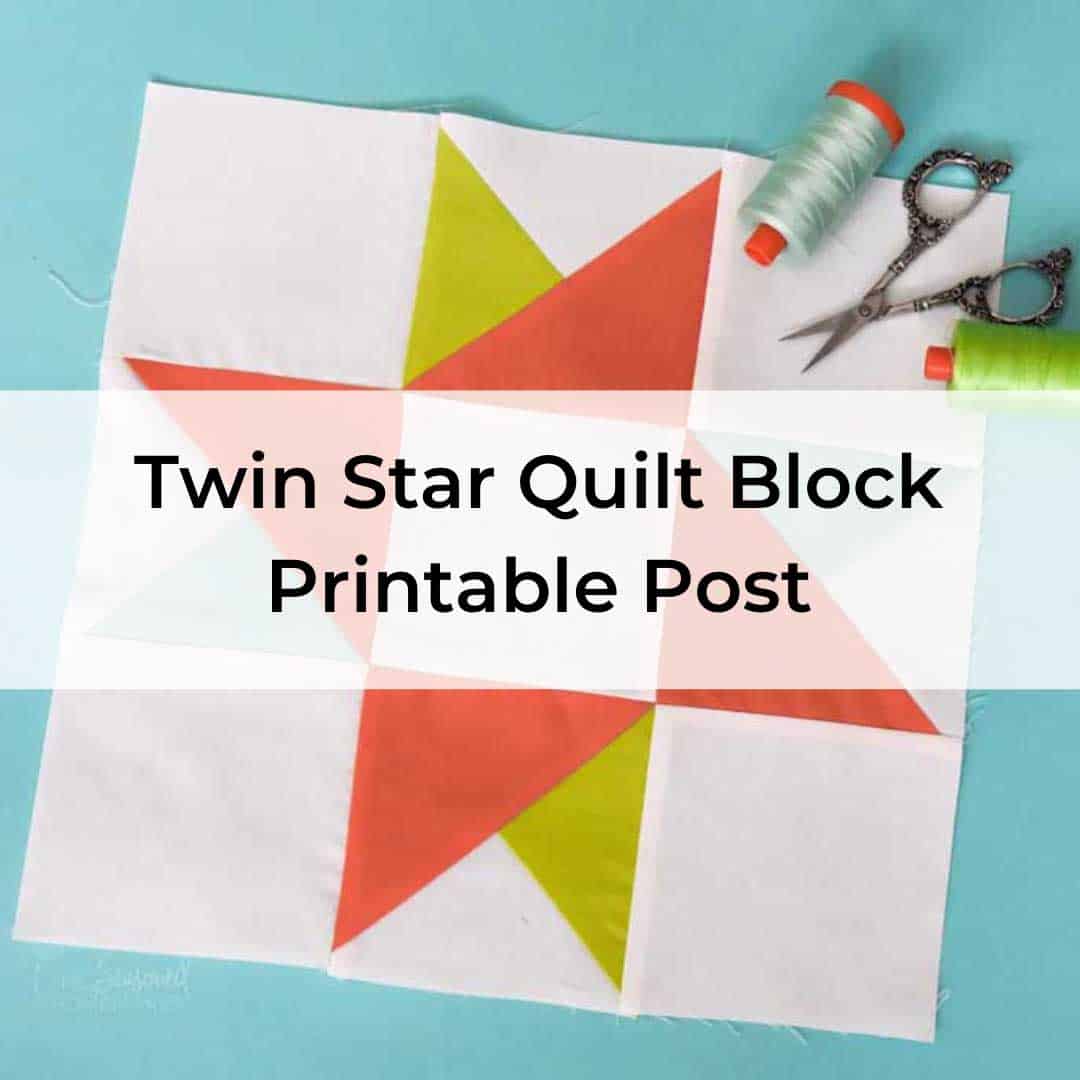
How to Make a Perfect Twin Star Quilt Block
This post may contain affiliate links which won’t change your price but will share a commission.
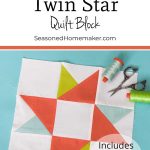
Inside: How to Make a Perfect Twin Star Quilt Block
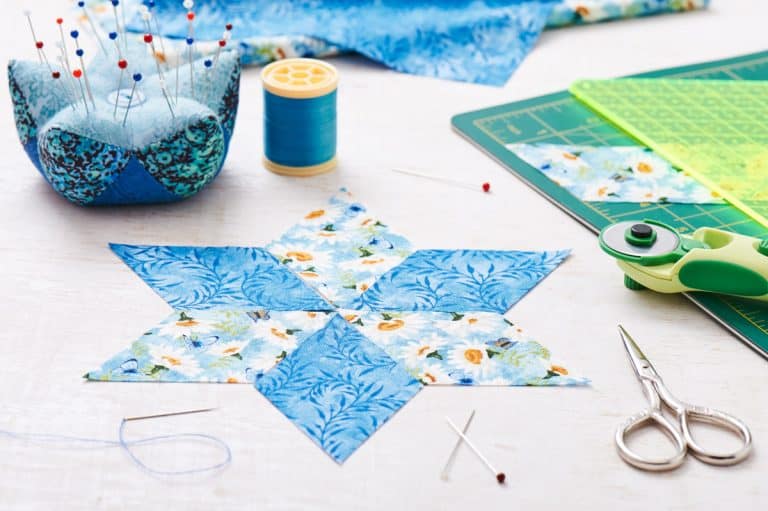
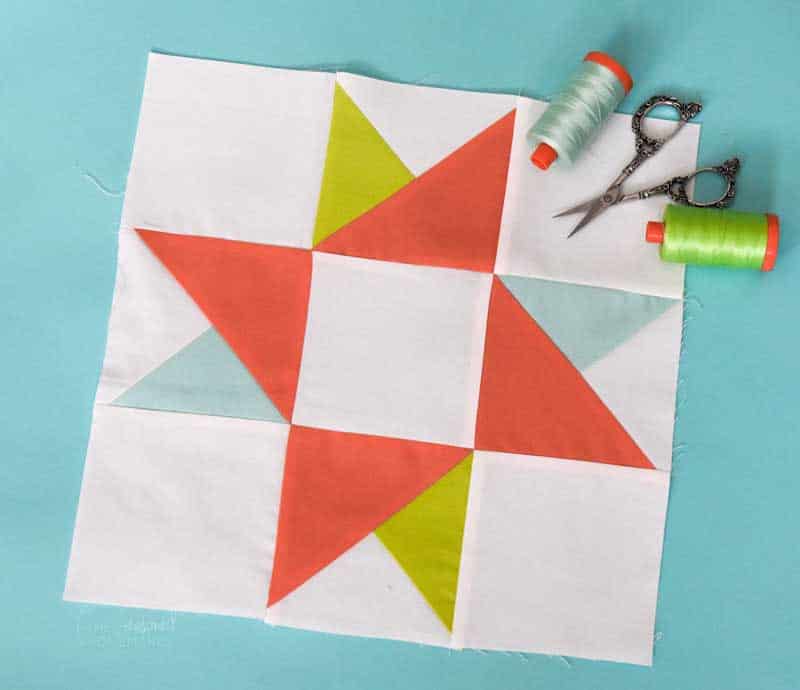
The Twin Star Quilt Block is a variation of the Friendship Star block and is ideal for beginning quilters. At its core, it’s only a 9-patch block that uses a split quarter square triangle, which I will demonstrate below.
This is a great block to make because it’s so versatile, and has the added bonus of improving your skills while you learn a new technique.
I tried to do a little research on the Twin Star Quilt block and couldn’t find any historical information, but I know you’re going to love how easy this quilt block is to make. And be sure to grab the FREE PDF instructions below.
Want an ad-free, printable copy of this tutorial? Scroll to the bottom of this post for more details!
How to Make a Perfect Twin Star Quilt Block
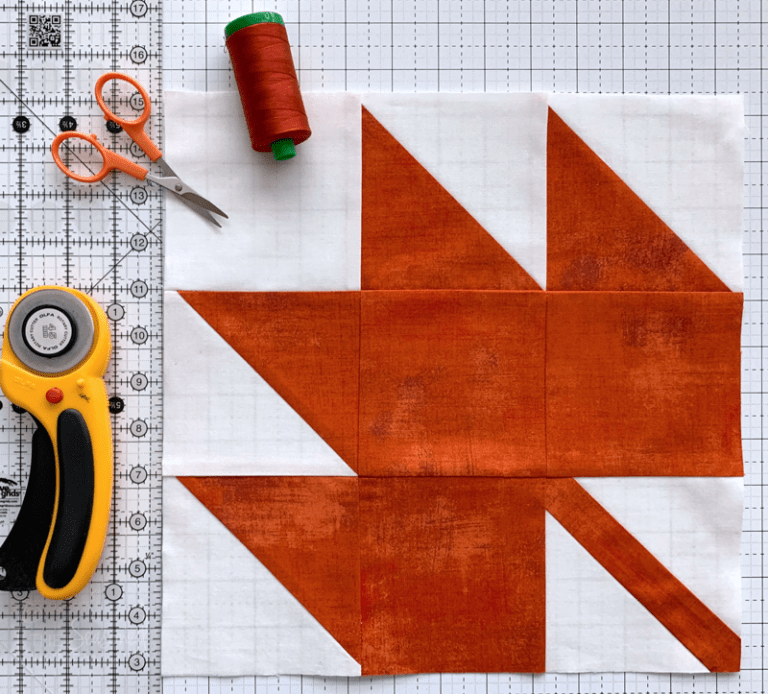
Supplies
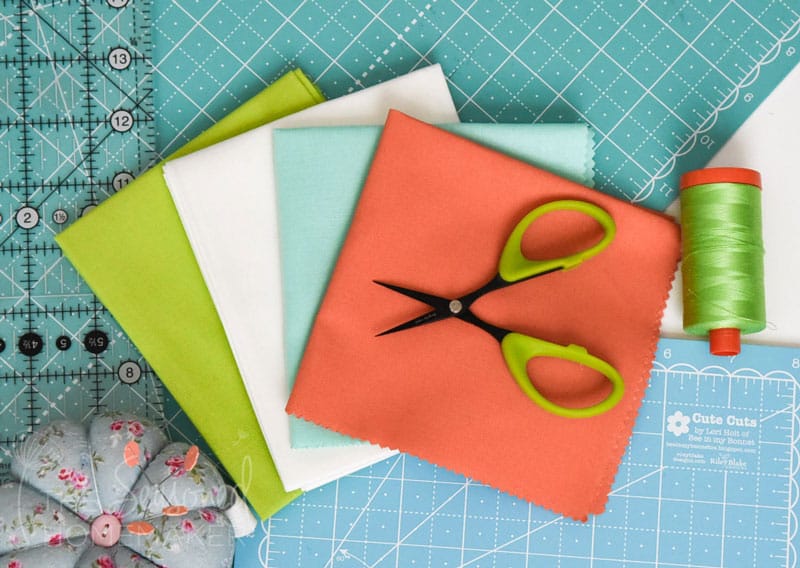
This block is very economical. I used some solid fat quarters that were in my stash. As long as you choose fabrics that have a contrast, anything will work.
- Solid Fabric #1 (Orange)
- Solid Fabric #2 (Green)
- Solid Fabric #3 (Turquoise)
- White Fabric (Kona White #1387)
I highly recommend you starch your fabrics before cutting. You’ll be cutting and sewing along the bias and this can cause your blocks to stretch out. Read more here: The Ultimate Guide to Starching Quilt Fabrics
Basic Sewing Supplies Needed
- Sewing Machine
- Its nice to use a 1/4″ sewing foot to help maintain a perfect seam allowance
- Cotton Thread
- I prefer Aurifil 50 wt. thread
- Sewing Pins
- Rotary Cutter with sharp blade
- Acrylic Ruler
- Rotary Cutting Mat
- Iron & Ironing Board
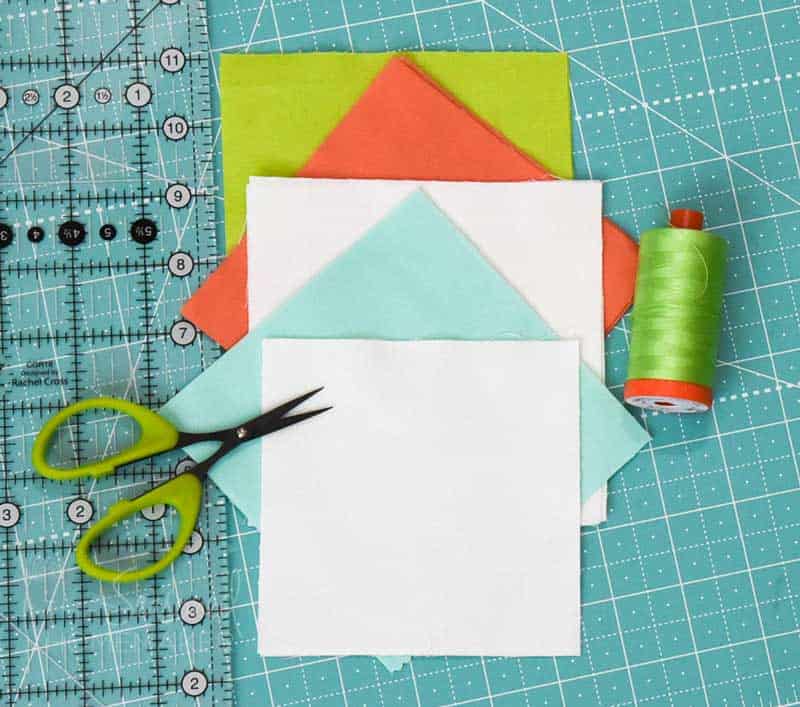
Twin Star – Cutting and Marking
- Qty (2) 5″x 5″ Orange (A)
- Qty (1) 5 1/4″ x 5 1/4″ Green (B)
- Qty (1) 5 1/4″ x 5 1/4″ Turquoise (C)
- Qty (1) 5 1/4″ x 5 1/4″ White (D)
- Qty (5) 4 1/2″ x 4 1/2″ White (E)
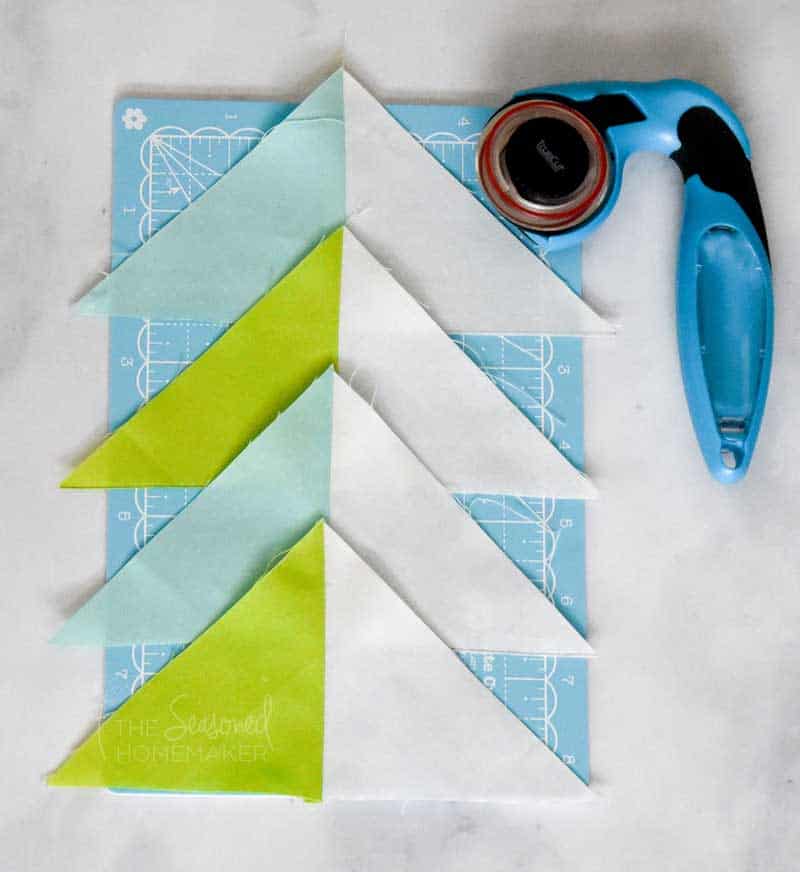
Step 1: Cutting Split Quarter Square Triangle
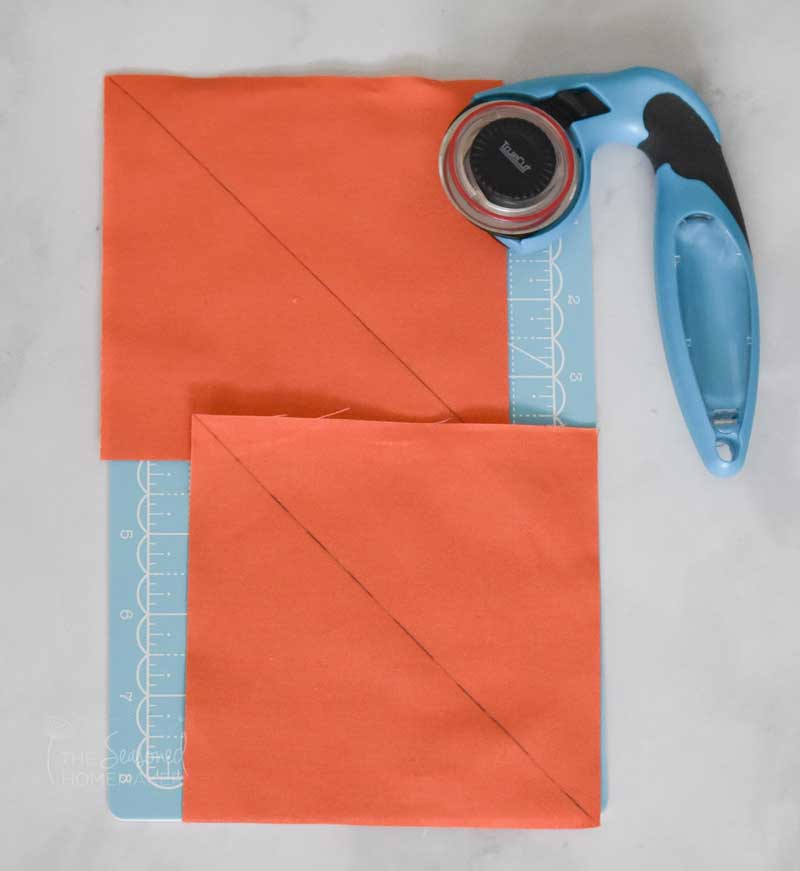
- Take the white (D), green (B), and turquoise (C) squares and with a pencil make two diagonal lines from corner to corner. Cut along these diagonal lines. This will give you 4 white triangles, 4 green triangles, and 4 turquoise triangles.
Note: You only need two green and two turquoise triangles, so set aside the remaining triangles for a second block.
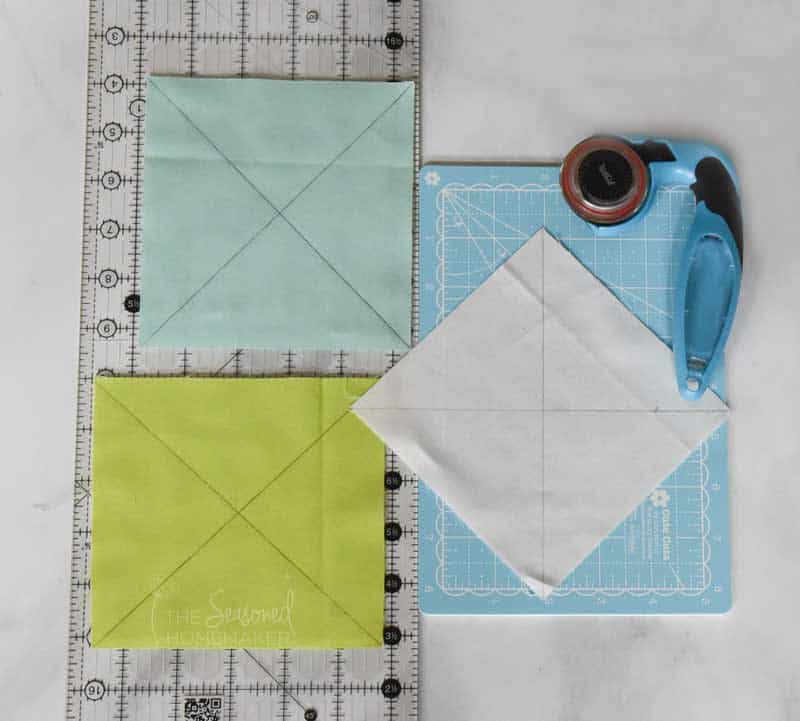
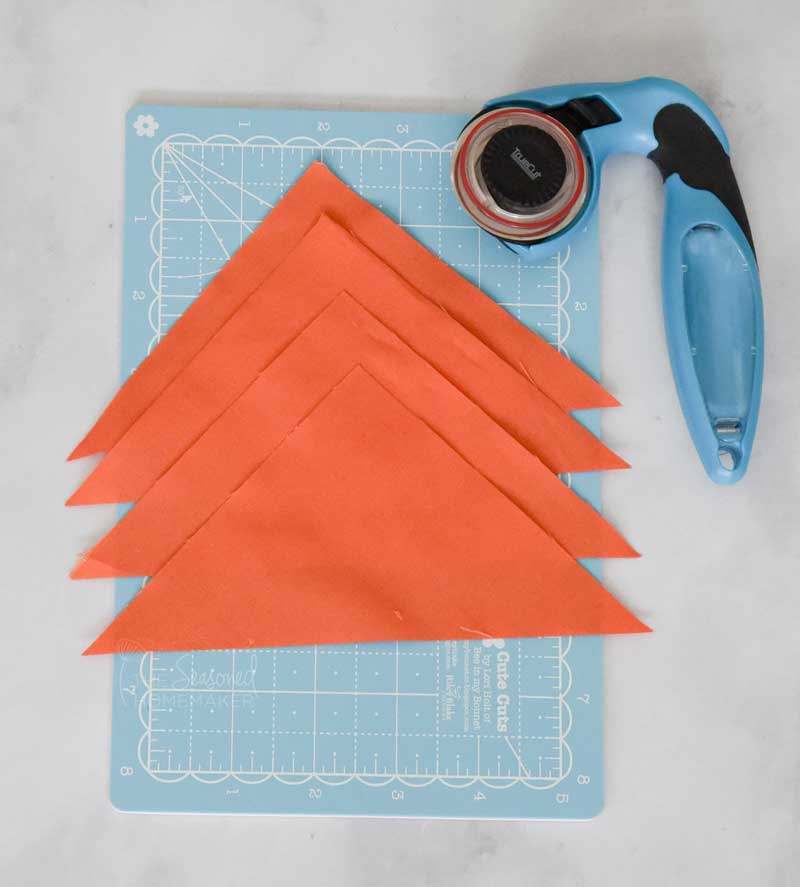
- Take the two orange squares (A) and with a pencil draw one diagonal line. Cut along this line. You will have 4 orange triangles.
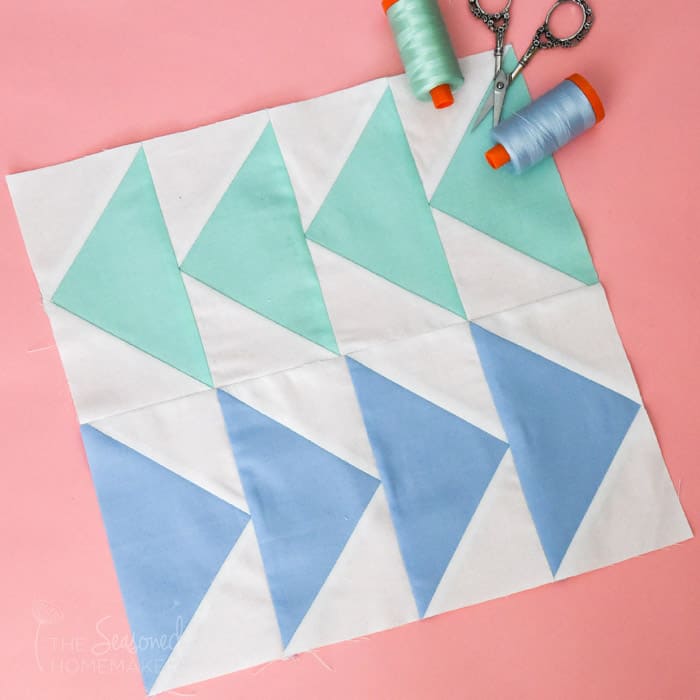
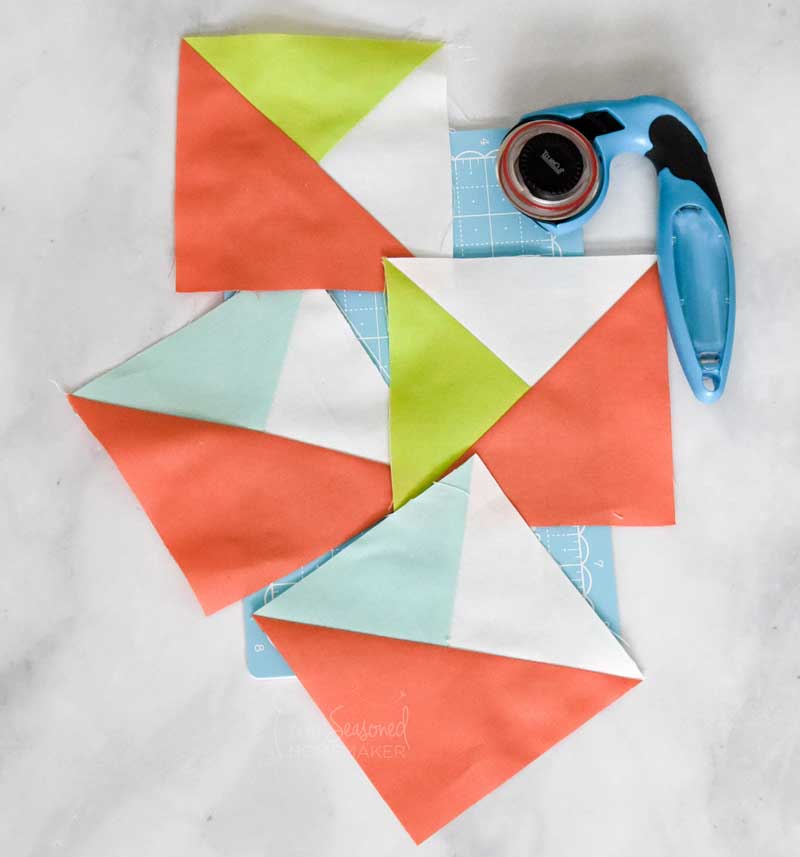
Step 2: Assembling Triangles
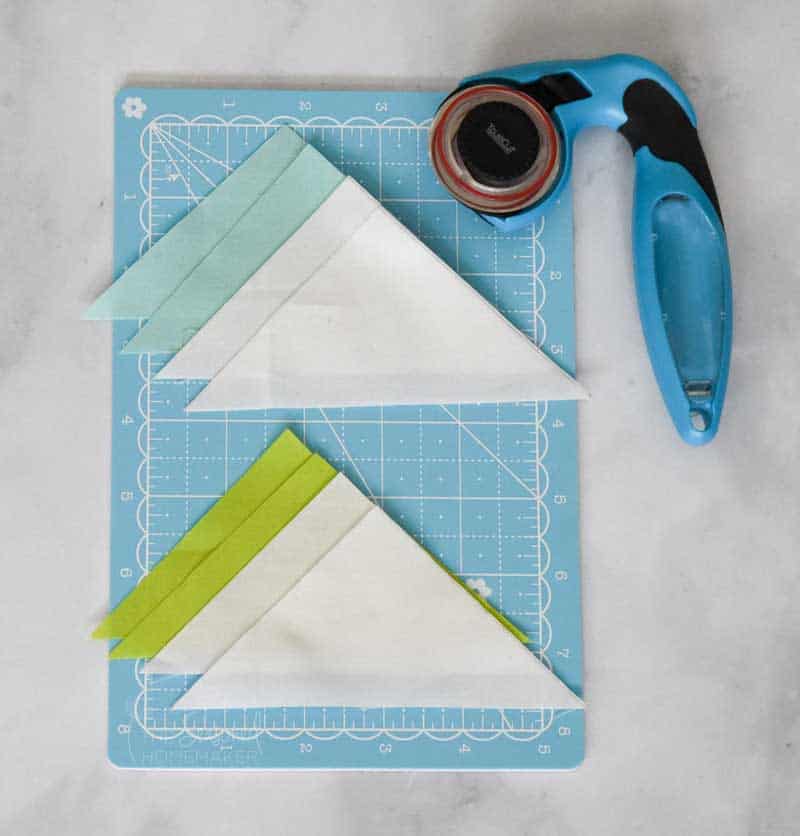
- It’s very important to pay attention to the orientation of your green and turquoise triangles. This will matter when assembling your block.
- Before stitching, it’s a good idea to layout the triangles as seen in the diagram below. I also recommend lowering your stitch length slightly (2mm) and using a walking foot or dual feed.
- Take one turquoise triangle and one white triangle and stitch together. Repeat.
- Take one green triangle and one white triangle and stitch together. Repeat with the remaining green triangle and the two turquoise triangles.
- Trim away dog ears and press seams towards the dark fabric.
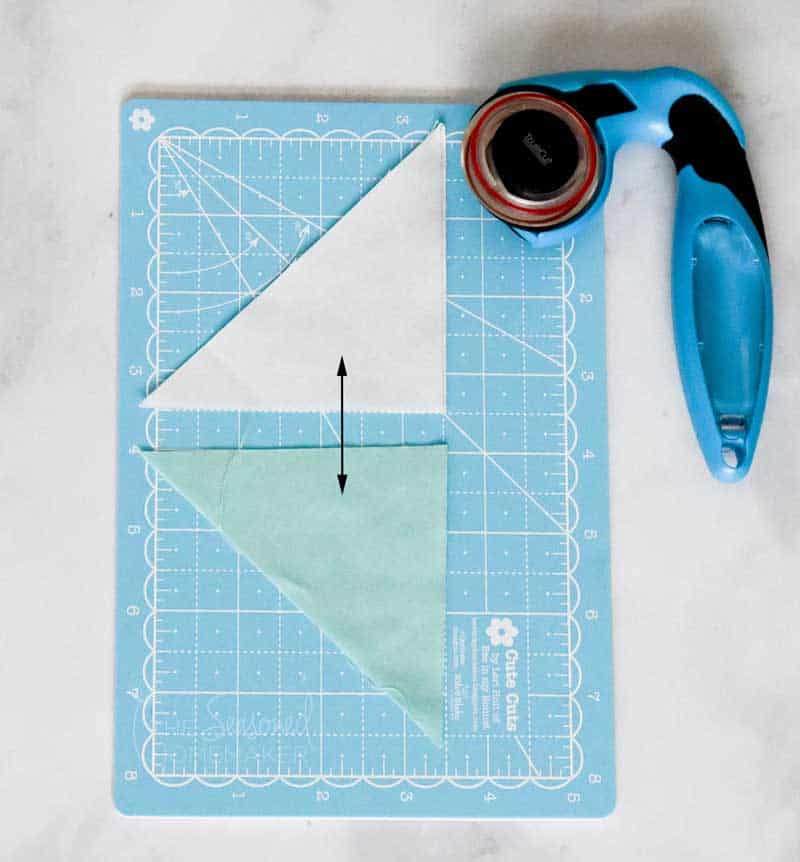
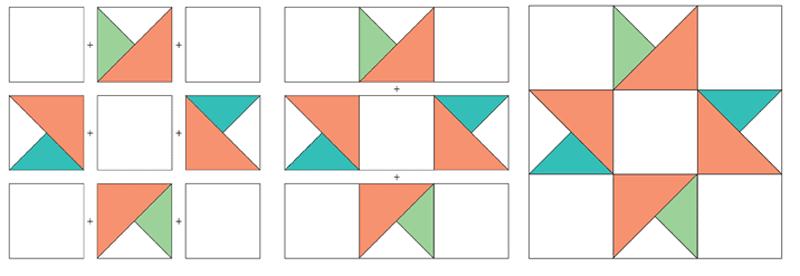
Step 3: Assembling Split Quarter Square Triangles (SQST)
- Pay attention to the orientation of your green and turquoise triangles when assembling SQSTs. See the Step 4 diagram below.
- Take one green/white triangle set and attach to one orange triangle. Press towards orange fabric. Repeat.
- Take one turquoise/white triangle set and attach to one orange triangle. Press towards orange fabric. Repeat.
- You should now have two green/white/orange squares that are 4 1/2″ and two turquoise/white/orange squares that are 4 1/2″. Trim to size if necessary.
Step 4: Block Assembly
- Arrange your blocks and SQSTs in correct layout (pictured below).
- Using a quarter inch seam allowance, sew together across in rows. Press seams in same direction on each row. Alternate pressing direction on each row.
- Join all rows lengthwise, using a quarter inch seam allowance. Take time to nest your seams.
- Press the completed block and trim down to 12.5″ square (if necessary).
Don’t you love the Twin Star Quilt Block – especially the simplicity.
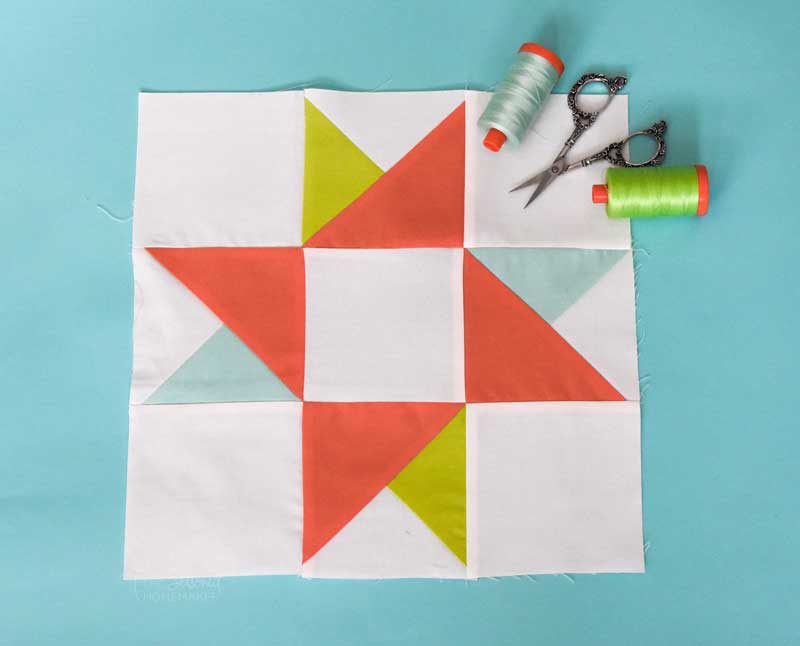
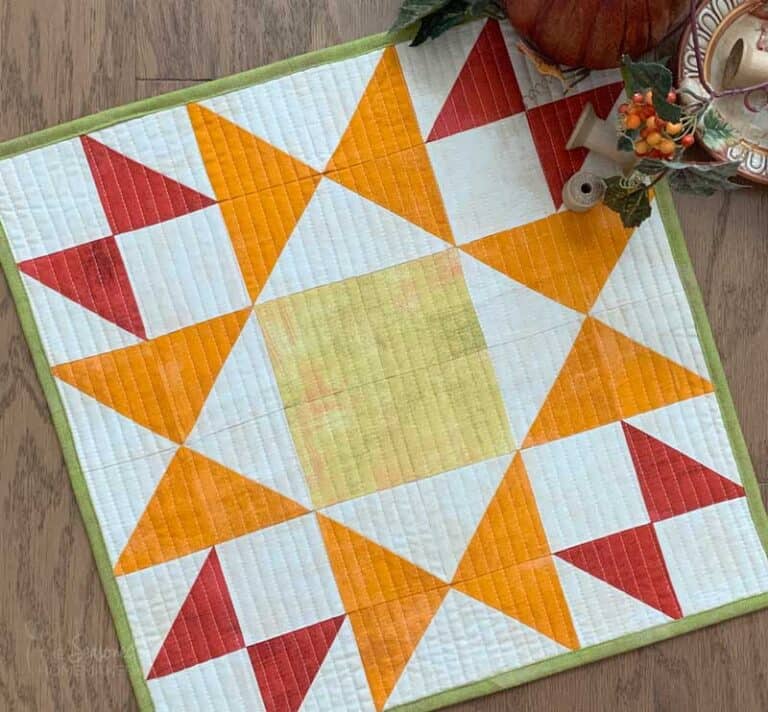
Try a different look by using small prints. Make each of the “stars” out of a different fabric from a collection. Or, try using low volume fabric for the background.
Better yet, the options for this simple quilt block are fun to imagine! This is ideally suited for a pillow or you could make several more Twin Star blocks for an entire quilt or piece three or four together for a nice table runner.
The Twin Star Quilt Block is a fun and simple quilt block. I hope you make lots and lots of them.
>>> Want an ad-free, printable version of this post? Click the pink button below and download the Printable PDF instructions.