How to Make a Perfect Economy Quilt Block
This post may contain affiliate links which won’t change your price but will share a commission.
Inside: How to Make a Perfect Economy Quilt Block
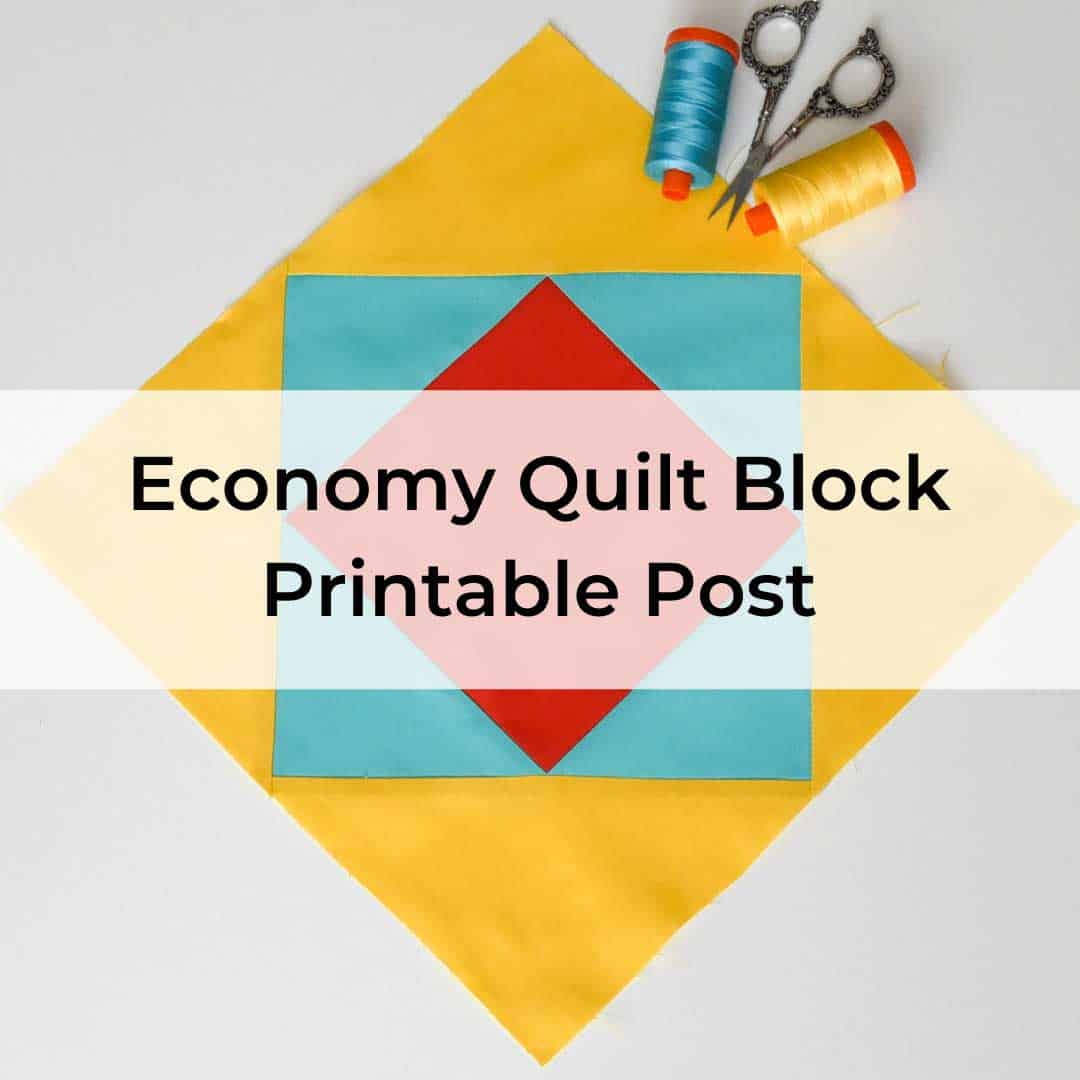
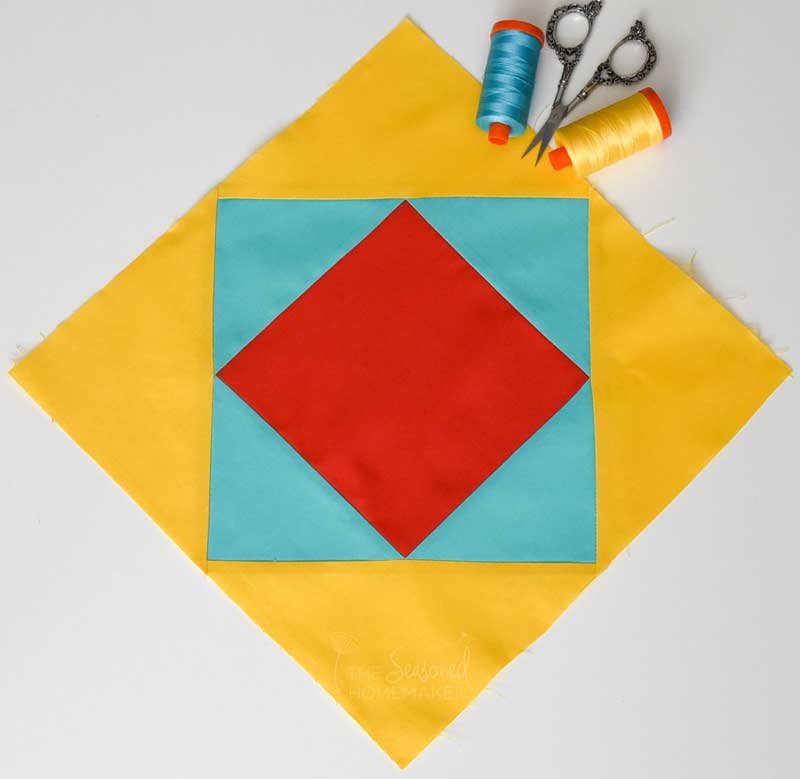
Are you familiar with the Economy Quilt Block? Perhaps you know it as the Diamond-in-a-Square Block or Square-in-a-Square Block.
It’s the perfect quilt block for highlighting a unique design in a fabric. But, many beginning quilters shy away from this block because they’re a little fearful when it comes to attaching the bias cut triangles.
Well, fear not, my quilt-y friends. I have a simple way to make sure your dog ears are even and your bias cuts don’t stretch.
A Little History
Once again I checked in my Encyclopedia of Pieced Quilt Patterns to learn more about the history of the quilt block. Because the information isn’t clear cut I had to dig around and it appears that this block was very popular in the 1930’s. Knowing that this was during the Great Depression it may have something to do with the name Economy Block.
In my opinion this is a stunning block. It looks great with solids and can be used to highlight fussy cut fabrics. It’s also easy to scale the block up or down making it an economical way to use up fabric scraps and still highlight something unique in the fabric design.
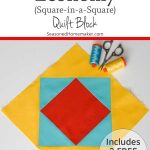
How to Make a Perfect Economy Quilt Block
Materials List
Because most of us have fabric stashes, scraps are an ideal source of fabrics and I recommend using them for your first try. For the sake of this tutorial I used colors similar to the diagram. However, this block can be a great way to highlight holidays or favorite teams.
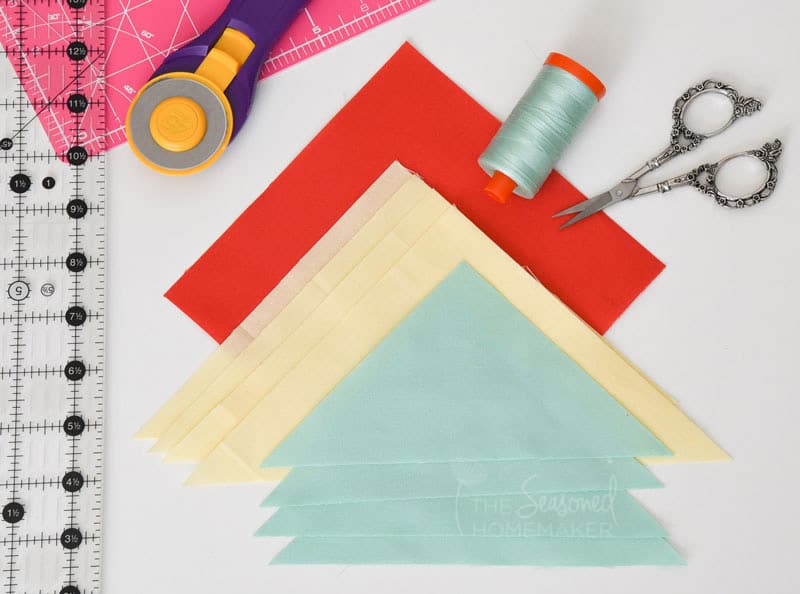
- Center Square fabric (Red)
- Center Triangles fabric (Turquoise)
- Outer Triangles fabric (Yellow)
Supplies
- Sewing Machine
- Quarter Inch foot for your sewing machine
- Aurifil 50 wt. Cotton Thread
- Sewing Pins
- Fabric Marking tool (Frixion Pen)
- Rotary Cutter with sharp blade
- Acrylic Ruler
- 15″ Square Acrylic Ruler
- Self Healing Rotary Cutting Mat
- Walking Foot
- Iron & Ironing Board
Cutting Out the Fabrics
These measurements are for a 12″ finished block.
NOTE: Scroll down to find out how you can get a Cutting Chart with measurements for three other sized blocks.
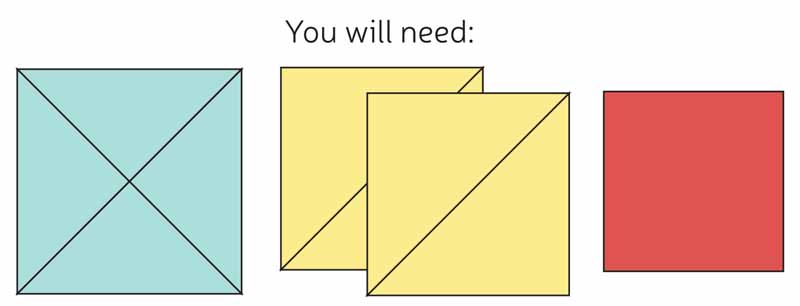
- Qty (1) 6.5″ Square – Red
- Qty (1) 7.5″ Square – Turquoise
- Qty (2) 7″ – Yellow

Download the FREE PDF
Click the pink button below for a FREE downloadable PDF that includes the Economy Quilt Block Assembly Diagram + Cutting Chart with Multiple Sizes.
Want an ad-free, printable copy of this tutorial? Scroll to the bottom of this post for more details!
Assembling the Economy Block
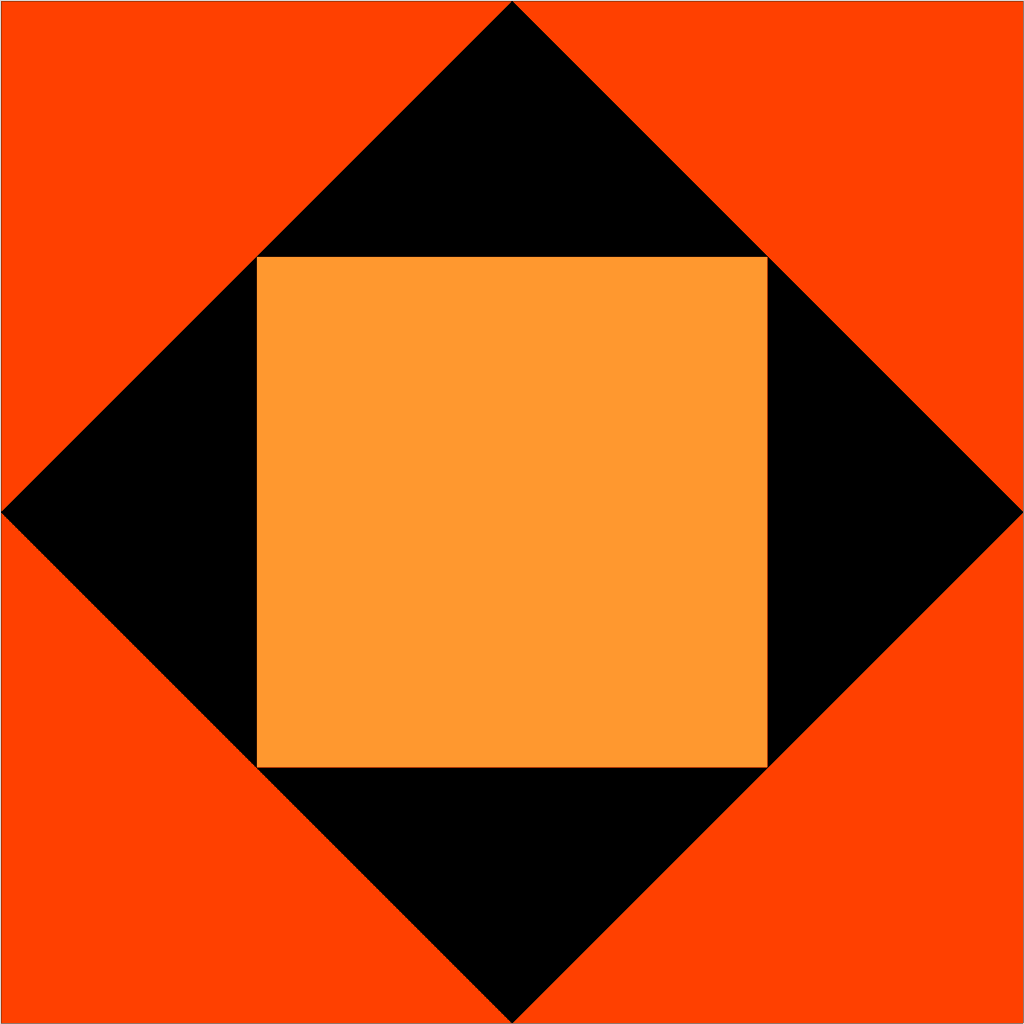
For the sake of this tutorial I’m referring to the different sizes according to the colors in the diagram above.
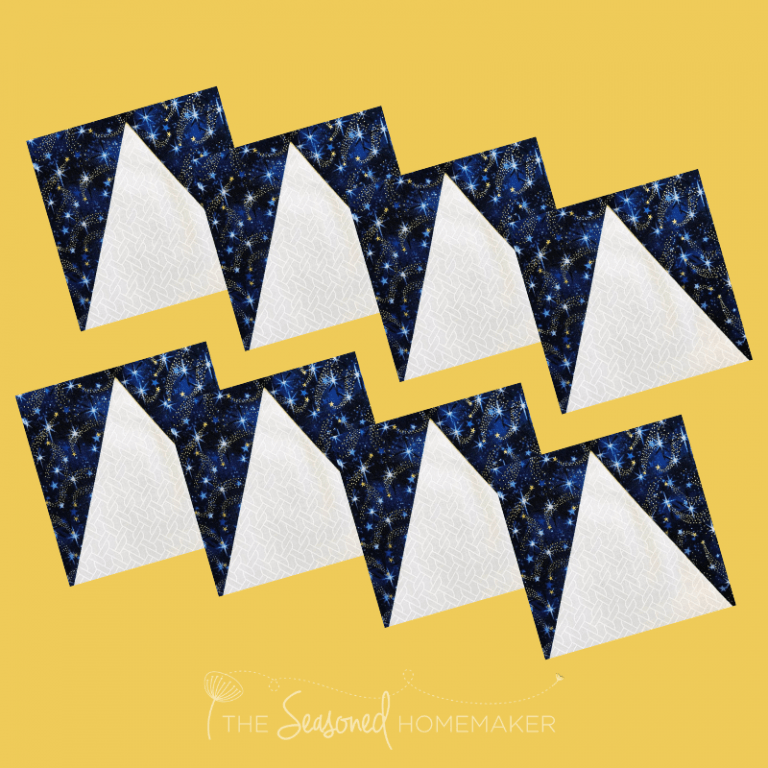
- Cut (1) 7.5″ square from Turquoise. Cut corner to corner to create (4) triangles.
- Cut (2) 7″ squares from Yellow. Cut each square on diagonal to create (4) triangles
- Cut (1) 6.5″ square from Red
Attaching the Triangles
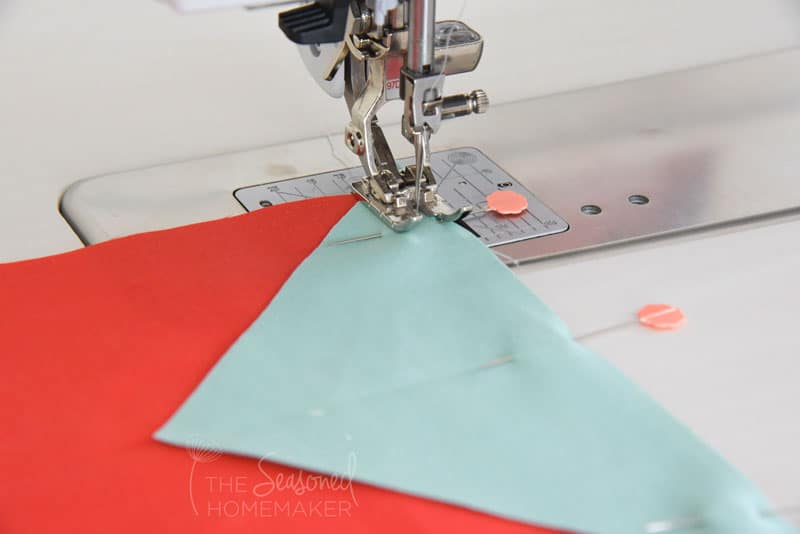
Step 1:
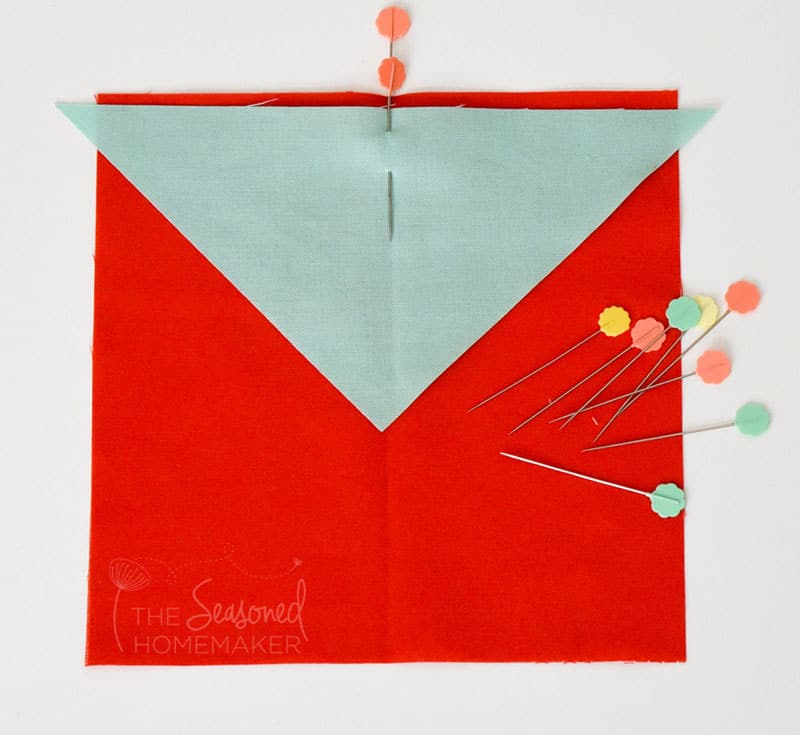
There is a simple trick I use to make sure my triangles will attach evenly to my squares.
In the Red center square mark the center with a pin. Then, on the long edge of a Turquoise triangle also mark the center. Line up the pins and pin at the center mark. Then pin near the corners. Note: After making a few of these, it’s pretty easy to finger press a crease in the square and the triangle. Use this crease to line up the centers. Be sure to pin to hold.
Step 2:
Stitch sides together using a walking foot and your triangles will attach centered and your dog ears will be even. I also recommend sewing from the back because you will be able to have more control matching the points.
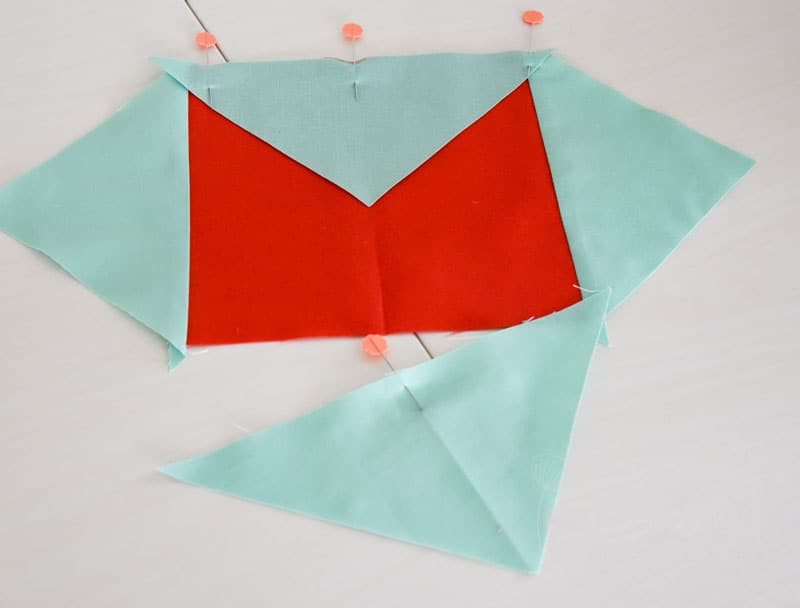
Step 3:
Once the triangles are centered on the square begin stitching together using the Assembly Diagram mentioned above.
Arrange your blocks in correct layout (pictured below)
- Using the above pinning method, pin Turquoise triangle on the long edge to Red square.
- Stitch using a quarter inch seam allowance, stitch to one side of the square. Repeat on opposite side. Press seams away from the center after attaching two triangles. Attach remaining Turquoise triangles in same manner and press seams away from center.
Step 4:
- Trim away dog ears.
- Repeat this process for the Yellow triangles. I recommend sewing from the wrong side in order to match points more accurately.
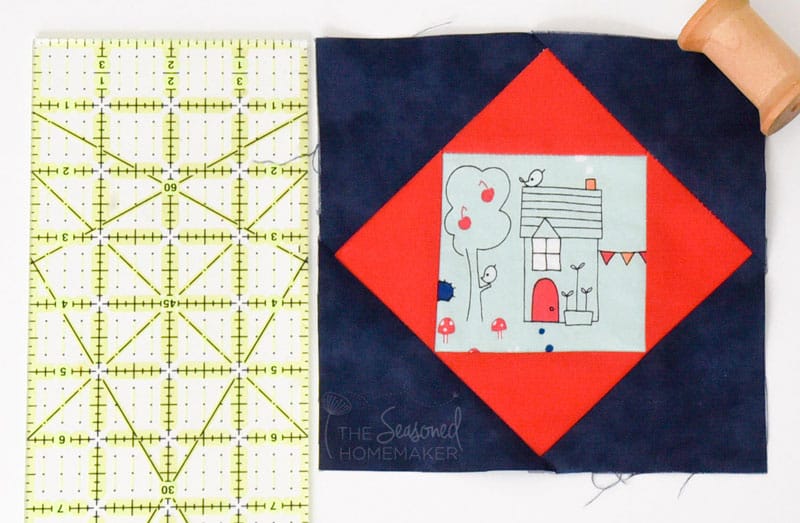
- Press your completed block. Using a 15.5″ square ruler, trim down to 12.5″ square (if necessary).
A Few Ideas
Because the Economy block is perfect for fussy cut designs, I was able to create this 6″ finished block using scraps.
Note: The cutting measurements for this block are in the FREE PDF Download.
I also created this fun design in EQ8 using Halloween-ish fabric. But, this block would work for all holidays: Christmas, Valentine’s Day, or the Fourth of July.
I’m thinking I might put three of these together with some sashing for a cute table runner.
If I get ambitious I might even do some machine embroidery for the center block.
As you can see, this simple block has endless possibilities. Best of all, it’s perfect for scrap busting.
>>> Want an ad-free, printable version of this post? Click the pink button below and download the Printable PDF instructions.