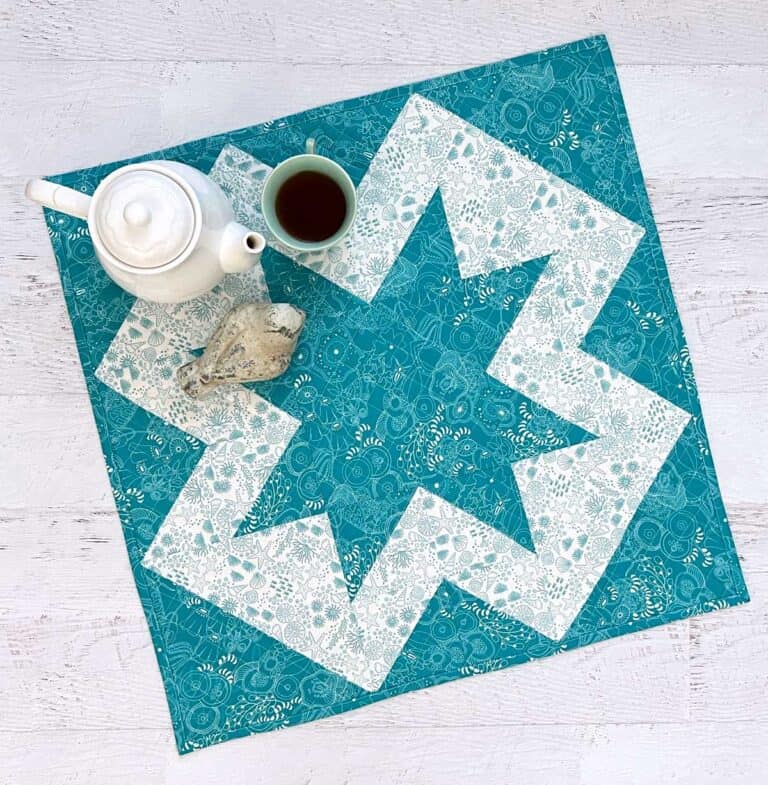
How to Make a Dresden Plate Mini Quilt
This post may contain affiliate links which won’t change your price but will share a commission.
Inside: How to make a Dresden Plate Mini Quilt
A Dresden Plate Mini Quilt is the perfect way to use up your scraps. It’s ideal for a single color way or seasonal fabrics (think Valentine’s Day, Easter, Christmas, etc.). Or, you could get really crazy and make something like my Halloween Dresden Neighborhood Quilt. It’s all basically the same process.
While this project is designed to make a mini quilt, with a little adjustment, you could easily turn it into a quilted pillow or even a mug rug. Look for details on this at the end of the post.

Want an ad-free, printable copy of this tutorial? Scroll to the bottom of this post for more details!
How to make a Dresden Plate Mini Quilt
Materials
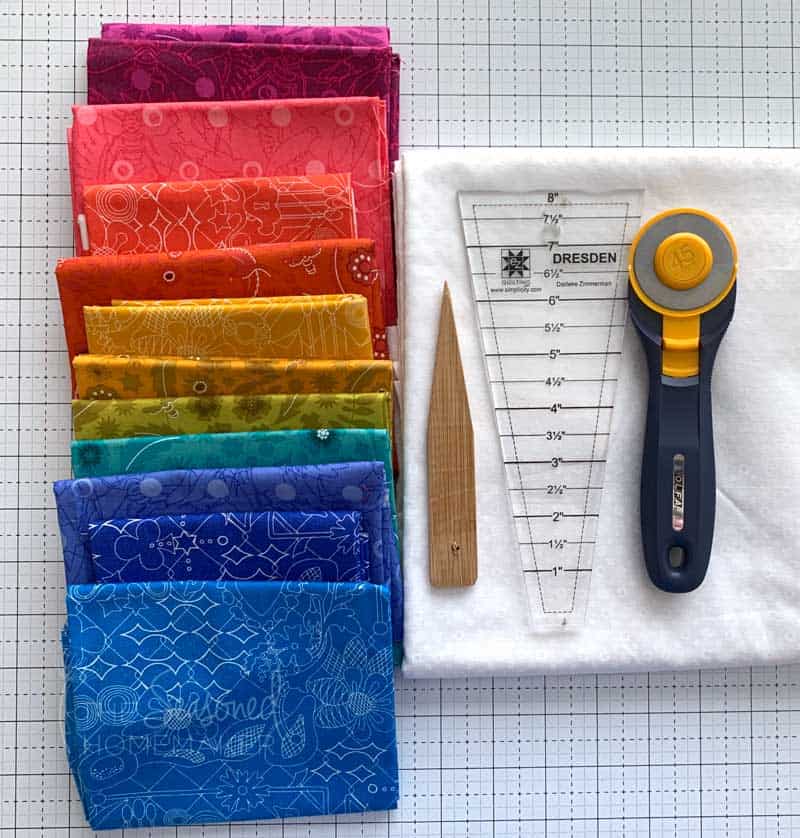
- Collection of fabrics (I used a previous collection of Sun Print by Alison Glass)
- I recommend using a non-directional fabric
- (2) 5″ x 5″ pieces of coordinating fabric for center
- (2) 22″ x 22″ pieces of background fabric
- 1/2 yard binding fabric
- 24″ x 24″ pc. of fusible quilt batting
Supplies
- Sewing Machine
- Quarter Inch foot for your sewing machine
- Aurifil 50 wt. Cotton Thread
- Water-Erasable Pen
- Wonder Clips
- Sewing Pins
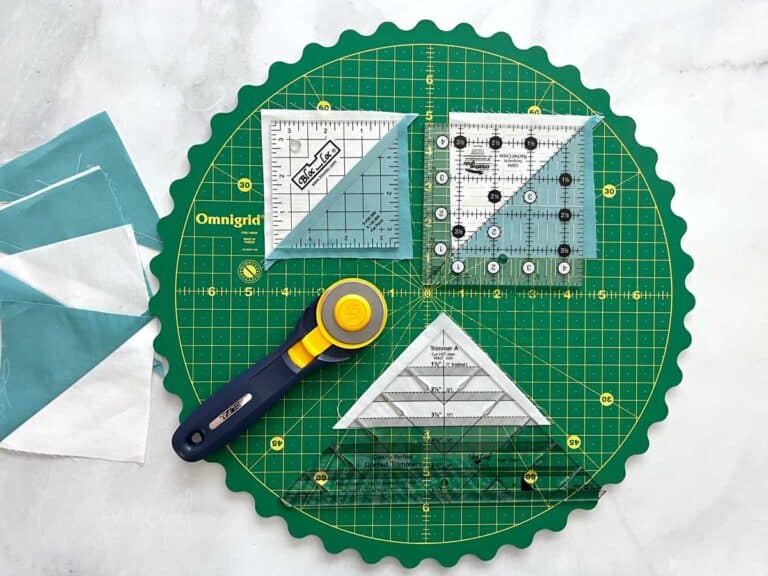
- Rotary Cutter with sharp blade
- Acrylic Ruler
- Self-Healing Rotary Cutting Mat
- Iron & Ironing Board
- Wool Pressing Mat
- Dresden Template w/ Wooden Pointer
- Superior Mono-Poly Thread (optional, but recommended)
- Seam Creaser Tool (optional)
- Sew Steady Grid Glider (optional)
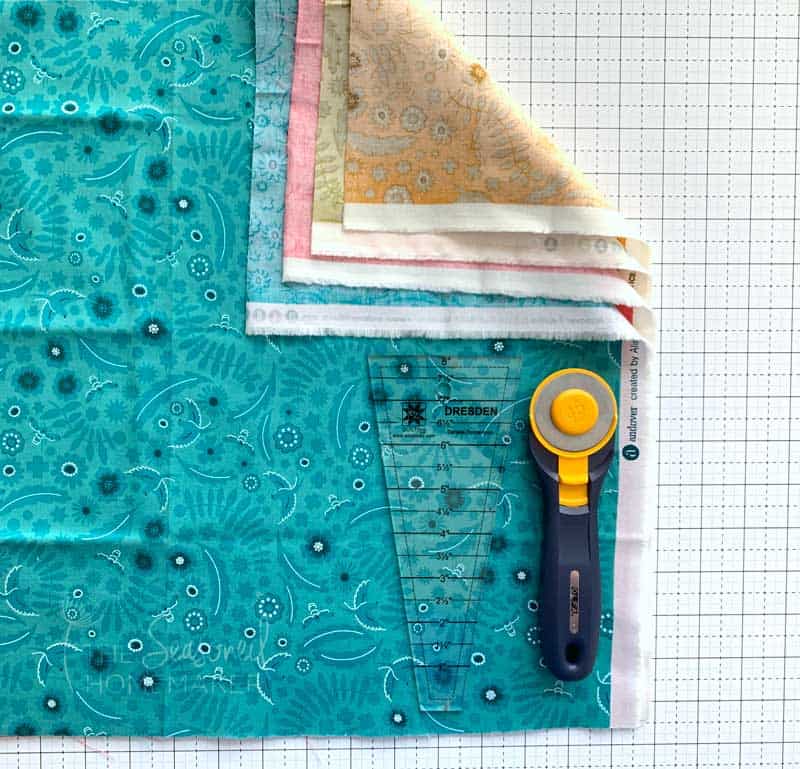
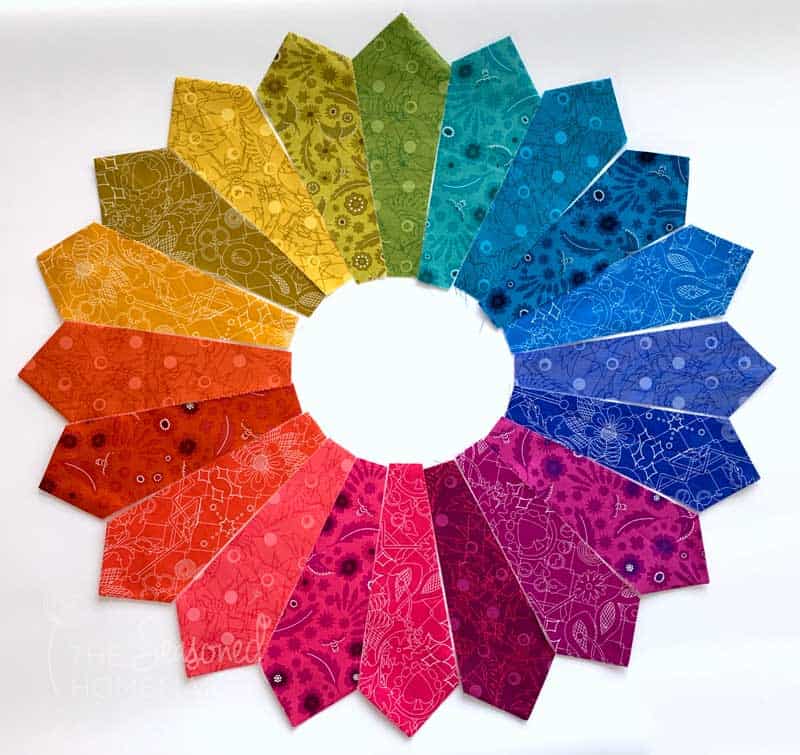
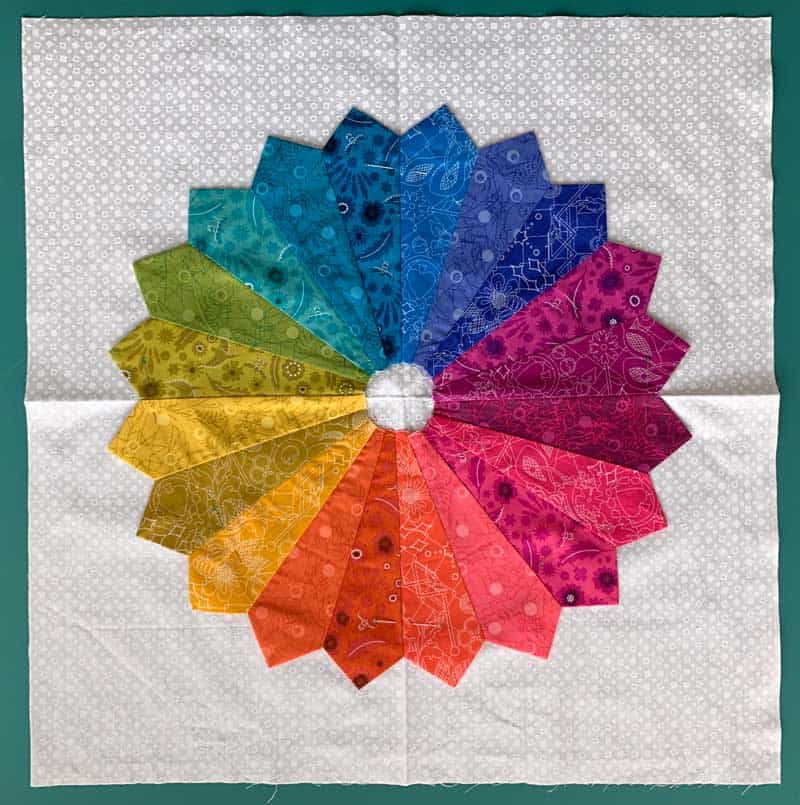
Step 1: Cut Out Dresden Plates
Using the Dresden template, cut out (20) 8″ Dresden blades.
Pro Tip: Stack three to four layers of fabric to cut out your blades. Be sure to use a sharp blade
Step 2: Layout the Design
It’s a good idea to layout the design before you start sewing. You will want to pay attention to color value and order.
Pro Tip: Snap a photo on your phone and view in black and white. You’ll be able to easily see the color value. It’s also handy for remembering the fabric order.

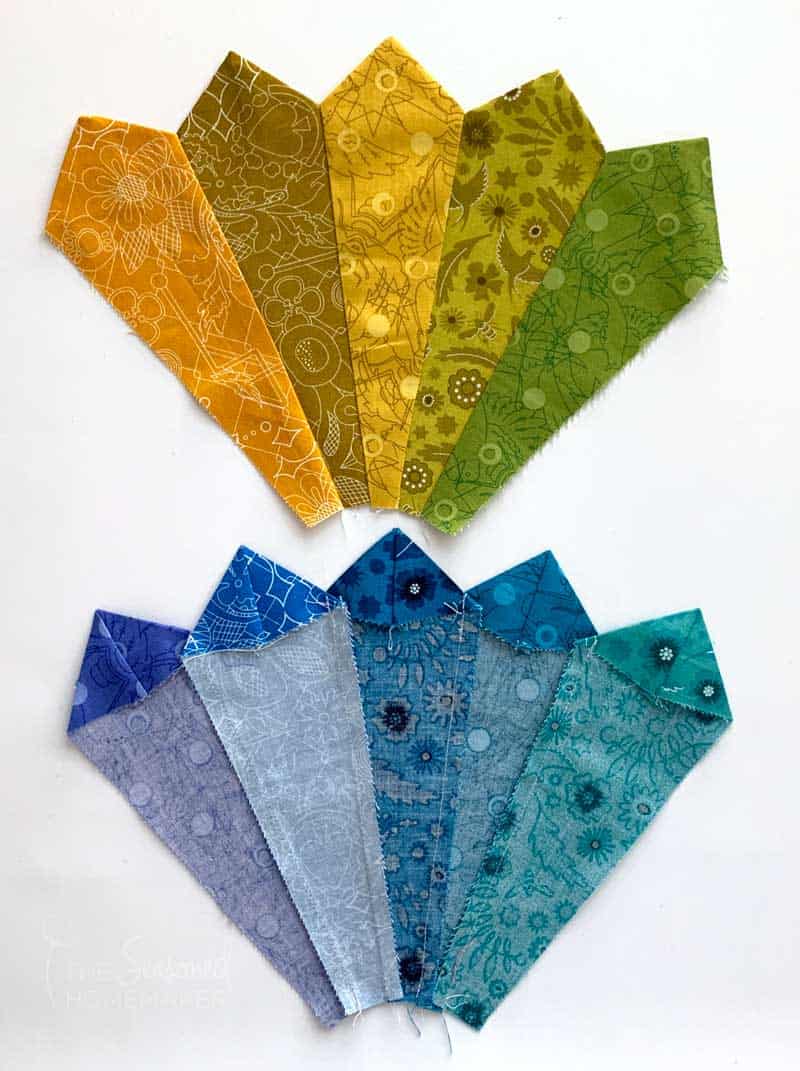
Step 4: Making the Dresden Points
- This process should be done one blade at a time. If you’re an experienced quilter, this is ideal for chain piecing.
- Fold blade in half lengthwise and finger press or pin a crease along the fold line.
- Using a 1/4″ seam allowance, stitch across the top edge of the blade.
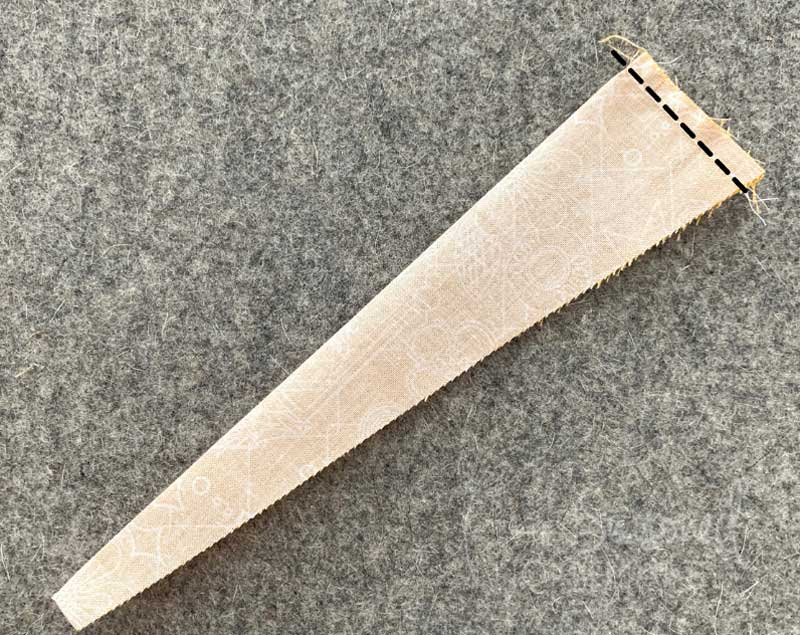
- Trim away 1/8″ in the corner near the fold.
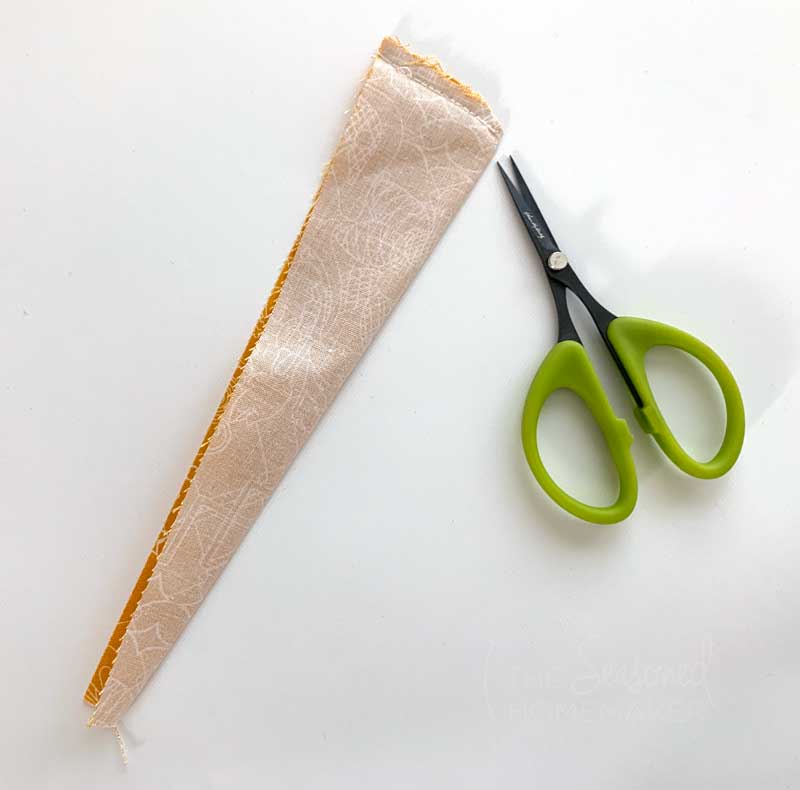
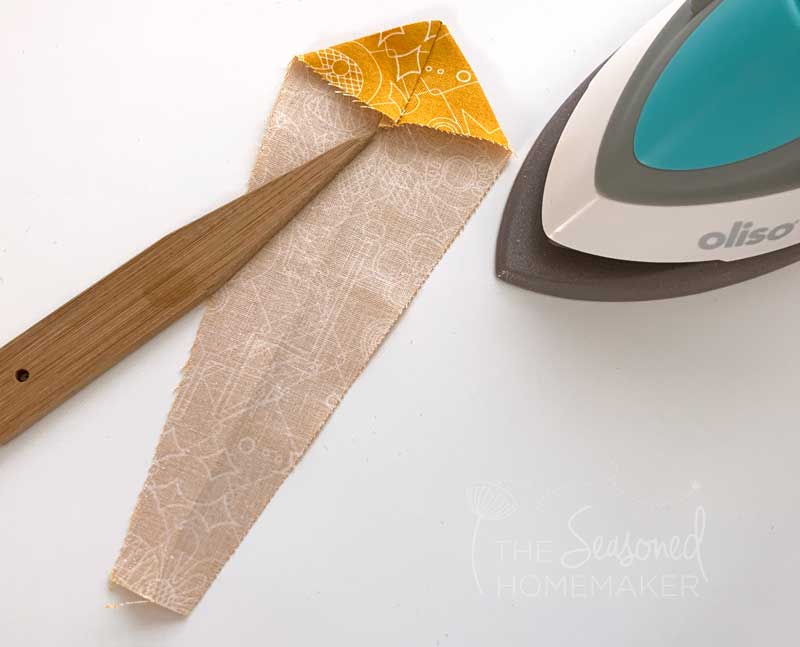
- Like magic, it makes a triangle point when its turned right side out. Use wooden pointer to make a sharp point.
- Be sure the triangle point and seam are centered along the finger pressed crease. This will make all of your blades even and they will attach together smoothly.
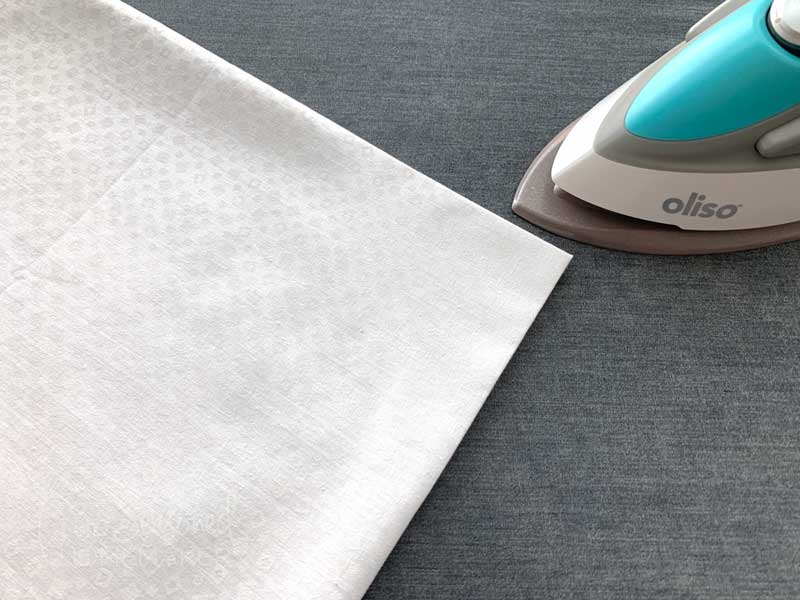
- Press seam allowance to one side.
- Pro Tip: Using a wool pressing mat makes your blades really flat!
- Continue this process until all blades are finished.
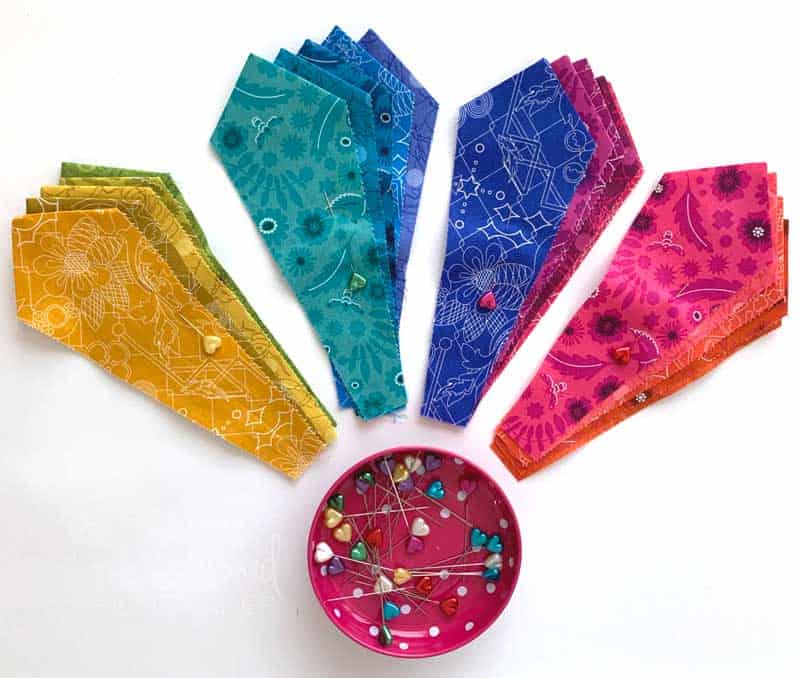
- Put finished Dresden blades into stacks of five. Clip or pin together in order.
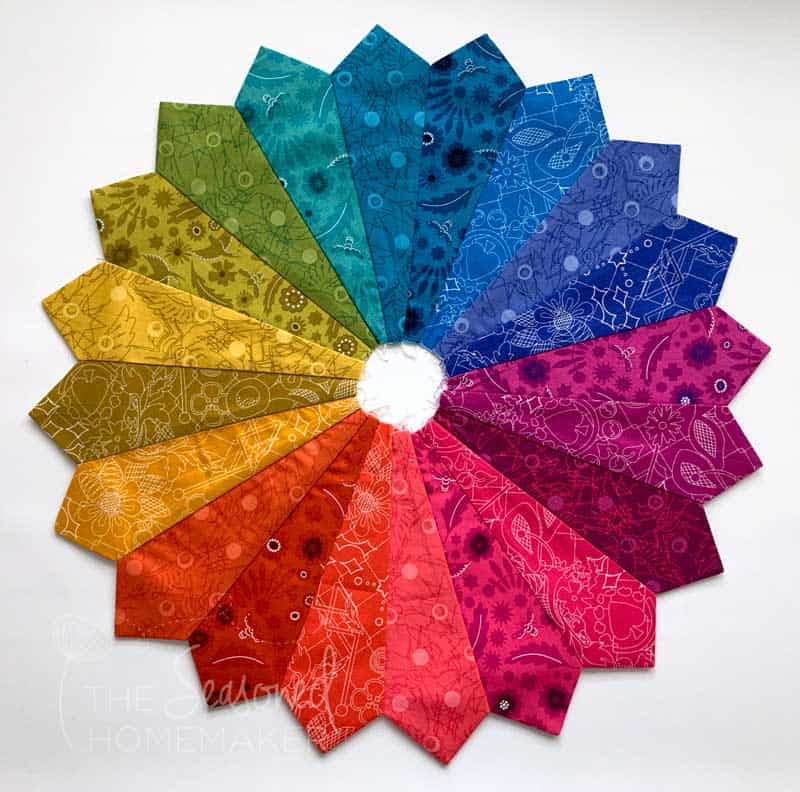
Step 5: Making the Dresden Plate
It’s a good idea to work this process in quarters by attaching five Dresden blades together at a time to form one quarter of the Dresden plate.
Once all of the blades are attached into four quarters, then all you need to do is attach each of these quarters.
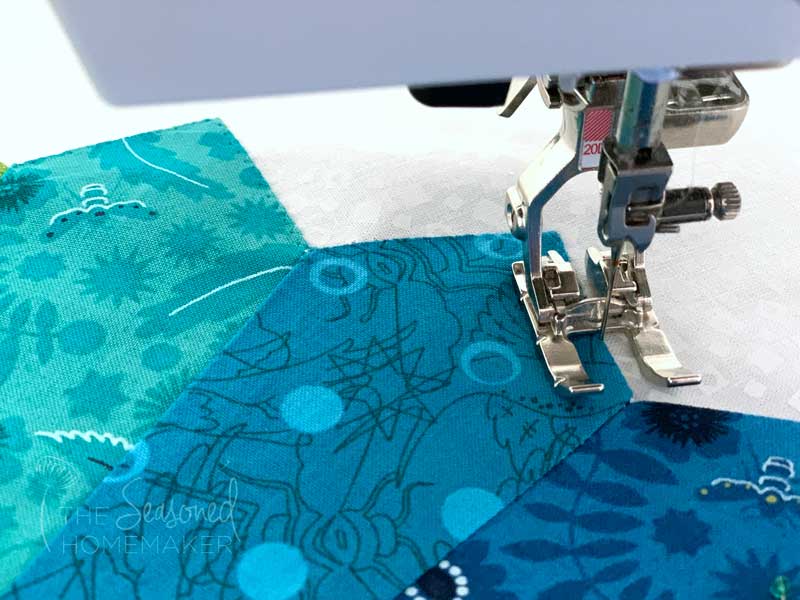
- Carefully line up two of the Dresden blades right sides together and pin at the top and middle.

- Set your stitch length to 2mm.
- Begin at the top and stitch together using a 1/4″ seam allowance. Backstitch at the top and bottom for added security.
- Press seam allowance to one side.
- Continue until you have a set of five blades stitched together. Set aside.
- Repeat this process until there are four sets with five blades each.
- Once all four quarters are finished, connect the Dresden quarters together using a 1/4″ seam allowance. Note: If your center doesn’t lay flat it may mean that your seam allowances aren’t quite 1/4″. Just correct the smaller seam allowances and you should be fine!
- Give a final press. Make sure everything is nice and flat.
Step 6: Dresden Design Placement
- Take the 22″ x 22″ Background Fabric and fold into quarters. Lightly press at center point.
- Carefully place the Dresden Plate designon the Background Fabric so that the fold lines are on a seam.
- Pin to hold.
- Carefully set aside.
Step 7: Stitching Down the Design
There are two methods of attachment for this design. Purists will say the design should be hand stitched to the Background Fabric. But, the practical side of me thinks that machine stitching is perfectly fine.
One in-between option is to use a thread which appears to be invisible and gives the appearance of hand stitching. This is my favorite option.
I recommend Superior Threads Mono-Poly Thread. This thread is nothing to be afraid of – the key is changing the tension setting on your sewing machine and using a ZigZag Foot or an Open Toe Foot.
- Set your sewing machine to the zigzag setting.
- Lower your zigzag stitch length and stitch width to 1.5 – 2.0mm. Adjust as needed.
- Stitch around the outer edge of the Dresden design with a small zigzag stitch. Ideally, it should be a very narrow zigzag stitch. Make sure when the zigzag swings to the right that it is barely on the outside of the design. Pro Tip: Use an Open Toe Foot for this step.
- Press the quilt top.
>>> Some Tips for Sewing with Mono-Poly Thread:
Every machine is different, so you may need to make a few adjustments.
Before stitching down, I recommend you practice a little to make sure your tension is set correctly.
Lower your sewing machine tension. This will take a little fiddling around. For me I found that lowering my tension to 1.5 worked perfectly with Aurifil 50 wt. thread in the bobbin.
Of course, you could use a nice cotton thread and straight stitch, regular zigzag, or even a satin stitch. See this tutorial for a few different options – Be sure to scroll to the bottom for a demo video.
Step 8: Making the Dresden Plate Center
Click the pink button below to get the FREE Circle Template.
- From the Coordinating Fabric, cut out two 5″ x 5″ squares.
- Pro Tip: This is a good place to fussy cut a piece of fabric for the center of the quilt.
- Print out the Circle Template from the pink button above. Cut out the template. Pro Tip: Printing on card stock will make it easier to trace.
- Lay both squares of fabric right sides together. Place the circle template in the center and pin. Using a water erasable pen, trace around the outer edge of the circle. This should be done carefully since it will be your stitching line. Remove paper and re-pin the two squares together.
- Carefully, sew on the line that you’ve just drawn. When you get back to the starting point, stitch over to secure the stitching. Remove markings with water. Pro Tip: Use an Open Toe Foot for better precision.
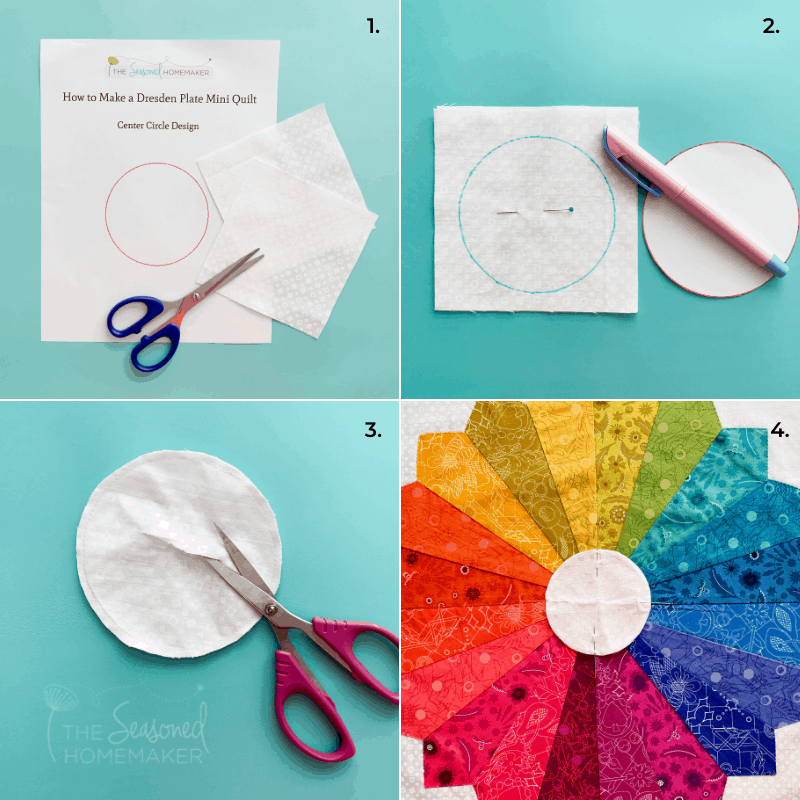
- Trim about 1/8″ around the entire circle.
- On one side only, pull the fabric away and make a 2″ slit in the center. This will be on the wrong side of the Dresden middle circle. Turn the circle right side out through the slit.
- Carefully smooth out the circle. Try to get the seam line to fold toward the back where the slit is. A Seam Creaser Tool is great for getting a smooth circle.
- Fold into fourths and pin the corners. Carefully line up the circle with your Dresden seams.
- Stitch in place using the same method used in Step 7.
Step 9: Quilting
Make a quilt sandwich using fusible batting. Fuse the batting by pressing the front and back with a dry iron. Be sure your quilt backing and batting have an additional 1-2″ margin around the quilt top. If you plan to do denser quilting you will need to add another inch or two of batting around the perimeter.
Pro Tip: I like to fuse the batting back first and then put a few pins around the perimeter. This helps me correctly place the quilt top before fusing.

It’s time to quilt! The quilt design you choose is entirely up to you and could depend on the effect you’re trying to achieve. For my quilt, I am doing a small stipple in the center, then looping inside the Dresden design, followed by another all-over stippling on the background fabric. Note: For any free motion machine quilting I recommend having something like the Sew Steady Grid Glider.
One thing to know about quilting something that has been appliqued – if you want the design to stand out, the quilting surrounding the design needs to be denser. See an example here.
Straight line quilting always looks good and is perfect for novice quilters.
If you are a beginner, I recommend you look into some sort of simple grid such as the one in this tutorial.
Step 10: Finishing the Quilt
Squaring
Once you’ve finished with all of the quilting you will need to trim away the excess binding and square the quilt. If you are unfamiliar with this process, visit this post and follow the directions for squaring the quilt and making binding.
I squared my quilt to 21″ x 21″. That way, it’s the perfect size if I want to make a pillow using a 20″ x 20″ pillow form. It’s also the perfect size for a table topper.

Optional Hanging Corners
(Optional Step) At this point you may want to consider adding optional hanging corners to the back of your quilt. If you’re making a wall hanging, hanging corners allow you to slip in a small dowel for hanging.
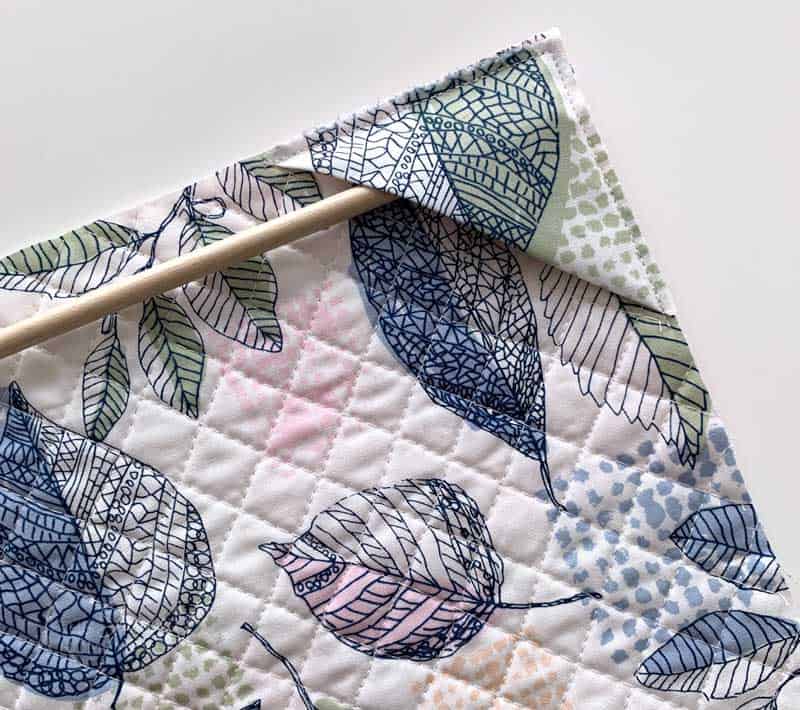
To do this, fold two 3” fabric squares right sides together in half to form two triangles. With raw edges matching, pin the triangles to the top left and top right corners. Using a 1/8” seam allowance, stitch to hold in place until binding is added.
Binding
After the quilt is square, you’ve decided on hanging corners, and you’ve made the binding, it is now time to machine bind the quilt. See this post if you need help with how to machine bind a quilt.
Your mini quilt is finished! Best of all, you’ve mastered the wedges and learned how to make a Dresden design!
Get the Printable Post
Want an ad-free, printable version of this post? Click the button below and download the Printable PDF tutorial.
Other Project Options
This Dresden project also can be used to make a pillow. For pillow-making I’m sending you to another tutorial which goes into more detail about how to make an envelope pillow.
Follow this tutorial to turn your quilt top into an envelope pillow. How to Make an Envelope Pillow. Note: This tutorial has directions that include French Seams which could be bulky with a quilt top – especially if you decide to add piping. You can skip the French Seams and just zigzag or serge your edges.
Follow this tutorial if you want to add piping to your pillow. How to Add Piping to an Envelope Pillow. Note: For the pillow on this page I’ve used a (#2 size) 1/4″ piping cord; however, the pillow in the tutorial uses a (#1 size) 1/2″ piping cord.