One of the most annoying things about owning a Silhouette is when the blade no longer makes clean cuts. I mistakenly thought that my Silhouette blades were dull and when this happened I would replace them. Rookie mistake! Today I’m all about 
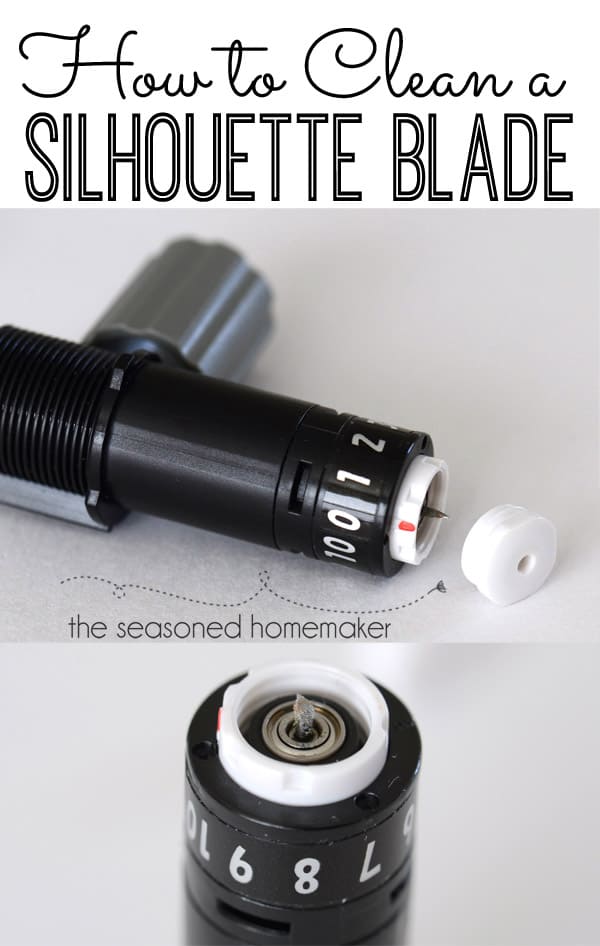
Cleaning a Silhouette Blade.
My biggest mistake was thinking the Silhouette blades were dull. They weren’t dull at all, they just needed cleaning. And, today I am going to show you how to clean your Silhoutte blades and extend its life.
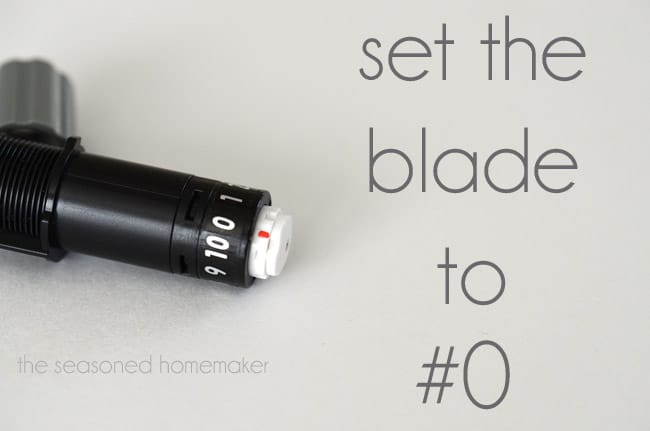
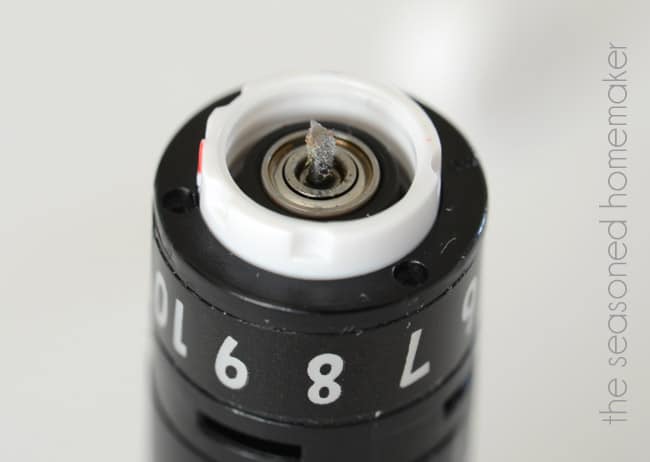
First things first. Remove the blade from your Silhouette and set it to the number 0 {zero}.
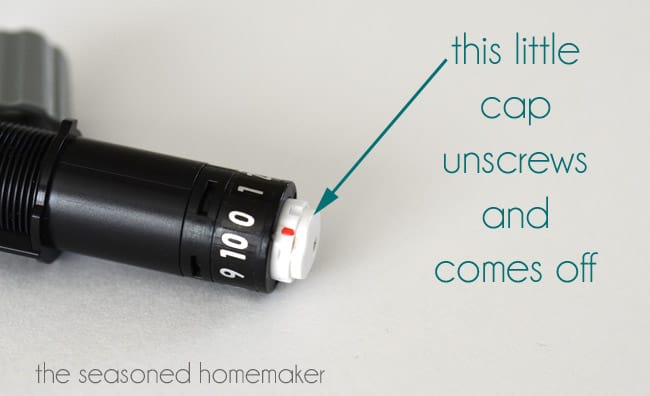
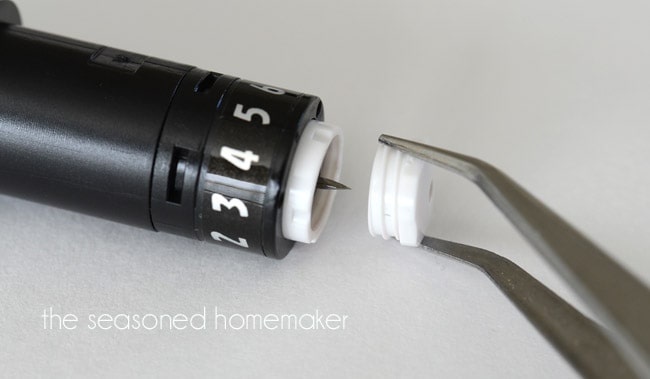
On the very tip of the blade housing is a cap that covers the blade. This little cap unscrews ~ oh, yes it does! Unscrew this cap to the left and remove it ~ just don’t lose the cap.
Voila! Cap removed.
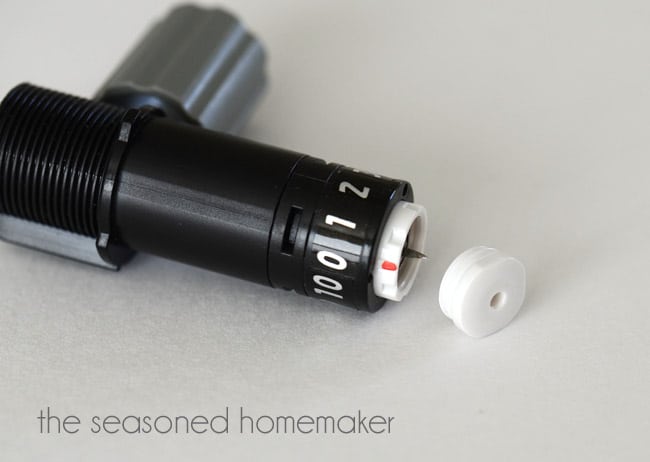
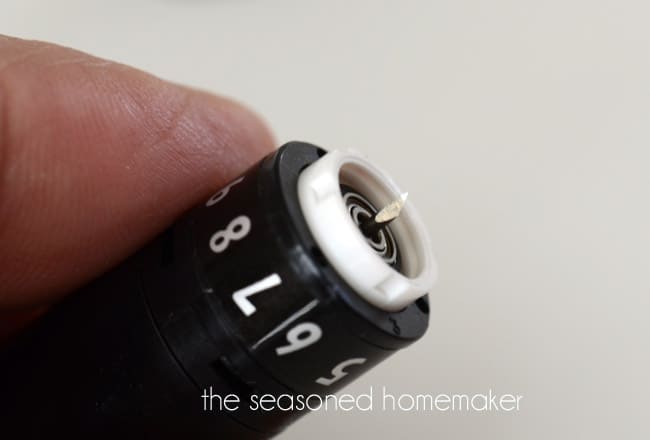
Notice how linty the blade is. That is after cutting out lots of paper designs. Towards the end of my cutting, I was getting some spots that didn’t always make perfect cuts. That means it is time to clean the blade.
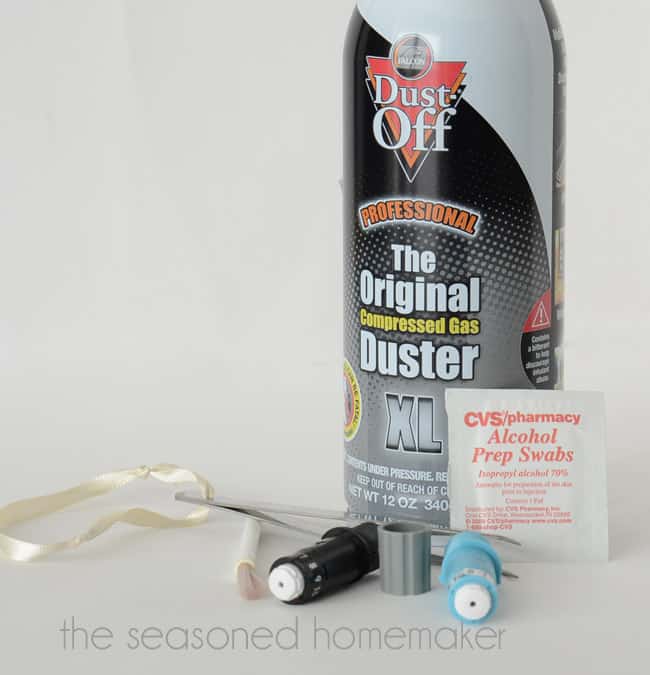
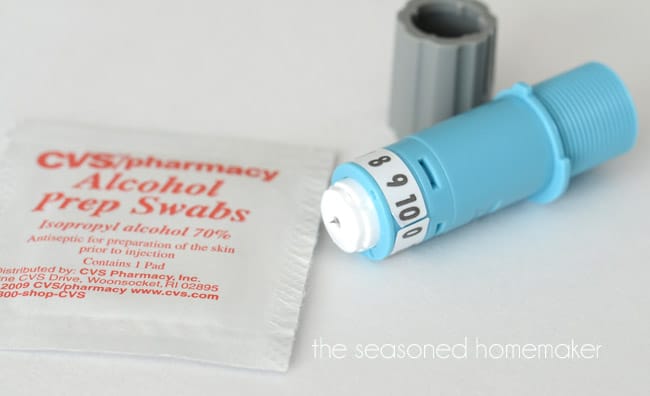
I have a variety of things I use to clean my blades. If I’m in a hurry I used a can of compressed air. Sometimes I quickly brush off the lint with the lint brush that goes to my sewing machine. If I am cutting something like adhesive-backed card stock then I may need to use an alcohol wipe to remove any sticky residue that might be on the blade.
Clean as a whistle. All lint removed and ready to cut again. It doesn’t get much easier than that!
All that’s left is putting the cap back on the blade and you are ready to cut again.
The same steps work for the fabric blade as well. Just repeat the above steps with one exception. When you cut fabric it will likely have fusible web on the back. This quickly builds up and the blade will no longer make clean cuts. It is necessary to use an alcohol swab to clean off the sticky residue. I have a quick tutorial on it here.
Regularly cleaning your Silhouette blades will save you money ~ which leaves a little something for buying more fabric!
I just got a silhouette machine for Christmas and this post is priceless. Thank you!!!!!
Thank you! Any and all help with this machine is helpful! Any thoughts on how to be frugal with the vinyl? I hate throwing away the negative or positive space….just don’t like wasting supplies.
Kim, try to save your negative/positive space vinyl for another project – just save the backing of your vinyl and place ‘weeded vinyl’ back on it.
Great tutorial. I have a dumb question, though that I’m hoping you can answer. I just got a Silhouette for Christmas and when the cap is on it, the blade doesn’t pop out the bottom hole. Is that supposed to happen? How does it cut if the blade isn’t out further than the cap. I’m hoping you can help me out and give me some basic Silhouette blade 101 answers! Thanks! 🙂 – Julia
If you blade is set on 0 or 1 you might not see the blade. Even at a setting of 5 it barely shows but that doesn’t mean it won’t cut. I always follow the Silhouette setting and never have problems.
So smart! Thanks so much for sharing!
This is such a great tip! I’ll have to remember this!!
GREAT TIP!!!!! Thanks for sharing!
this is good to know. Thanks
I’ve had a Silhouette for years now and had no idea the top of the blade unscrewed. You are a genius!!! Thanks so much for this tip. I always knew the blade being dirty really affected how it cut, and I tried to clean it as best I could, but this makes it so much easier! So glad I saved most of my old blades (not sure why I did, but now I know)!!
I cannot, for the life of me, get that little white tip to screw or pop off. Any advice?
If you have a pair of jewelry pliers this might help give you a better grip to unscrew the cap.
I took a pair of tweezers and spread them just a little bit to fit around the cap and turned. It took a couple of tries, but it worked.
Thanks for sharing! I found you over at the Creativity Unleashed Link Party.
This is so timely for me! Thank you. I just ordered a Silhouette and it’s supposed to be delivered Monday.
I had always heard to turn the dial counter clockwise to 8 or 9 and you could see the lint/paper and that worked pretty well. Yesterday I cut a BUNCH of paper and was having problems. I was able to finish, but this morning when I read this, I tried it. Sure enough! Little pieces of paper down in there. Thank you SO much for this fabulous tip! I’m visiting from Think Pink Sunday.
Do you know how many of these I have thrown away for this reason! Next one I am going to clean first to see if that is my fix. thanks so much, now can you get the trash man to bring my old blades back?
Awesome to know! Thanks for sharing!
Thank you! I know mine will be due for a cleaning soon, it’s gets a lot of use 🙂 This looks pretty easy.
Thanks for the great tip…I’ll have to try this on my Cricut blade. I’ve always just purchased a new one. 🙁
~Ariean
The blade that came with my Silhouette Cameo does not have the projection on the white part that is supposed to unscrew. The white part is all one level. Nothing to grab on to. Now what?
If your blade is set on zero you won’t be able to see it. Try changing the setting.
Wow, thanks for sharing with us that tip, I almost throw away two blades that doesn’t work any more until I read this. I´m going to clean it wright now, thanks so mucho again. God bless you!
Lucía
You just saved my deadline!!!! Thank you for helping me not have to go purchase a blade 25 miles away, so over an hour round trip plus coming home in between my work’s final destination. THANK YOU!!! Found you on Google.
Thank you for that great tip. I found that the cap on my blade was coming off while I used it so had to screw it on tighter.
Do you have any handy hints for making the cutting mat stickier. Someone suggested spray on re-positioning glue.
Thank you and I also found you on Google.
Try using KK2000 on the mat. I’ve done this before with some success.
Great info. I ordered replacement blades, but this helped me fix whatever was not right. Now, I was able to finish my project before my deadline. I can put the new blades up for another day!
I also found you through Google!
Blessings!
Brilliant will hopefully save us a fortune
I just don’t want to take such a money-saving tip and run with it. I wanted to take time to let you know how appreciated your tip is. I just purchased the Silhouette and trying to start my business. My blade just quit!
I am impatient and was thinking of going to find a place to buy another blade when I saw your post! The darn thing had paper stuck in it! I learned this only after reading your post and following the instructions. I like knowing the mechanisms I am working with. Thank you so much for sharing the knowledge.
Thank you
WAs just about to buy blade, you are so smart, there was so much lint around the blade, it must not have been able to move. Thank you
Great tip!! Thanks so much – I nver knew this.
Very useful tip. Thanks so much.
You are so awesome for this tip. Thank you very much!!!
Great tutorial and information, awesome for newbie. Thank you!!!
Thanks so much for this information, I know sometimes my cuts are not clean and this is something I didn’t know to do.
Hi! I just cut a bunch of cardstock for my daughter’s school project and immediately after, I tried to make a monogram decal. I had sooooo much trouble doing so when I never have before. It cut the vinyl but it was nearly impossible to weed. Could it be because of the cardstock that I had just cut??
Yes. I keep separate blades that I label because cardstock ruins blades.
This helped me out a lot. Thank you!!!
You are a lifesaver !!!!
So I am a newbie and took my blade apart thinking it was in a case… and I needed to take it out. (pausing so you can stop laughing.) When I put it back together on which setting do I put the red line? I have a cameo 3 and the blade has a red line.
The setting depends on what you are cutting. Set on either 3 for paper or 5 for yardstick.
Oh wow! I’m a newbie with the silhouette cameo and was just about to buy a new blade. I’m so thankful to you for posting this!