

How to Applique Like a Pro
This post may contain affiliate links which won’t change your price but will share a commission.
Inside: How to Applique Like a Pro
Applique is the process of stitching small pieces of fabric to a larger piece of fabric, and in the process, creating a unique design. It’s an ideal way to customize a project (like a pillowcase!) by introducing a new color, some texture, or even a touch of whimsy.
The most basic applique can be as simple as adding a name or initials to something like a tote bag. But it doesn’t stop there – applique can be used to create scenes on pillows and quilts. You can literally add any design to any fabric. The possibilities are endless!

The key to applique success:
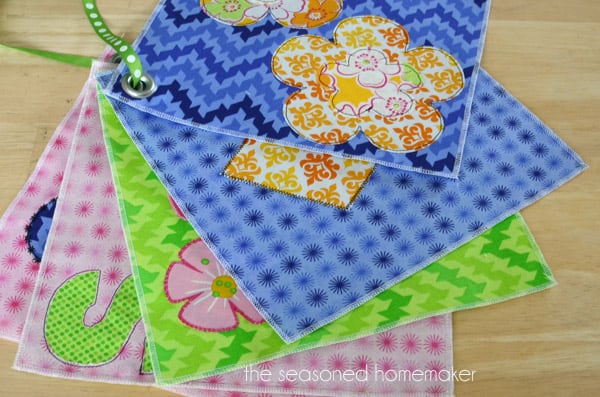
The key to successful applique is knowing which type of stitching works best for your project. And this tutorial will walk you through a few of the most basic applique stitches – straight stitch applique, zigzag applique, fussy cut applique, reverse applique, and decorative stitch applique.
Applique Techniques:
Step 1 – Straight Stitch Applique
This is about as easy as it gets and adds so much to any project. Once washed, it will fray around the edges and have an even better look.
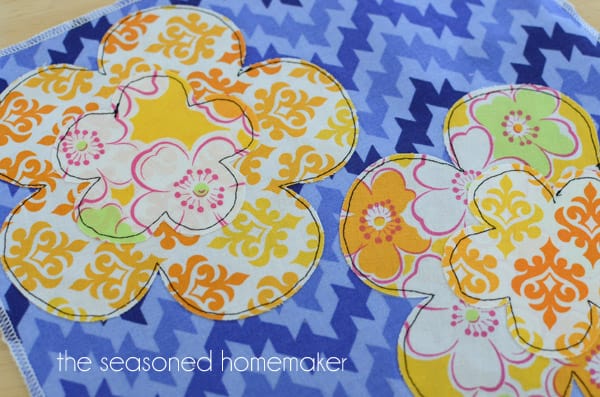
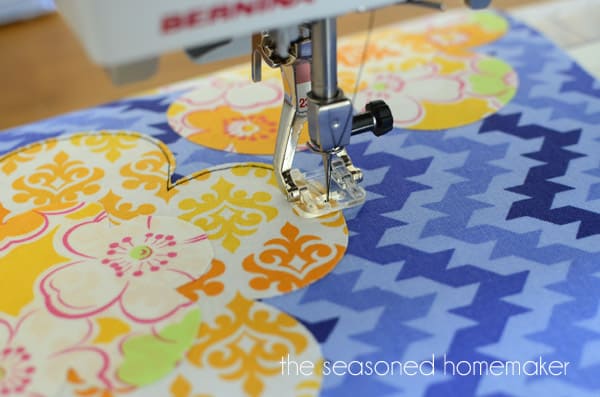
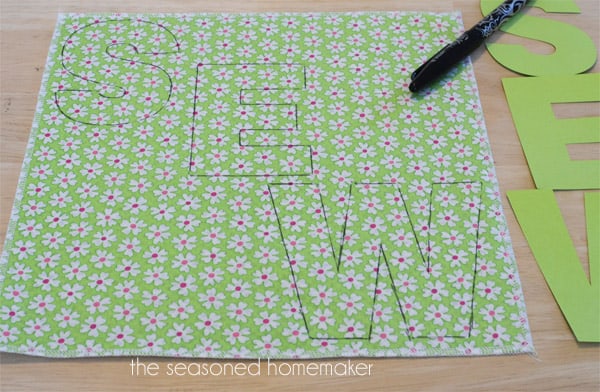
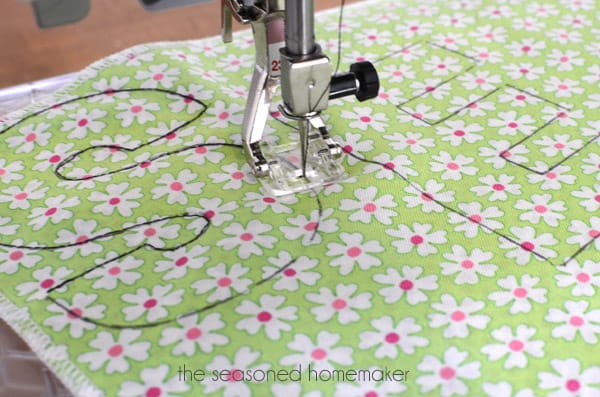
Step 2 – Lettering and Zigzag Stitch Applique
When I teach applique, I always teach students how to applique lettering and then stitch around the letters with a zigzag stitch.
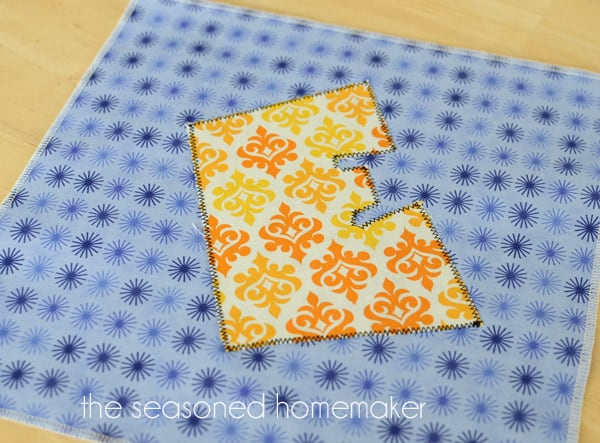
Step 3 – Fussy Cut Applique
Fussy Cut Applique is one of those sewing things where the possibilities are endless. It begins with a design on the fabric, but there is so much more you can do. For my sampler all I did was stitch around the outside of the design with invisible thread.
Another possibility would’ve been to satin stitch in matching colors all of the design. Dark pink around the dark pink out edges, light pink, orange, etc. That would need to be an entire class on satin stitch applique.

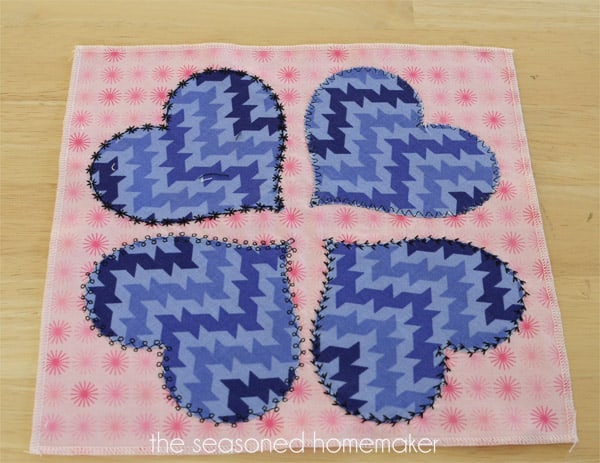
Step 4 – Decorative Stitch Applique
Time to pull out those decorative stitches on your machine and play with them. See how the decorative stitching makes the design really pop out. I’ve used a variety of stitches here. The key is to play with it until you love it.
Step 5 – Reverse Applique
Reverse Applique is one of my favorites. I think it can change a kid’s t-shirt from plain to WOW! And, it can cover a hole or two in a favorite garment.
Here’s a quick look at the process. First, you need two layers of fabric. Use a heat soluble or water soluble fabric pen to trace out your design.
Next, straight stitch around the design.
Carefully cut inside the stitching.
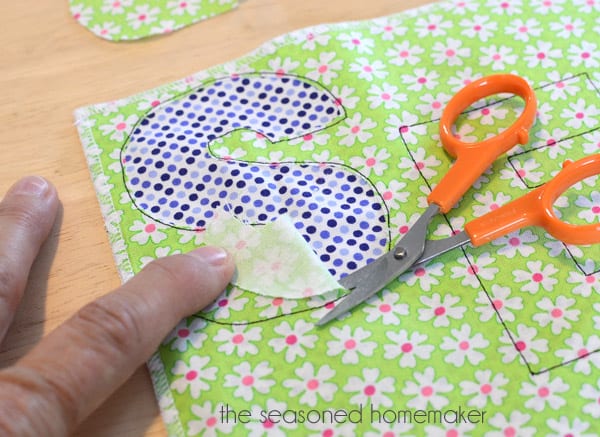
That’s all there is to it.

Finding Designs:
Isn’t applique easy and fun! Now it’s time to create some fun designs. This doesn’t have to be difficult. I have an entire section on this website with a variety of applique ideas. Visit my Applique Archives to learn more.
I also have a few applique template sets that are designed for beginners. Visit my Shop to learn more. Note: A few of my patterns also have a free tutorial project. Be sure to look for this!
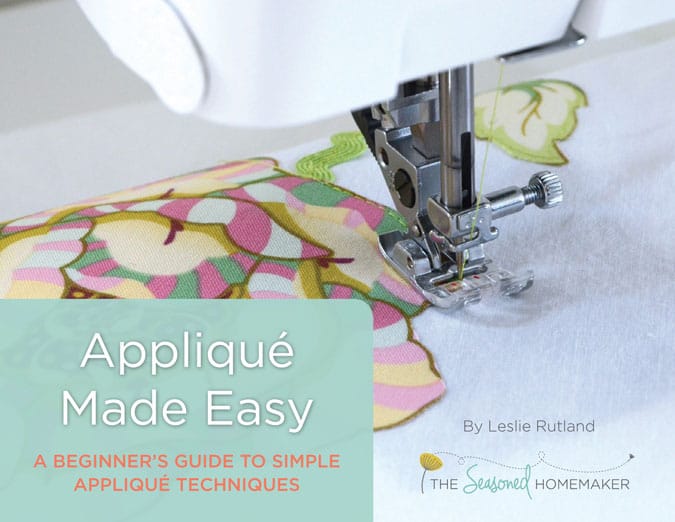
If you want to further develop your appliqué skills, check out my eBook:
Applique Made Easy: A Beginner’s Guide to Simple Appliqué Techniques
Watch a Video
I’ve included a short video that shows how easy it is to applique and start embellishing your own projects!
Ahhh you make it look so easy. How I wish I could take your class as I know you are an excellent teacher. Thankfully I love your tutorials as you make them so clear and easy to follow. Can’t wait to see the completed sewing room.
What a cute sample pack!!! I’d love to take that class!!
The decorative stitches really pop!!!
Great to have pulled all the methods together in one post 😀
Great sample pack! it seems sooooo easy… I wonder if it really is! great tutorial, I wish I could take yor class, but I live in Italy 😉
Italy! I wish I was there!
Lovely work! It definitely looks so easy when you show it here. I’ll have to take a look at some of your links.
What a splendid tutorial, you can tell your a teacher! This makes me feel like I can do it, just not sure how to cut the appliqués out. I wonder if my sillhouette can cut fabric?? Thanks for the helpful hints!
I have several tutorials on my blog about cutting fabric with a Silhouette. Look on the Categories drop-down and click on Silhouette.
Thanks for the tutorial round up! I’m still a beginner using my machine and can’t wait to give these a try!
These are cute! I feel like it’s still a little beyond my skill level!
Last year I wanted to make a special wall hanging for my great granddaughter Tori. She competes in cheer as in cheerleading but it doesn’t have anything to do with school. I wanted to make the wall hanging with the logo of her team in large letters. Very fortunately I discovered a new thread called “Charlots Fusible Thread”. I happened to see a free video about this thread on the web site of Superior Threads. It is great to use and and there is only the fusible thread that is sewn around the edge of the applique piece. Then it is piece is ironed on to the front of the background fabric. Then it is ready to be zig zigged or straight stitched or decorative stitched to the backround fabric. I loved using this especially because applique pieces are soft and not stiff like they would be with an all over fusible. This is my go to thread when ever I want to do machine applique.
Wow would I love to take your class also. I have a Euro-Pro machine which is about 12 yrs. old anyway. I’ve barely used any of the varied stitches it offers. Big coward. I just went into sewing room to see what stitches are available. None like yours except for the zigzag which I use a lot on burlap. When I sew burlap table runners I put a small zigzag stitch on all sides so burlap won’t shed threads hopefully. Took me awhile to figure out how to sew burlap without jamming constantly. I’m not the most patient person but I’ve been sewing since I was a kid.
I’ve done applique. I noticed on your machine you had a plastic foot when you were appliqueing. I hadn’t seen that before but I might even have that foot, who knows. I’ll have to take a look at my manual and feet I have.
The euro-pro isn’t my favorite machine, I have an old Kenmore that’s about 44 yrs. old or more which needs a minor repair. My old Kenmore is like an old friend but the euro pro does have more to offer in variety of techniques and abilities.
So glad to find your blog thru Live Laugh Rowe blog party. Happy weekend
When I do machine applique i love to use my open toe foot because I can see the edge of the applique fabric easier as i’m sewing. Besides the other stitches that Leslie uses I like to do blanket stitch (not all machines have a blanket stitch) and also the satin stitch. ‘
I love the machine decorative stitches that Leslie uses around the appliques. Very pretty and the contrasting color of the thread shows up very well. I’ll be doing that the next time I do some applique.
Leslie, this post is fantastic!!! You have enlightened my world with that reverse applique. 🙂 Thanks for sharing your applique knowledge – our torn holes will now be repaired so much prettier! How fun, too.
Oh that’s onderful I love appliqué but I’ve never tied machine, I want to try the reverse appliqué ASAP
I <3 your sampler. So cool you teach class. Pinned and new follow to your soc media!
So cute. Glad you shared it! Keep inspiring us!
Does the fabric need to be prewashed before you appliqué it?
This question is debated in appliqué circles all the time. I think the fusible adhesive will adhere better to pre-washed fabric, but it will still work well on fabric that hasn’t been washed.
Just found your tutorials, love them. Thank you. I’m just trying to get up the nerve to applique.This was a big help for me.
Is all of this done with a regular sewing machine or are you using an embroidery machine?
I used a regular domestic machine.
Wow! Always wondered. Thanks for sharing your knowledge.
I wanted to take the time to tell you, Your amazing! Thank you for posting these awesome videos.
So glad that I found this. I am thinking about making some throw pillows with a dala horse applique on them for my BFF. She is of Scandinavian heritage and she loves dala horses. What technique do you think would work best for this?
It really depends. If you have a printed piece of fabric and can fussy cut, then use a tiny zigzag. If you’re planning to free-motion attach, then use a contrasting thread and straight stitch. If you’re interested in paper piecing, this is a great dala horse pattern. https://www.stitchedincolor.com/patterns/dala-horse-block-pattern-1
I love your tutorial. I learned a lot from it. Thank you!
What is the name of the clear foot you use?
See this tutorial: https://www.seasonedhomemaker.com/sewing-machine-feet-the-clear-sole-all-purpose-foot/
I learned a lot from your tutorial. Planning to do my girl t-shirt. Thank you for your wonderful video. Love it.