

Finish Seams Without a Serger
This post may contain affiliate links which won’t change your price but will share a commission.
Isn’t it always about the details? This thought particularly applies with sewing. Especially in the area of finishing seams. Finished seams on any project prevent unraveling and make the inside look much nicer.
Using a serger is one of the best ways to get finished seams on a sewing project. What if you don’t own a serger? Well, there are many ways to Finish Seams Without a Serger.
Want an ad-free, printable copy of this tutorial? Scroll to the bottom of this post for more details!
Finish Seams Without a Serger
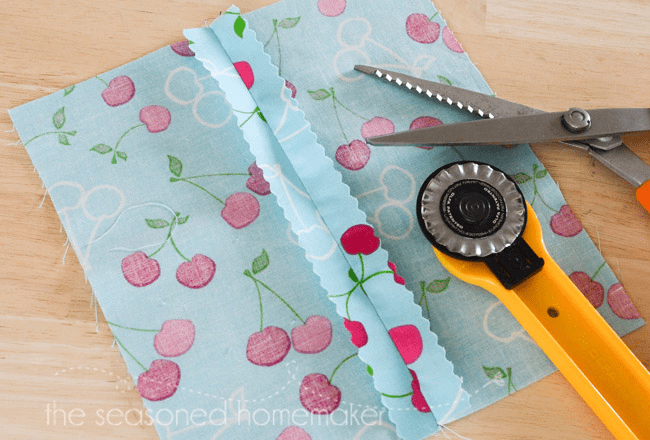
1. Pinked Seams
One of the simplest ways to prevent unraveling and finish seams would be to use pinking shears*. Once you’ve sewn your seam, just clip along the edges with the pinking shears before pressing. It’s that easy. A few years back pinking blades* became available for rotary cutters. (affiliate links) This makes pinking even faster and is my go-to pinking method.
Pinking works really well on woven fabrics that don’t get washed and dried too often. It is most effective on tightly woven fabrics, but not really recommended for something with a loose weave like linen.

2. ZigZag Seams
So you don’t own a pair of pinking shears and you still want finished seams. Zigzagging is a great option. Almost all machines come with a zigzag stitch with adjustable stitch width and stitch length. I use the default setting for my zigzag stitch (1.5 mm stitch length/3.5 mm stitch width). These setting will vary with machine manufacturers and the type of fabric you are using. Sew a few samples until you find the perfect zigzag finishing stitch then write it down.
There are two ways to finish seams using a zigzag stitch. The first would be to sew a seam using the correct seam allowance. Then go back and zigzag next to the seam allowance and trim away any excess fabric. This works really well for curves like princess seams and armholes.
This finish is fairly close to a serger seam and will eliminate most unraveling. Before I owned a serger, I used this method and had years of success with it. #itsawinner

The second way to finish a seam using a zigzag stitch is to zigzag the edges prior to sewing seams together. This works well on straight seams or applications that might prevent trimming.
Either way, zigzagging a seam finish is one of the most common ways to finish a seam without a serger.

3. Turn & Stitch
The turn and stitch method of seam finishing is something my grandmother used until she got a sewing machine that had a zigzag stitch. Visit any thrift store that carries vintage garments and look inside at the seam finish ~ I bet this is what you will see.
If you’ve inherited a Singer Featherweight (or any older machine) that still runs like a champ (and there a tons out there) you won’t have a zigzag stitch. Turn and stitch is a great way to get clean, finished seams.
All you do is sew your seam at the seam allowance. After sewing the seam, turn under the raw edge of the seam allowance 1/8″ fold on either side of the seam, press, and stitch down. It’s really that easy. Because this technique only uses straight stitching it doesn’t require much thread and I consider it a very economical way to finish a seam.

4. Machine Overcast
When I was a newlywed (39 years ago) my husband bought me a mechanical Kenmore sewing machine that had lots of options ~ one particular stitch was an overcast stitch that required an overcast foot. Most machines today come with something like this, no matter the price point.
It is designed to be sewn on the seam edge, however, I used an all-purpose foot and sewed the overcast stitch at the seam allowance, then I trimmed away the excess. I like this stitch because it allows me to sew my seam together and zigzag at the same time. The only added step is trimming the excess fabric {without cutting any of the overcast stitches}. This is a very clean and secure seam that can be done quickly and one of the best options if you don’t own a serger.

5. Hong Kong or Bound Seams
I’ve included the Hong Kong or Bound Seam into this collection because it’s not that difficult and is ideal for things like unlined jackets. If you plan to sew something like an unlined jacket then the four applications above are not going to be as clean. However, binding the seams is an ideal way to finish the inside of a garment and give it a little sass.
Hong Kong or Bound Seams are suitable for heavier weight woven fabrics because they will not change the way the fabric drapes.
I have a tutorial on Attaching Bias Tape. The same steps apply for this technique. In most cases you will finish the seam edges once it has been sewn. In this photo, I attached my bias tape to the wrong side of the seam and wrapped it over so the sewn edge is showing. Imagine the possibilities for unlined jackets. #kindofsassy

6. French Seams
French Seams have to be one of the best ways to finish the inside of any project. I think they are perfect for children’s clothing, making the garment sturdy because all seams are sewn twice. When my girls were little I used French Seams on most of their garments {until I purchased a serger}. French Seams were especially useful when my girls attended a school that required uniforms which I was able to sew. Their uniforms held up extremely well due to these sturdy seams.
French Seams are best used for straight seams and are not recommended for curved seams. They are work best on light weight woven fabrics and are ideal for sheer fabrics. See my detailed tutorial on how to make French Seams.

You don’t need a serger in order to sew beautiful things. Finishing seams without a serger can make any garment or home decor project have a finished look and last a lifetime. I think it is worth the effort to learn how to Finish Seams Without a Serger and make your projects special. After all, isn’t really about the handmade touch.
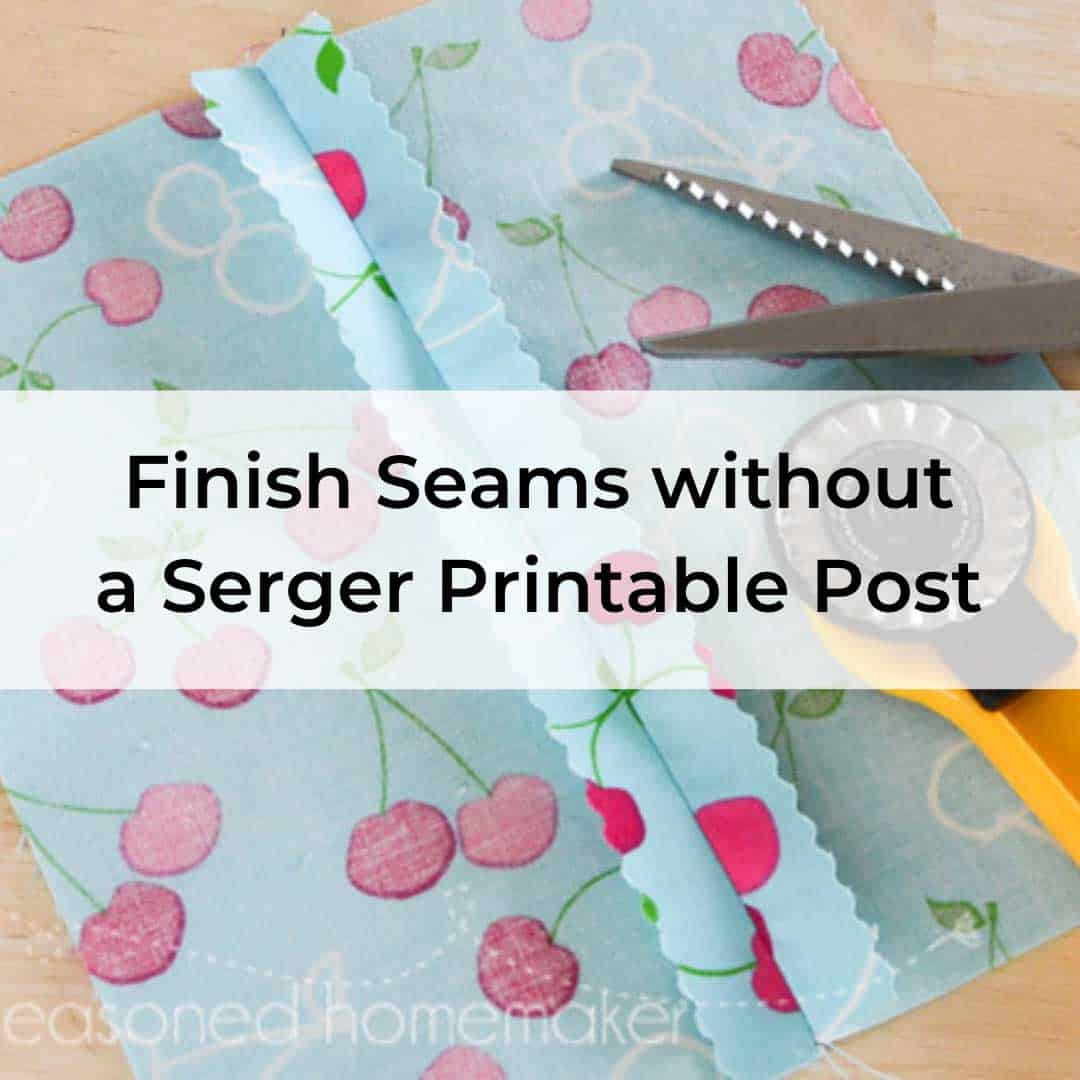
>>> Want an ad-free, printable version of this post? Click the pink button below and download the Printable PDF instructions.


I have a serger, but wow, some of these seams are gorgeous! I’ve heard of French seams before, and thought they were great, but now that I’ve seen the Turn & Stitch and the Hong Kong Bound seams, I’m blown away!
Great round-up!
This is great! I had never thought to do (or even heard of a couple) of these. Thanks!
Such a helpful post!!!
I really love my serger, but this is a pleasant trip through the past for me!! These finishing techniques are still so valid!! Thanks for the trip!
Even though I can only manage very simple “straight line” sewing … (and those aren’t too straight), there are some tips that even I can use here. Thanks. I’m wanting to do some toss pillow covers and try drop – cloth drapes.
Great tutorial. French seams are the best 🙂
Another great sewing tutorial. As always your pictures are done so well to illustrate.
Hi, I am a quilter/craft sewer and I discovered your blog a few days ago. Love this post and I’m sure I will use more than one of these methods. I’ve been wandering through your blog and I am enjoying your style and subject matter.
Thank you. That’s very kind.
I had been doing the zig zag but wondered if it was effective enough! I am soo happy to know that it is! All of these are amazing and can’t wait to try them all out!
One way to keep those edges clean is to put some adding machine tape underneath when you zigzag. It will prevent puckering. Just tear it off when you’ve finished the seam. Any remaining paper will come out in the first wash.
I’ve always done the zigzag stitch, but good to know there are other methods out there. Wonderful tips!
Great tips, I didn’t realise I had so many options! I’ve always had Serger envy and just use my pinking shears which in most cases are just fine. I’ve done the odd french seam but some of these might come in handy for some projects – until the day I finally treat myself to a serger of course!
Great ideas! I really like the overcast stitch used that way. One of those, “why didn’t I think of that?” moments going on over here. Thanks for sharing.
Terrific tips! I am always sewing with my sister (Shawna) and we talk endlessly about finishing seams – actually we look for fabric that doesn’t fray – now if that isn’t craziness. Great tutorial and extremely useful – can’t wait to share the post with her. We both learned how to use her Serger recently and it was pretty fun… but sometimes you just have to use your sewing machine. So thanks for the tips.
Thanks for sharing this on your #simplybebetsy gallery!
Sharon and Denise
I was gifted a new sewing machine with all the bells & whistles for Christmas. I don’t sew all the time, but I’m loving it! And I really have no idea how a serger works, or what it’s for. This post is full of lots of great tips, and I’ve pinned it!
I saw you sharing at Project Inspire{d}
Debbie 🙂
I love the pinking shear idea. Didn’t know that you could buy the blade for a rotary cutter. Thanks for sharing the tips.
Wow! I never knew how many ways there were to finish a seam! Thanks for sharing.
That’s great! I was wondering how to finish the edges of a dog coat. Bookmarked ..thank you 🙂
Wow, so many different options! Will definitely be bookmarking and coming back to this one. (Seen on It’s Party Time link up.)
I love that you have all of these tips in one spot. Once I realized I didn’t need a serger it opened up so many possibilities for new sewing projects. Love this! Pinning.
Hi Leslie,
Thank you for the sewing tips and info. Good to know about the pinking blade for a rotary cutter, too.
Think I’m going to get one of those!
Val
Thanks for a wonderful, timely post! I got a great machine at a thrift store recently, but haven’t done any sewing in more than 20 years. Home Ec taught me all this stuff, but THAT was 30+ years ago! I was just thinking that I needed to research all these methods again before my first project on the new machine – and there was your post. Thanks : )
I’ve used each of these methods at various time, except the Hong Kong/Binding method. Thanks for helping me to discover something new.
Leslie–you did such a lovely job on this post! I honestly had no idea about some of these methods! Thanks for sharing them! I will definitely use this as future reference!
This is handy! It never occurred to me to bind a seam, but that makes a lot of sense for a jacket. Thanks for the great guide, Leslie : )
Great ideas! Thanks for the inspiration! I’ll definitely be putting some of these methods to the test!
This is a great post and i love the photographs. I don’t really do sewing but i was given some nice fabric from my sister and I have been thinking about getting my sewing machine out for a bit of an airing.
Love all the different ways you shared! So many I am going to try to see what works best for me! Thank you so much for this post I needed something like this to help make my sewing improve.
Thank you for this; it was very informative.
Oh goodness this is the best sewing tutorial. Love your great photos…I’m making sure to pin it so I can refer back! Thanks friend for linking at Twirl and Take a Bow xo
I realy loved your post. I’m fairly new at sewing garments and was thinking of investing in a serger. Reading this tells me I don’t need one, just yet. I also loved the tag at the end: #handmadenothomemade – I have often thought that people look down on something homemade but once its handmade or hand crafted some reason its now special. Thanks for your wisdom.
How would you finish towel material?
Great techniques! There is also seam binding. Instead of using bias tape, which is too heavy. Use Rayon seam binding as an alternative!
Never thought of using the overcast stitch right on the seam line with a regular foot. That would really healp eliminate sewing the ‘first’ seam and will speed everything up. In the past few years after over 45 years of sewing I’m trying to do things the correct way so my clothes will turn out better. Not that some of what I own isn’t at least 15 years old and still going strong despite many washings even though I didn’t finish seams properly!
When people try to compare the cost of homemade clothing to store bought, of course if you compare Walmart clothes the price is about the same, but I have had some Walmart clothes that can’t be worn after one wearing, so how does that stack up to clothes that last 15 years??? 🙂
Great tutorial! Thanks. I was wondering about the rotary cutter one. I have one I bought many years ago and it still frays some. Is it because it doesn’t come to a point like the scissors or did I maybe get a dud? Thanks.
I think that the rotary cutter is just a little imperfect for fraying. It works, but not perfectly.
Sorry, one more question. For number 3, do you end up with three stitch lines on the outside or is it only stitched onto the seam allowance? Thanks!
Only one stitch on the seam allowance. The two others are on the inside.
This is so great! I am not a perfect seamstress but this is going to help me tremendously. Thanks for sharing.
I’ve been sewing a long time (almost 25 years), but I’m mostly self-taught. I’ve always done the binding method or the turn over and stitch “vintage” method (must have learned that from my grandmother). My machine has the overcast stitch, but I didn’t know what it was for. I will definitely be trying it next time I sew a clothing project.
What kind of serger do you own? I am going to buy one and need some advice please. TY!
I own a Babylock Evolution. It’s on the high end. However, I recommend Babylock sergers in general. I’ve owned two and they have both been trouble free.
Thanks for sharing. God Bless!
Yes, I learned how to make these seam finishes when I took high school homemaking classes. Then later taught these seam finishes to high school students in Home Economics classes. Tried and true.
I learned a few of them in Home Ec, too!
I have never had a serger and have always used method #2 to finish seams. They never ever open up on you, it looks professional, and the only time I had to use fray check was one time when I had a very loose woven fabric. I have never seen anyone else use this method and have no idea where I got it from but was glad to see you share it. Thankyou
My daughter gave me her sewing machine a few years ago and I just started to use it. These ideas make me face slap myself because they are so cool and brilliant.
Thank you.
Tried and tested are always a winner.
I just recently got a new Janome machine (LOVE it!) and now I *finally* have an overcast stitch – FABULOUS!! It works so well, and is a great time-saver, since you seam and finish all in one step! Following up with pinking shears instead of plain scissors. Great post!
What a fantastic tutorial! So many of us forget that, before advances in sewing machines, these things were done in other ways! Definitely sharing this one! 🙂 Lisa
The type of seam your are calling French seam is called English seam in France !!!
XoXo
Christine (France)
Loved your tutorial. Reminds me of what I was taught in home ec. in the mid- seventies! I recently ordered a s sidecutter presser foot from Amazon. It looks similar to a walking foot and cuts the excess fabric off when using the overlock stitch on your machine. I plan to master it and then introduce my sewings students to this foot. Curious to know if anyone has used it with sucess.
I’ve seen this foot but never used it. I’ve had a serger for over 25 years. Once I got one, I never even gave the overlock stitch a second look.
I’m peruvian, don’t speak English very well but I could understand everything, thanks a lot, your lessons are very useful for me. I’d like to sew doll’s clothes. Congratulations.
.
hi, thank you for all these great tips! When you use the zigzag stitch, do you keep the same tension or reduce it?
Generally, I keep the same tension. However, it’s not a bad idea to add some kind of tear away stabilizer (such as adding machine tape) to keep the stitches from tunneling.
Hi, These are great tips for finishing seams. Thanks! I had one question, I have an old Kenmore (Love It) and I do have the overcast stitch option. When you are aiming to use this stitch to finish a seam is the overcast the sole stitch or do you use the overcast in addition to your traditional stitch? Thanks!
I usually stitch a straight stitch before applying the overcast stitch. That way it is very secure. The overcast stitch is there to prevent unraveling.
Wow so many methods. Im going to try the machine overcast ..for my doll clothes. Use pinking. Shears on the bodies as it cuts down bulk . Thank you for sharing. Have just found your site and love it
As I use a Featherweight for all my machine sewing, I have used the pinking, turn and stitch, and French seams to finish off my insides. French seams are wonderful formpillowcase dresses and any other long straight seam!
Back when I was making my daughters dresses (she is now 25), I was taught to use only French seams in the dress including the sleeves. Boy that was fun.
I’ve frequently wondered of I could use the overcast stitch as an all in one seam and overcast without the special foot. Thank you for writing up the answer to my question. This will really save me time and thread. Great blog post. Thank you.
Really helped me alot, I can use these daily.
My daughter would like a pineapple sewed onto her dress.
Step 1) Cut out a fabric pineapple.
Step2) Ironed backing onto the fabric with the pineapple.
Step3) ?????
need to sew it on to with out fraying to occur. Unable to fold fabric as it is to difficult with the shape.
Is there away to sew it on without fraying?
If you visit my blog, go to the Sewing section on the Navigation bar. Click on Appliqué – all questions will be answered there.
I love this information and the way you present it. So easy to understand. Thank you.☺
Hi, Leslie. I don’t know how to thank you enough for your tutorials. I had stopped sewing years ago. Now I have purchased a lot of fabric and patterns. Now all I have to do is get over my irrational intimidation of my 5 thread serger. I bought it from Singer a cupla years ago, because I also bought some knit fabrics a little after that. I just know that every time I walk past it with it on my blind side, it’s making faces at me. I really want to tackle it and put it into submission. However, I can’t really afford a class to learn more about it. Can you possibly give me a tip as to where I might find some tutorials that can help me? I have to conquer this thing. I’m getting a bad reputation with my daughter and grandaughter, and that has to stop. Thank you again for sharing your knowledge and putting in the effort to teach me how to get back in the saddle. Cheryl
How fun to read!
…and clear.
I am returning to sewing after many years & as I read your notes, I found myself sayin that’s right.
Plus there are new methods & helps now available.
I’m encouraged.
Thanks
Thank you I am new to sewing and am grateful for all tips. As I dont own a serger this article on finishing seams will be very useful. Again thank you.
I’m glad I happened across your web site. It has some great tips for seam finishing, among other things. I was initially looking for a description of “serging” and have subsequently found out it is what we here in Australia call “overlocking”. So thank you – I learnt something new today.
Thank you for the information, I have not done any sewing for a very long time however am in a craft group and we are making little pop overs for our local school kindy kids when they will do their painting to keep their uniforms clean. will do the French seam on the shoulders and bias binding all around. Having a debate re the sides about what is better- elastic or velcroe on the side , what would you do?
I’d go with velcro for kids.
I really enjoyed your quick review on finishing seams! Great pictures and well worded descriptions! Thanks!!
Hi Leslie,
Thanks for the great tips! For seams that won’t receive a lot of stress, nor will they be washed… would pinking the ends followed by folding the seam over on itself and then top stitching prevent significant fraying?
Thanks in advance for your advice.
Yes, that would work very well.
Thanks! These are great, and many were new to me. I’d also add the flat-felled seam to the list. 🙂
I just purchased my first sewing machine, * nothing fancy*, im excited to begin my adventure and I will save this info for future Reference.
Thank you so much! this is the first tutorial I have found that discusses what to do when you have an old sewing machine because like you mentioned I inherited a beautiful singer from my great grandmother and I have been able to maintain it so where it’s still is a beast! unfortunately she passed when I was too young to learn the secrets of sewing so I’m on a mission to teach myself. Thank you.
I know this is pretty old and I don’t expect an answer, but I’ll give it a shot especially since there are newer answers.
I’ve seen many blogs about Hong Kong seams and bound seams. All say to do them after construction. Is there a reason why you wouldn’t do them before? Seems like it’s be easier as long as you plan ahead, i.e. when a zipper is going on along a seam, that would be when you’d need to do it after the zip is installed. Just so seeing if there was some other down side.
Thanks for having these in all in one place. Will be bookmarking for sure! Love French seams by the way.
Hong Kong seams are a finish – therefore done after sewing the seam.
I love all of these different ideas! Is there one of these, or a different technique, that would work for finishing muslin swaddle blankets? I can’t figure out how to do that with such thin and transparent fabric. I’d love to hear any tips you might have for me!
This type of hem require a particular foot. Check with a local dealer who carries your machine brand. They should have what you need.
On your overcast and zig zag methods, you cut away the extra fabric. Working lately on masks, I find myself sewing on the edge, and also on repairs which makes it difficult to keep it going straight through the machine. I used to think the 5/8 seam allowance was for ravel prevention, but I’m starting to wonder, particularly with your two methods, if the only reason for the 5/8ths, is for sake of reaching both sides of the machines’ feed dogs. Would you know if that is the case? I’ve read one tv sewist recommends 3/8s on armscyth stitching, but I’d expect trouble there too.
The 5/8″ seam allowance provides a little bit of space for simple alterations. It also allows different options for seam finishing. However, more and more pattern companies are using a 3/8″ seam allowance which is usually the width of most universal presser feet.
Thank you for this article! I have struggled with adjusting stitch length, style, etc on my machin. the turn and stitch method allowed me to continue to use a straight stitch while producing beautiful finished seams on my first big sewing project – a dress for my baby girl! I found the manual for my machine so I am looking forward to trying overcasting as well. Thanks again!